


You installed your solar lights, they worked great for a few months, and now... they're barely making it through the night. Sound familiar?
Here's the thing: most people assume their solar lights are failing because of bad weather, cheap components, or just bad luck. But nine times out of ten, the real culprit is something much simpler — and completely fixable. A little dust on the panel. A battery that's never been given a proper full charge. A sensor that's been blocked by a growing shrub.
This guide is for anyone who's invested in quality outdoor solar lighting — whether that's a set of street lights for a long driveway, flood lights covering a parking area, or pathway lights around a yard — and wants to actually get the full lifespan out of them. We're going to go deep on what actually matters, what you can skip, and how to troubleshoot the most common problems before they turn into replacements.
Why Solar Lights Underperform (The Real Reasons)
Before we get into the maintenance checklist, it helps to understand what's actually happening inside your solar light when performance drops. There are four main systems at play:
- The solar panel — converts sunlight into electricity
- The battery — stores that electricity for nighttime use
- The LED module — converts stored electricity into light
- The controller/sensor — manages charging, discharge, and triggering
When your lights dim or cut out early, the failure is almost always in the first two. LEDs are incredibly durable — a quality LED module can last 50,000+ hours. Controllers rarely fail unless there's a surge or water intrusion. But panels get dirty, and batteries degrade. Those are your maintenance priorities.
Part 1: Solar Panel Cleaning — The Single Biggest Impact Task
If you do nothing else from this guide, clean your solar panels. Seriously. A layer of dust, pollen, bird droppings, or even just a thin film of grime can reduce panel output by 15–25%. In areas with heavy pollen seasons or near dusty roads, that number can climb even higher.
How Often Should You Clean Solar Panels?
For most U.S. climates, a cleaning schedule of every 4–6 weeks during spring and summer (peak pollen and dust season) and every 6–8 weeks in fall and winter works well. If you're in a dry, dusty region like Arizona, New Mexico, or parts of California, bump that up to every 2–3 weeks.
After any major storm — especially one with wind-driven dust or heavy pollen — do a quick visual check and clean if needed.
The Right Way to Clean a Solar Panel
You don't need any special products. Here's what works:
- Lukewarm water — cold water on a hot panel can cause thermal shock and micro-cracks over time
- A soft microfiber cloth or sponge — avoid anything abrasive; scratches reduce light transmission permanently
- A small amount of dish soap — for stubborn grime or bird droppings
- A soft-bristle brush — useful for reaching corners and edges on larger panels
The process: dampen your cloth, wipe the panel surface in gentle circular motions, rinse with clean water, and let it air dry. That's it. Do this in the morning or evening — never in direct midday sun, as the panel surface gets hot enough to evaporate water instantly and leave mineral deposits.
What to Avoid
Skip the pressure washer. Even at low settings, the force can damage panel seals and push water into the housing. Avoid glass cleaners with ammonia — they can degrade the anti-reflective coating on quality panels over time. And never use steel wool, rough sponges, or anything that could scratch the surface.
Checking Panel Angle and Shading
While you're up there cleaning, take a moment to check the panel angle. Most outdoor solar lights are designed with a fixed panel angle optimized for a general latitude range, but if your light has an adjustable panel, make sure it's still pointing south (in the Northern Hemisphere) at roughly a 30–45 degree tilt.
Also look for new shading sources. Trees grow. Shrubs fill in. A neighbor's new fence or addition can cast shadows that weren't there when you installed the light. Even partial shading for a few hours a day can significantly reduce daily charge accumulation.

Part 2: Battery Maintenance — Where Most People Go Wrong
The battery is the heart of any solar light system. It's also the component most likely to limit your light's performance as it ages — and the one most affected by how you treat it.
Understanding What's Inside Your Solar Light Battery
Most quality outdoor solar lights today use one of two battery chemistries:
- LiFePO4 (Lithium Iron Phosphate) — the premium option. Handles temperature extremes well, has a longer cycle life (2,000–3,000+ charge cycles), and doesn't degrade as quickly. You'll find this in higher-end street lights and commercial-grade fixtures.
- Li-ion (standard lithium-ion) — common in mid-range products. Good energy density, but more sensitive to temperature extremes and has a shorter cycle life (500–1,000 cycles typically).
Knowing which type you have matters because their maintenance needs differ slightly.
The Full Charge Reset — Do This Every 3 Months
Here's something most solar light owners never do: give the battery a proper full charge reset. Here's how:
- Turn the light off (or cover the panel completely) for 24 hours to let the battery discharge fully
- Then expose the panel to direct sunlight for 2–3 consecutive full sunny days with the light turned off
- After that, resume normal operation
This process helps recalibrate the battery management system and can restore some capacity that's been lost to partial-charge cycling. It's especially effective for Li-ion batteries that have been running on shallow charge/discharge cycles.
Temperature and Battery Performance
Cold weather is the number one enemy of solar light battery performance in the U.S. When temperatures drop below 32°F (0°C), lithium battery capacity can drop by 20–40% temporarily. This is normal — it's not permanent damage. But it does mean your lights will run shorter hours in winter, which is expected.
What causes permanent damage is repeated deep discharge in cold temperatures. If your lights are running completely dead every night in winter, that's stressful on the battery. Consider switching to a lower brightness mode or shorter runtime setting during the coldest months to preserve battery health.
Heat is also a factor. Batteries stored in direct sun (like in a sealed housing that gets very hot) degrade faster. Quality fixtures like the Hykoont BM024C use housings designed to dissipate heat, which is one reason build quality matters for longevity.
When to Replace the Battery
Signs that your battery needs replacement:
- Light runs for less than 4 hours on a full sunny day's charge (when it used to run 8–12 hours)
- Light doesn't turn on at all despite a full day of sun
- Visible swelling or leakage from the battery compartment
- Performance doesn't improve after a full charge reset
For most quality solar street lights and flood lights, battery replacement is straightforward — the battery pack is accessible and replaceable without replacing the entire fixture. Check your product documentation for the correct replacement spec.

Part 3: Sensor and Controller Checks
The light sensor (photocell) and motion sensor (if your fixture has one) are what tell your light when to turn on and off. When these malfunction, you get lights that stay on during the day, don't turn on at night, or flicker unpredictably.
Photocell Sensor Maintenance
The photocell is a small light-sensitive component — usually a small clear or amber dome on the fixture. It needs to be clean and unobstructed to work correctly. Dust, spider webs, and debris can cover it and cause the light to behave erratically.
Clean it with the same soft cloth you use on the panel. Make sure no new obstructions (branches, mounting hardware, other fixtures) are casting shadows on it during dusk or dawn — this can cause false triggering.
Motion Sensor Calibration
If your solar light has a PIR (passive infrared) motion sensor, it may have sensitivity and range adjustments. Over time, these can drift or get bumped out of position. Check your fixture's manual for the adjustment procedure — most have a small dial or DIP switches that let you set detection range and sensitivity.
Also check the sensor lens for cracks or fogging. A cracked PIR lens will have reduced detection range and accuracy.
Controller and Wiring Inspection
Once a year, do a visual inspection of any exposed wiring connections. Look for:
- Corrosion at connection points (green or white buildup)
- Cracked or brittle wire insulation
- Loose connections at the panel or fixture junction
- Water intrusion signs (rust staining, mineral deposits inside the housing)
Quality fixtures with IP65 or IP66 ratings are designed to keep water out, but seals can degrade over time — especially if the fixture has been physically impacted or if the housing screws have been overtightened and cracked the seal.
Part 4: Structural and Mounting Maintenance
This one gets overlooked because it's not about the electrical components — but a loose or misaligned mounting can affect both performance and safety.
Pole and Bracket Inspection
For pole-mounted solar street lights, check the pole base annually for:
- Rust or corrosion at the base (especially where the pole meets concrete or soil)
- Loose anchor bolts — these can work loose over time from wind vibration
- Cracks in the pole, especially at welded joints
- Tilt — a pole that's shifted from vertical will affect panel angle and light direction
For wall-mounted fixtures, check that all mounting screws are tight and that the bracket hasn't pulled away from the wall surface. Expansion and contraction from temperature cycles can gradually loosen wall anchors.
Fixture Housing Inspection
Check the fixture housing for:
- Cracks or impact damage
- Yellowing or hazing of the LED lens cover (reduces light output)
- Gasket condition around access panels and cable entries
- Buildup of debris inside any ventilation slots
A yellowed or hazed lens cover can be polished with automotive headlight restoration compound in many cases — this is a cheap fix that can noticeably improve light output without replacing the fixture.

Part 5: Seasonal Maintenance Calendar
Here's a practical schedule you can actually follow:
Spring (March–May)
- Full panel cleaning after winter — remove any mineral deposits from snow/ice melt
- Check for winter storm damage to poles, brackets, and housings
- Do a battery full charge reset after the cold season
- Trim any vegetation that's grown to shade the panels
- Check and tighten all mounting hardware
Summer (June–August)
- Clean panels every 3–4 weeks (peak pollen and dust season)
- Check sensor lenses for spider webs — spiders love warm fixtures
- Monitor runtime — if lights are cutting out before dawn, check panel output and battery
- Inspect wiring for heat damage in very hot climates
Fall (September–November)
- Clear fallen leaves from panels — even partial coverage kills charging efficiency
- Do a pre-winter battery check and full charge reset
- Check and replace any degraded gaskets before winter moisture arrives
- Adjust motion sensor sensitivity if needed for shorter days
Winter (December–February)
- Clear snow from panels after snowfall — even a thin layer blocks charging
- Reduce brightness or runtime settings to preserve battery in cold temps
- Check for ice buildup around fixture housings and cable entries
- Avoid using metal scrapers on panels — use a soft brush only

Recommended Products: Built to Last With Minimal Maintenance
Maintenance is easier when you start with a well-built fixture. Here are the Hykoont products we'd recommend for different outdoor applications — all chosen because their design minimizes the maintenance headaches we've covered above.
For Driveways, Parking Areas & Street Applications

Hykoont BM024 160W Solar Street Light — 2 Pack
$199.00 for 2-pack
The BM024 is a workhorse. At 160W with 21,600 lumens per fixture, it's designed for serious outdoor coverage — driveways, parking lots, commercial yards. The all-in-one design means the panel, battery, and LED are integrated into a single weatherproof housing, which eliminates most of the wiring maintenance issues we covered above. IP65 rated, with a LiFePO4 battery that handles temperature swings better than standard lithium.
The 2-pack pricing makes it one of the better value options for covering a longer driveway or two separate areas.

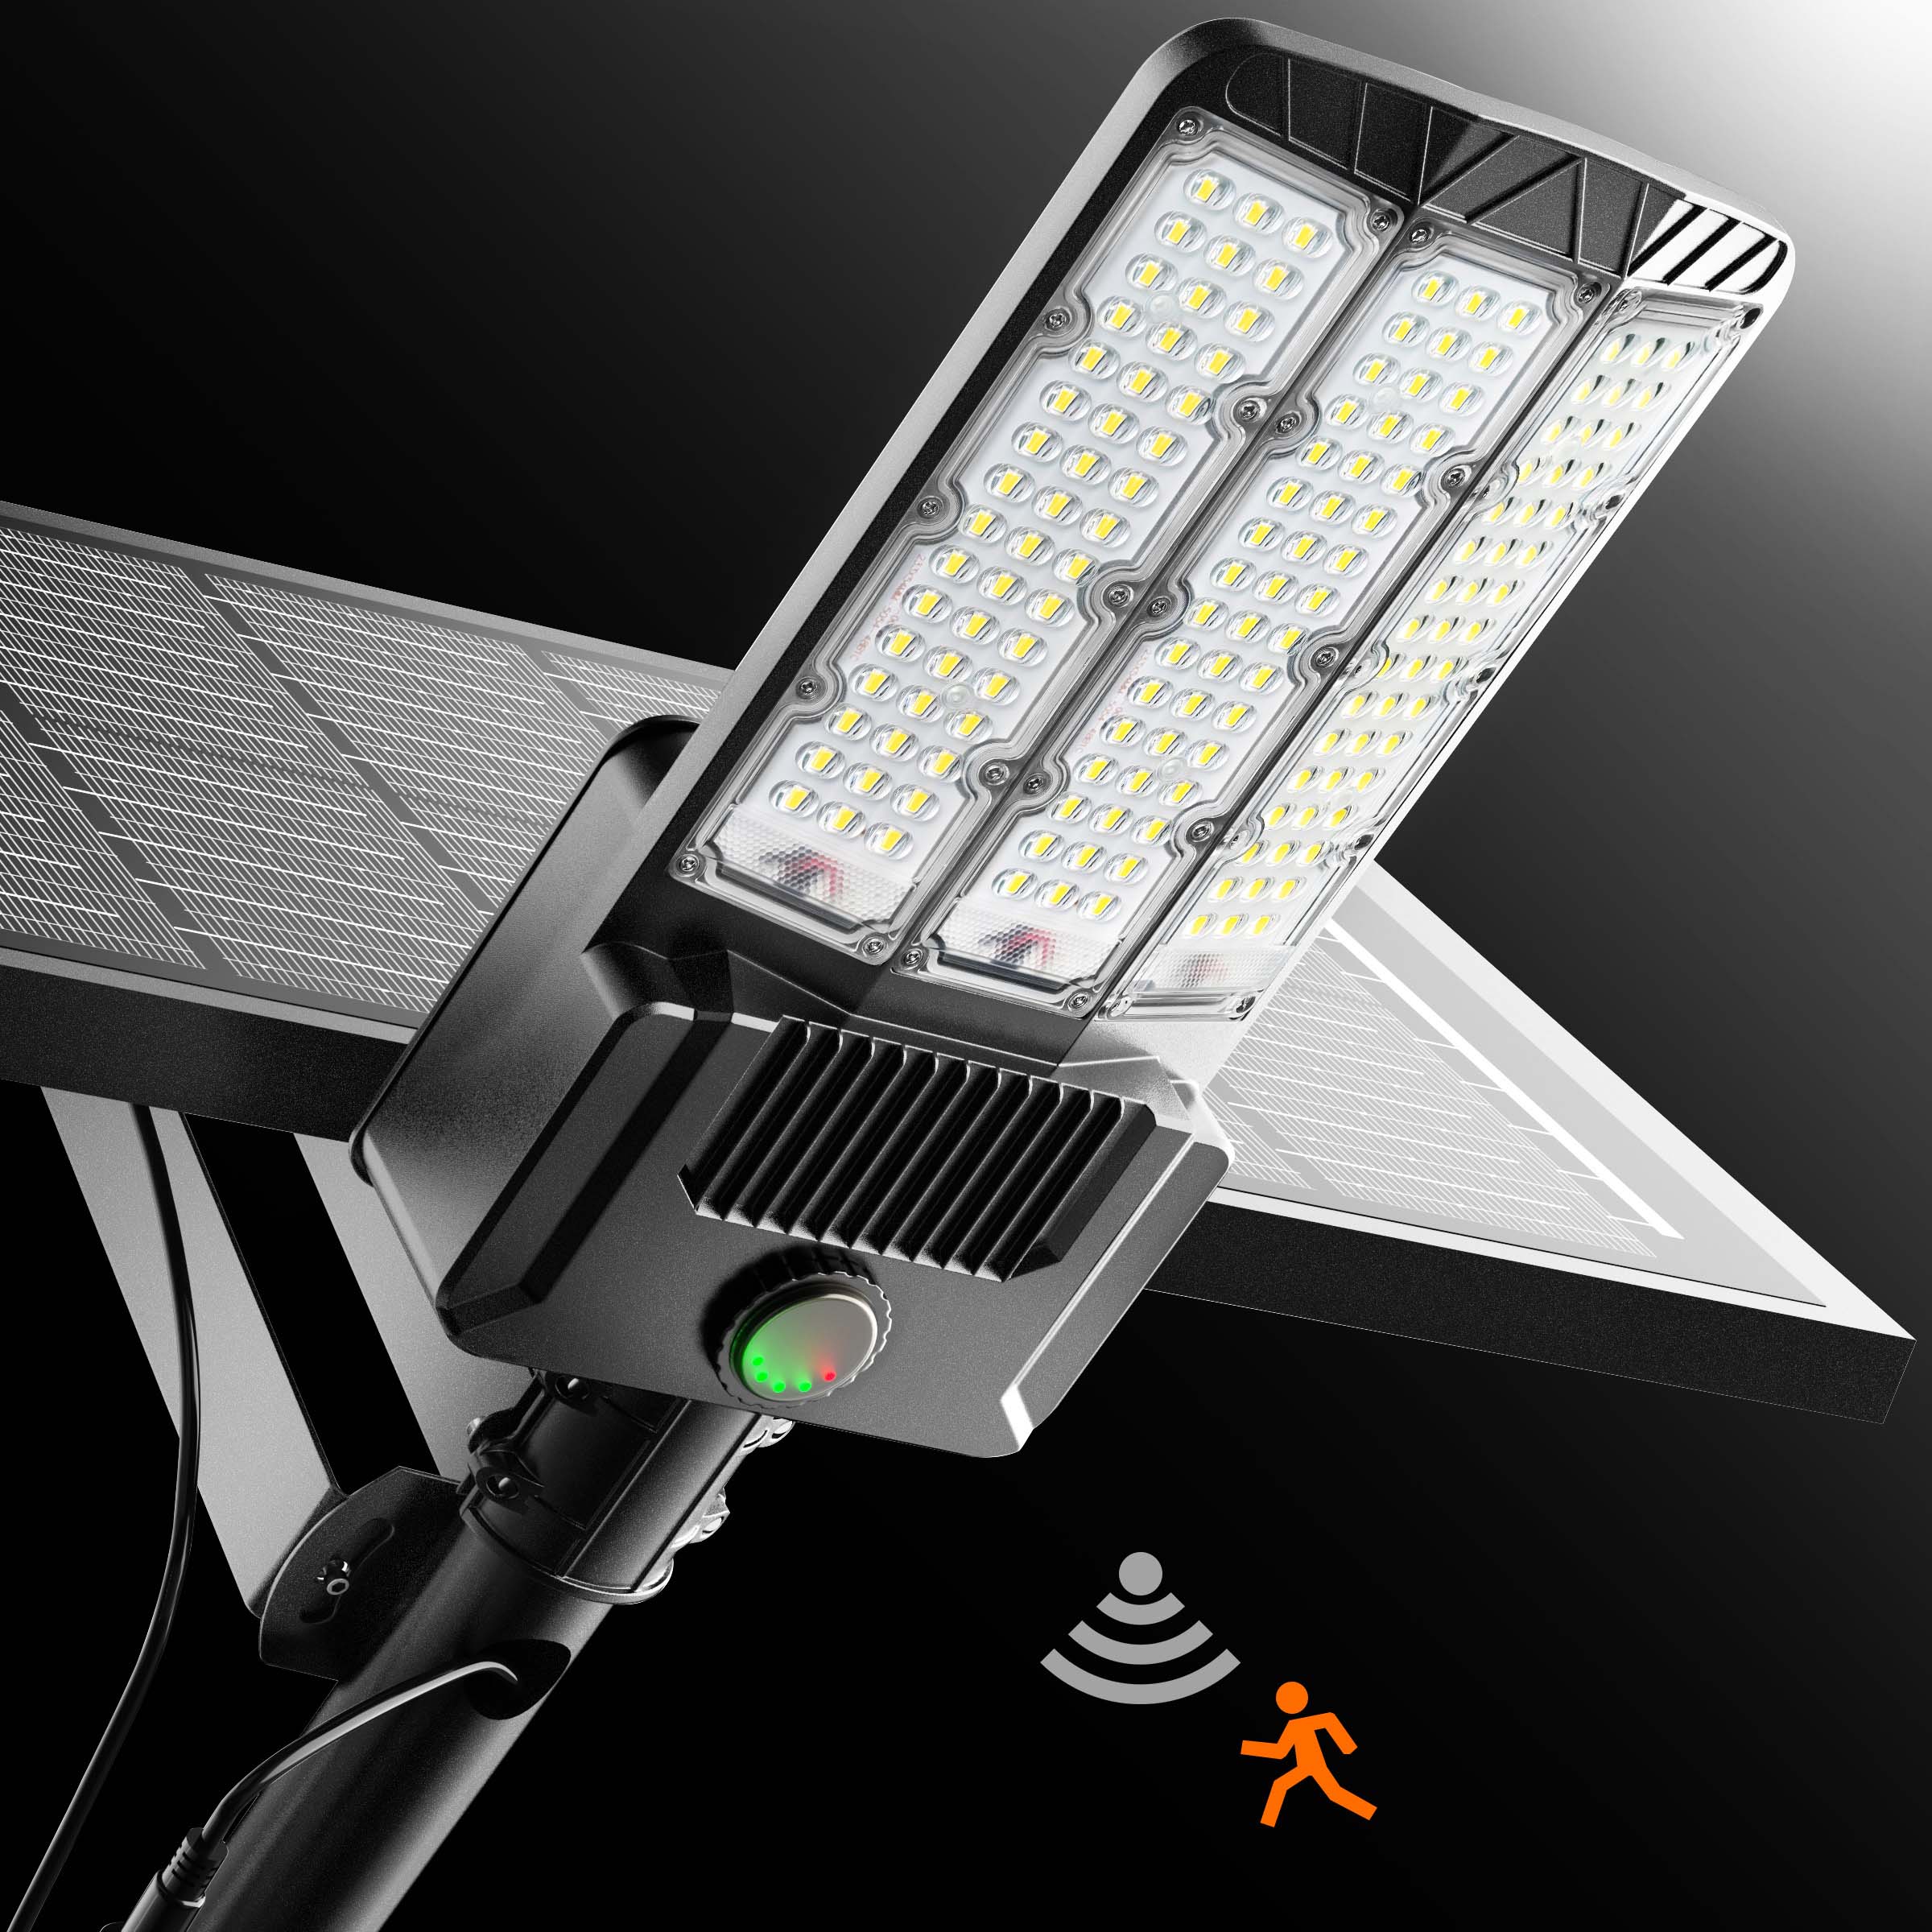
Hykoont BM024C Solar Street Light — 160W, 26,000 Lumens
From $79.00
The BM024C is the updated version of the BM024 line, pushing output to 26,000 lumens while keeping the same durable all-in-one form factor. The 6500K color temperature gives you that clean, bright white light that's ideal for security and visibility. Available in multiple configurations depending on your coverage needs.
The integrated design is particularly low-maintenance — fewer connection points means fewer potential failure spots over time.

Hykoont TW020 200W Solar Street Light
$89.00
The TW020 steps up to 200W for applications that need serious coverage — large parking areas, commercial properties, rural roads. The split-panel design on the TW series allows for better panel angle optimization compared to fully integrated units, which can make a real difference in charging efficiency in northern states with lower sun angles.
At $89.00, it's an exceptional value for the output level. The TW series is also one of the easier lines to maintain because the panel is accessible for cleaning without needing to dismount the entire fixture.

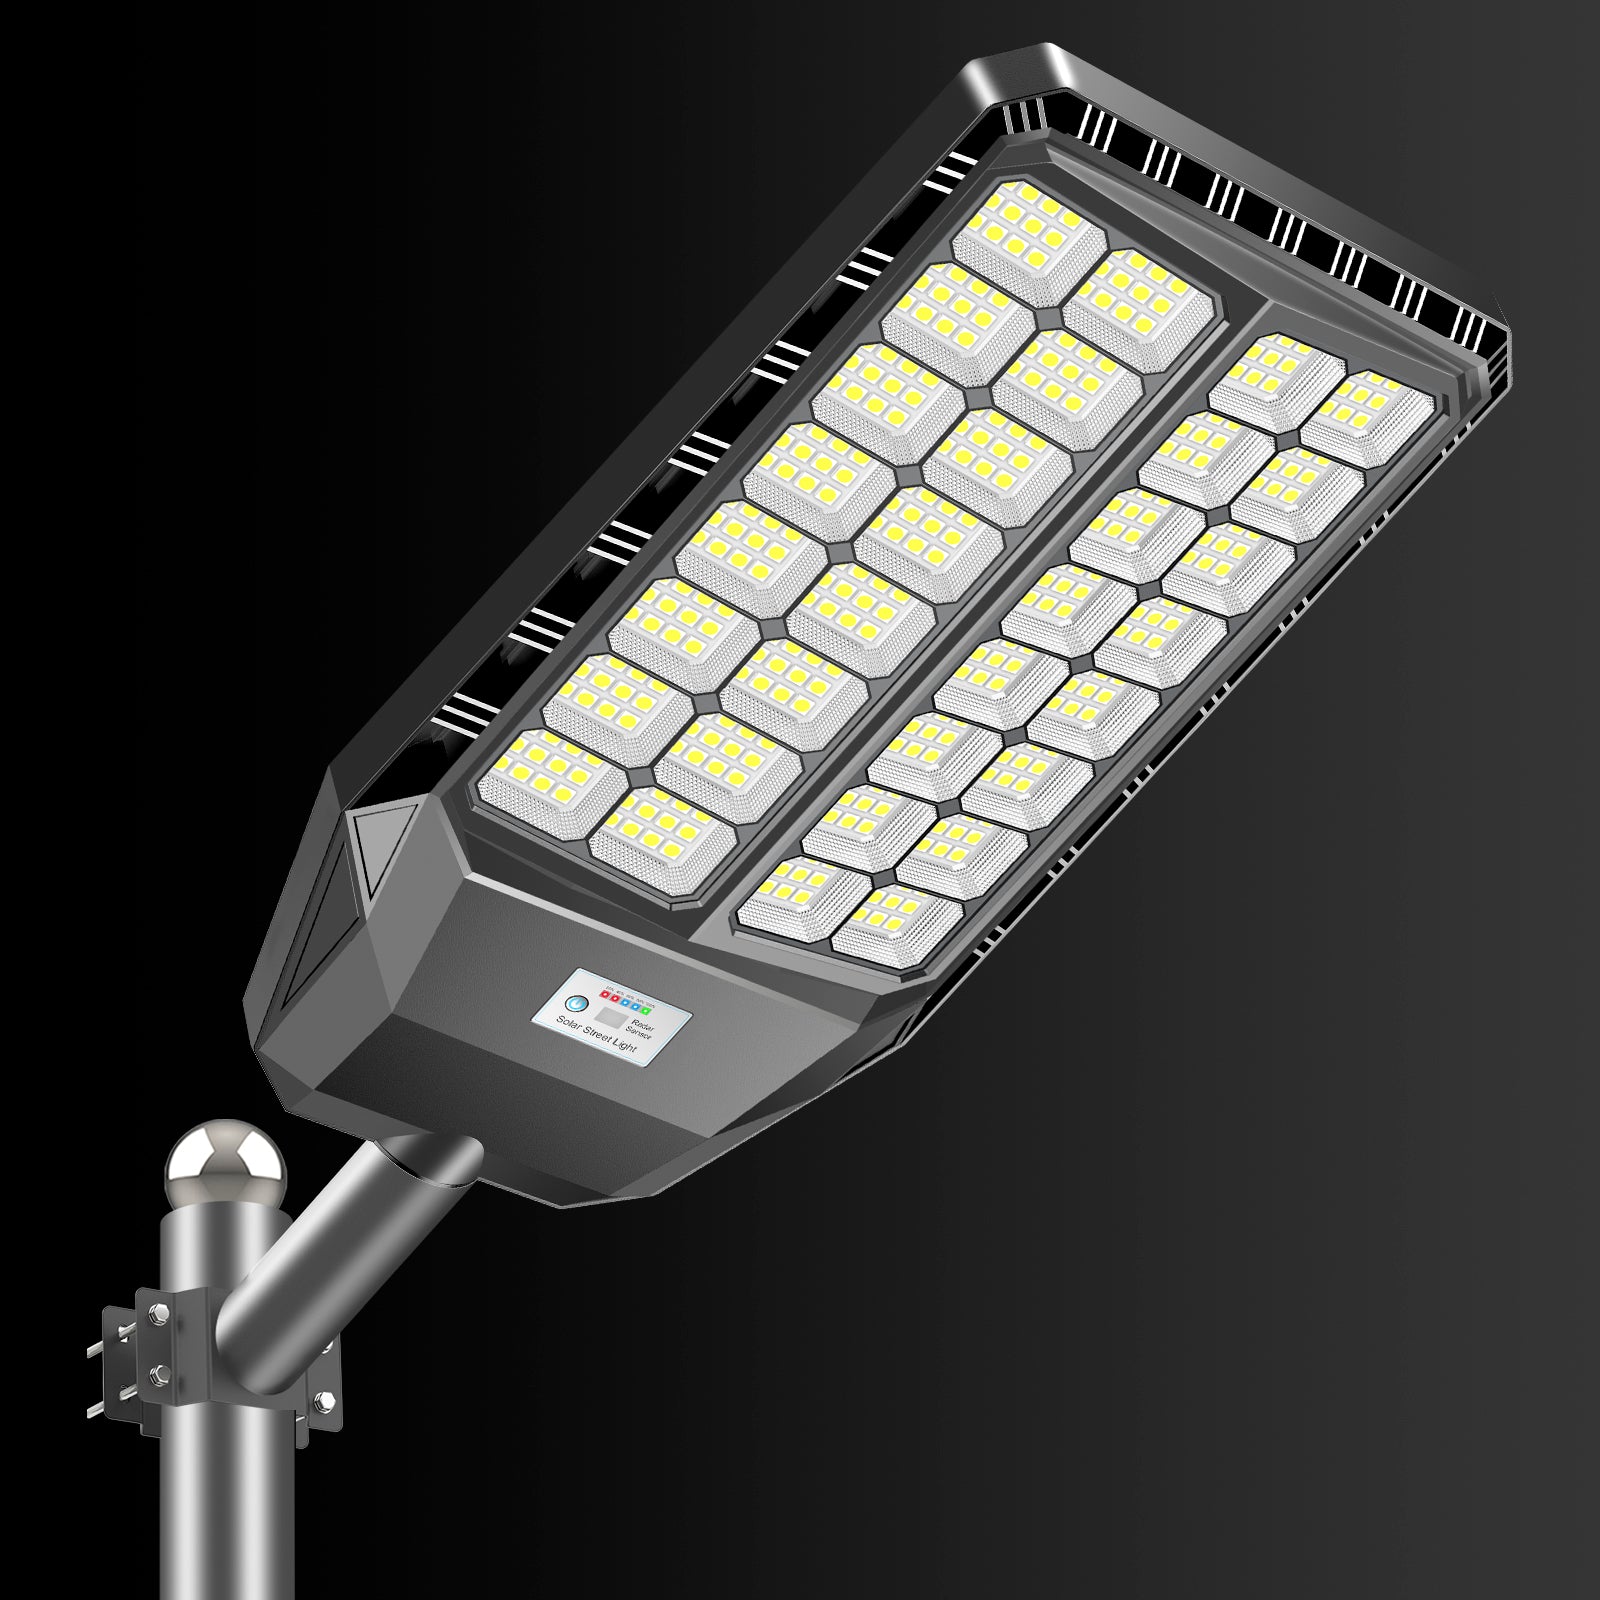
Hykoont BM027 Outdoor Solar Street Light — 25,650 Lumens, IP66
From $169.00
The BM027 is the one to consider if you're in a wet climate or coastal area. The IP66 rating (vs. IP65 on most competitors) means it's rated for powerful water jets — not just rain. For yard, garage, and pathway applications where the fixture might be exposed to sprinkler systems or heavy coastal moisture, that extra protection matters for long-term reliability.
25,650 lumens at 6500–7000K gives you excellent visibility for security applications.
Troubleshooting Guide: Common Problems and Fixes
Problem: Light doesn't turn on at night
Check first: Is the on/off switch actually in the ON position? (Sounds obvious, but it's the most common cause.) Is the panel getting direct sun during the day, or is it shaded? Is the photocell sensor clean and unobstructed?
If those are fine: Try the full charge reset procedure. If the light still doesn't come on after 2–3 full sunny days of charging, the battery likely needs replacement.
Problem: Light turns off after only 2–3 hours
Most likely cause: Battery capacity has degraded, or the panel isn't getting enough sun to fully charge the battery. Check for shading, clean the panel, and do a full charge reset. If runtime doesn't improve, battery replacement is the next step.
Problem: Light stays on during the day
Most likely cause: The photocell sensor is covered, shaded, or malfunctioning. Clean the sensor lens and check for obstructions. If the sensor is damaged, it may need replacement — contact the manufacturer for a replacement sensor or controller board.
Problem: Light flickers or flashes
Most likely cause: Loose wiring connection, low battery voltage causing the controller to cycle on and off, or a failing LED driver. Check connections first, then do a battery reset. Persistent flickering usually indicates a failing component that needs replacement.
Problem: Light is dim even after a full day of sun
Most likely cause: Dirty panel (most common), degraded battery, or the light is set to a lower brightness mode. Clean the panel first. Check the mode settings — many solar lights have multiple brightness modes that can be accidentally changed. If neither fixes it, battery replacement is likely needed.
Problem: Light works fine in summer but barely works in winter
This is normal to a degree — shorter days mean less charging time, and cold temperatures reduce battery capacity. But if the difference is dramatic (e.g., 10 hours in summer vs. 1 hour in winter), the battery may be degraded. A healthy battery should still provide 5–6 hours of runtime even in winter conditions.
Frequently Asked Questions
How often should I clean my outdoor solar light panels?
Every 4–6 weeks during spring and summer, and every 6–8 weeks in fall and winter. In dusty or high-pollen areas, clean more frequently — every 2–3 weeks. Always clean after major storms.
Can I use a pressure washer to clean solar panels?
No. Even at low pressure, a pressure washer can damage panel seals and force water into the housing. Use a soft cloth or sponge with lukewarm water and mild dish soap.
How long do solar light batteries last?
LiFePO4 batteries typically last 5–7 years (2,000–3,000 charge cycles). Standard lithium-ion batteries last 2–4 years (500–1,000 cycles). Actual lifespan depends heavily on temperature exposure and how deeply the battery is discharged each cycle.
My solar light worked great for a year and now barely lasts the night. What happened?
Most likely the battery has degraded from repeated deep discharge cycles, or the panel has accumulated enough grime to significantly reduce charging efficiency. Start with a thorough panel cleaning and a full charge reset. If that doesn't restore performance, the battery probably needs replacement.
Do solar lights need maintenance in winter?
Yes — winter actually requires more attention in some ways. Clear snow from panels after snowfall (use a soft brush, not metal scrapers). Reduce brightness or runtime settings to reduce battery stress in cold temperatures. Check for ice buildup around cable entries and housing seams.
Can I leave solar lights installed year-round in cold climates?
Yes, if the fixture is rated for your temperature range. Quality solar street lights and flood lights are designed for year-round outdoor use. LiFePO4 batteries handle cold better than standard lithium-ion. Expect reduced runtime in winter — that's normal, not a sign of failure.
Why does my solar light stay on during the day?
The photocell sensor is likely covered, shaded, or malfunctioning. Clean the sensor lens and check for obstructions like spider webs, debris, or shadows from nearby objects. If cleaning doesn't fix it, the sensor may need replacement.
How do I know if my solar light battery needs to be replaced?
Key signs: runtime has dropped to less than half of what it was when new, the light doesn't turn on despite a full day of sun, or the battery shows visible swelling or leakage. A full charge reset that doesn't improve performance is also a strong indicator.
Does the angle of the solar panel matter?
Yes, significantly. For most of the continental U.S., panels should face south at a 30–45 degree tilt for optimal year-round charging. If your fixture has an adjustable panel, check and optimize the angle — especially if you've moved the fixture or if the mounting has shifted over time.
Are more expensive solar lights actually easier to maintain?
Generally, yes — but not because they need less cleaning. Higher-quality fixtures use better seals (higher IP ratings), more durable battery chemistries (LiFePO4 vs. standard Li-ion), and more robust housings that resist UV degradation and physical damage. They also tend to have more accessible battery compartments for replacement. The maintenance tasks are the same; the components just hold up better over time.
The Bottom Line
Solar lighting is genuinely low-maintenance compared to wired systems — no electrician needed, no trenching, no utility bills. But "low maintenance" doesn't mean "no maintenance." The lights that last 5–7 years and keep performing well are the ones that get a panel wipe-down every month, a battery reset every quarter, and a quick structural check once a year.
That's maybe 30 minutes of work per fixture per year. For lights that are running every single night, that's a pretty good return on time invested.
If you're in the market for fixtures that are built to make that maintenance as easy as possible, the Hykoont BM024 series and TW020 are worth a close look. Both are designed with accessible components, quality battery chemistry, and housings that hold up to real outdoor conditions — which means less time troubleshooting and more time enjoying the light.


Leave a comment
This site is protected by hCaptcha and the hCaptcha Privacy Policy and Terms of Service apply.