


Every summer, the same conversation happens. Someone spends a weekend setting up their backyard — new chairs, a fire pit, maybe some string lights — and then realizes two things: the mosquitoes are unbearable, and it gets dark way too early to actually enjoy the space.
The fix for both of those problems has gotten a lot better in the last couple of years. Solar technology has quietly crossed a threshold where the output, runtime, and reliability are genuinely good — not "good for solar" good, but just good. And the bug zapper category has finally merged with solar in a way that makes sense for outdoor use.
This is a guide to the outdoor solar gadgets worth actually buying for summer 2026. Not a list of everything on the market — just the stuff that solves real problems, with honest notes on what each product does well and where it fits.
The Two Problems Every Backyard Has in Summer
Before we get into specific products, it's worth being clear about what we're actually solving here, because the solutions are different.
Problem 1: Mosquitoes and Flying Insects
If you live anywhere east of the Rockies — or in the Pacific Northwest, or really anywhere with standing water nearby — mosquitoes are a genuine quality-of-life issue from May through September. Citronella candles help a little. Sprays work but need reapplication. Screens are great if you're on a porch.
But for open yards, patios, and garden areas, UV bug zappers are the most effective passive solution. They run all night, don't require any effort after setup, and actually kill insects rather than just repelling them temporarily. The solar-powered versions eliminate the need for an outdoor outlet, which is the main reason people don't install them in the first place.
Problem 2: Darkness After 8 PM
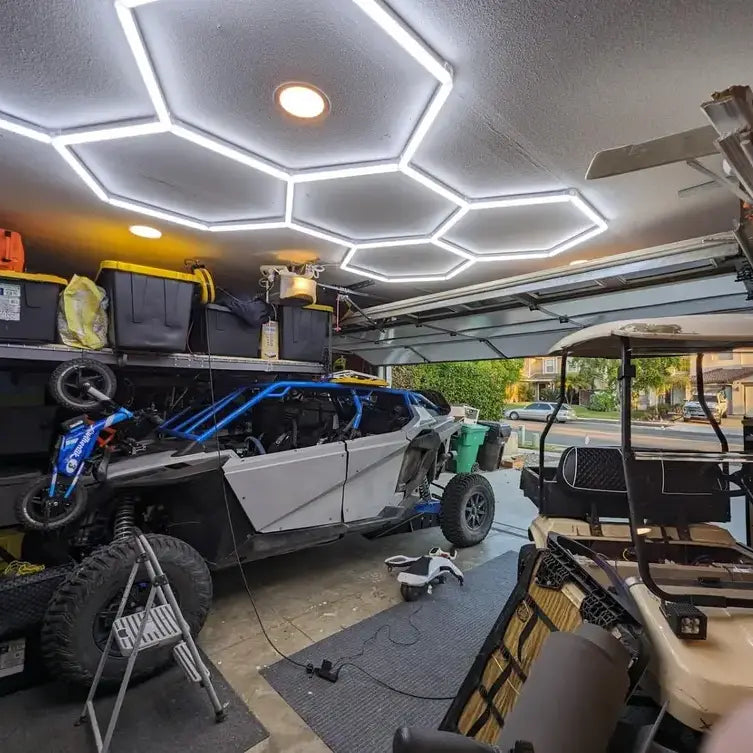
Even in summer, usable outdoor time gets cut short by darkness. A well-lit yard extends that window by 2-3 hours easily. The challenge has always been installation — running conduit, hiring an electrician, dealing with GFCI outlets. Solar street lights and flood lights have eliminated that barrier entirely. You mount them, angle the panel toward the south, and they charge during the day and run at night. That's it.
The quality gap between cheap solar lights and good ones is significant, though. We'll get into that.
Part 1: Solar Bug Zappers — The Upgrade Your Patio Actually Needs
Let's start with the bug problem, because it's the one that drives people inside earlier than anything else.
How Solar UV Bug Zappers Work
UV bug zappers work by emitting ultraviolet light at wavelengths that attract mosquitoes, moths, gnats, and other flying insects. When they fly toward the light, they contact an electrified grid and are killed instantly. It's not a new technology — UV zappers have been around for decades — but the solar-powered versions are a relatively recent development that makes them genuinely practical for outdoor use.
The key specs to look for in a solar bug zapper:
- UV tube wattage — more wattage means stronger UV output and larger effective range. 18-30W is the range for serious outdoor coverage.
- Number of UV tubes — triple-tube designs create a more complete UV field than single-tube units, attracting insects from more angles
- Solar panel size and battery capacity — determines how long the unit runs after dark. Look for units that can run 8-10+ hours on a full charge
- IP rating — outdoor bug zappers need to handle rain. IPX4 minimum; higher is better
- Coverage area — measured in acres or square feet. Match this to your actual yard size
Placement Strategy: Where to Put Your Bug Zapper
This matters more than most people realize. A few rules:
- Don't put it directly on your patio or seating area. You want to attract insects away from where you're sitting, not toward it. Place the zapper 20-30 feet away from your main seating area, ideally between your yard perimeter and the patio.
- Height matters. Mosquitoes tend to fly at 3-6 feet off the ground. A zapper mounted at 4-5 feet is in the optimal zone.
- Near standing water or vegetation. These are mosquito breeding and resting areas. A zapper near a garden bed or near a fence line adjacent to a neighbor's yard will intercept more insects than one in the middle of an open lawn.
- Away from competing light sources. Other bright lights nearby can reduce the zapper's attractiveness to insects. Give it some separation from your main patio lights.

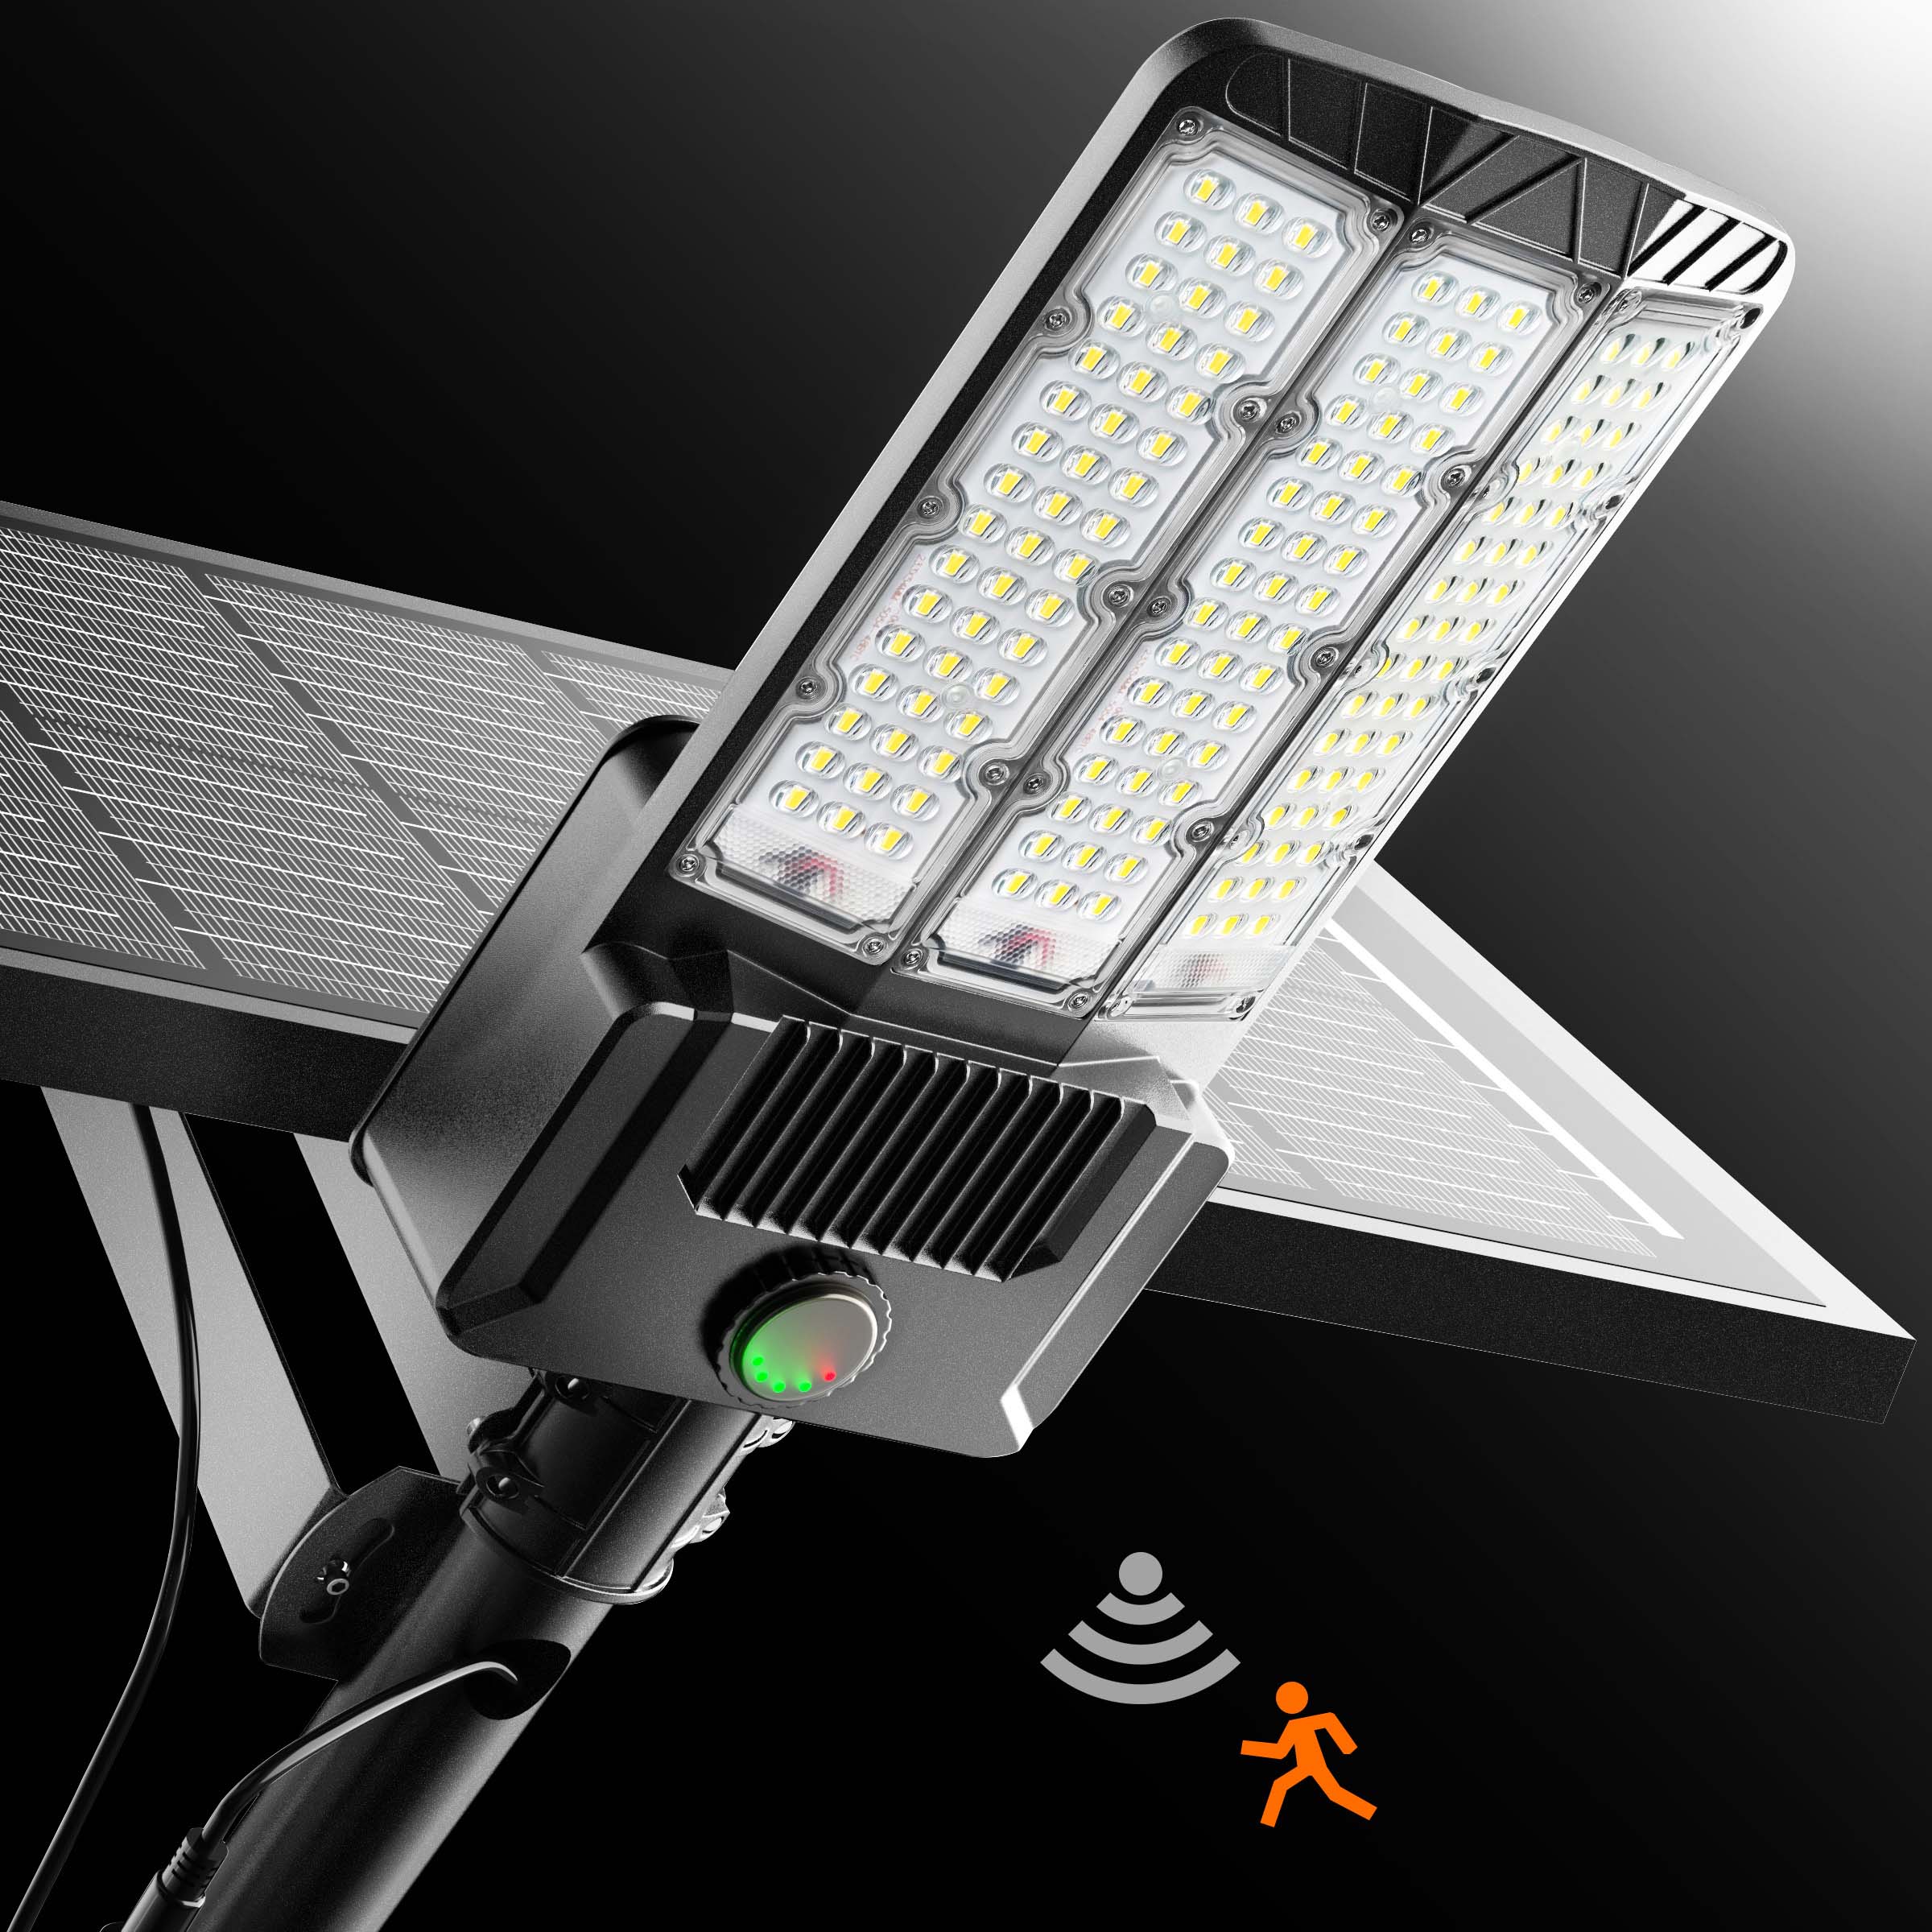
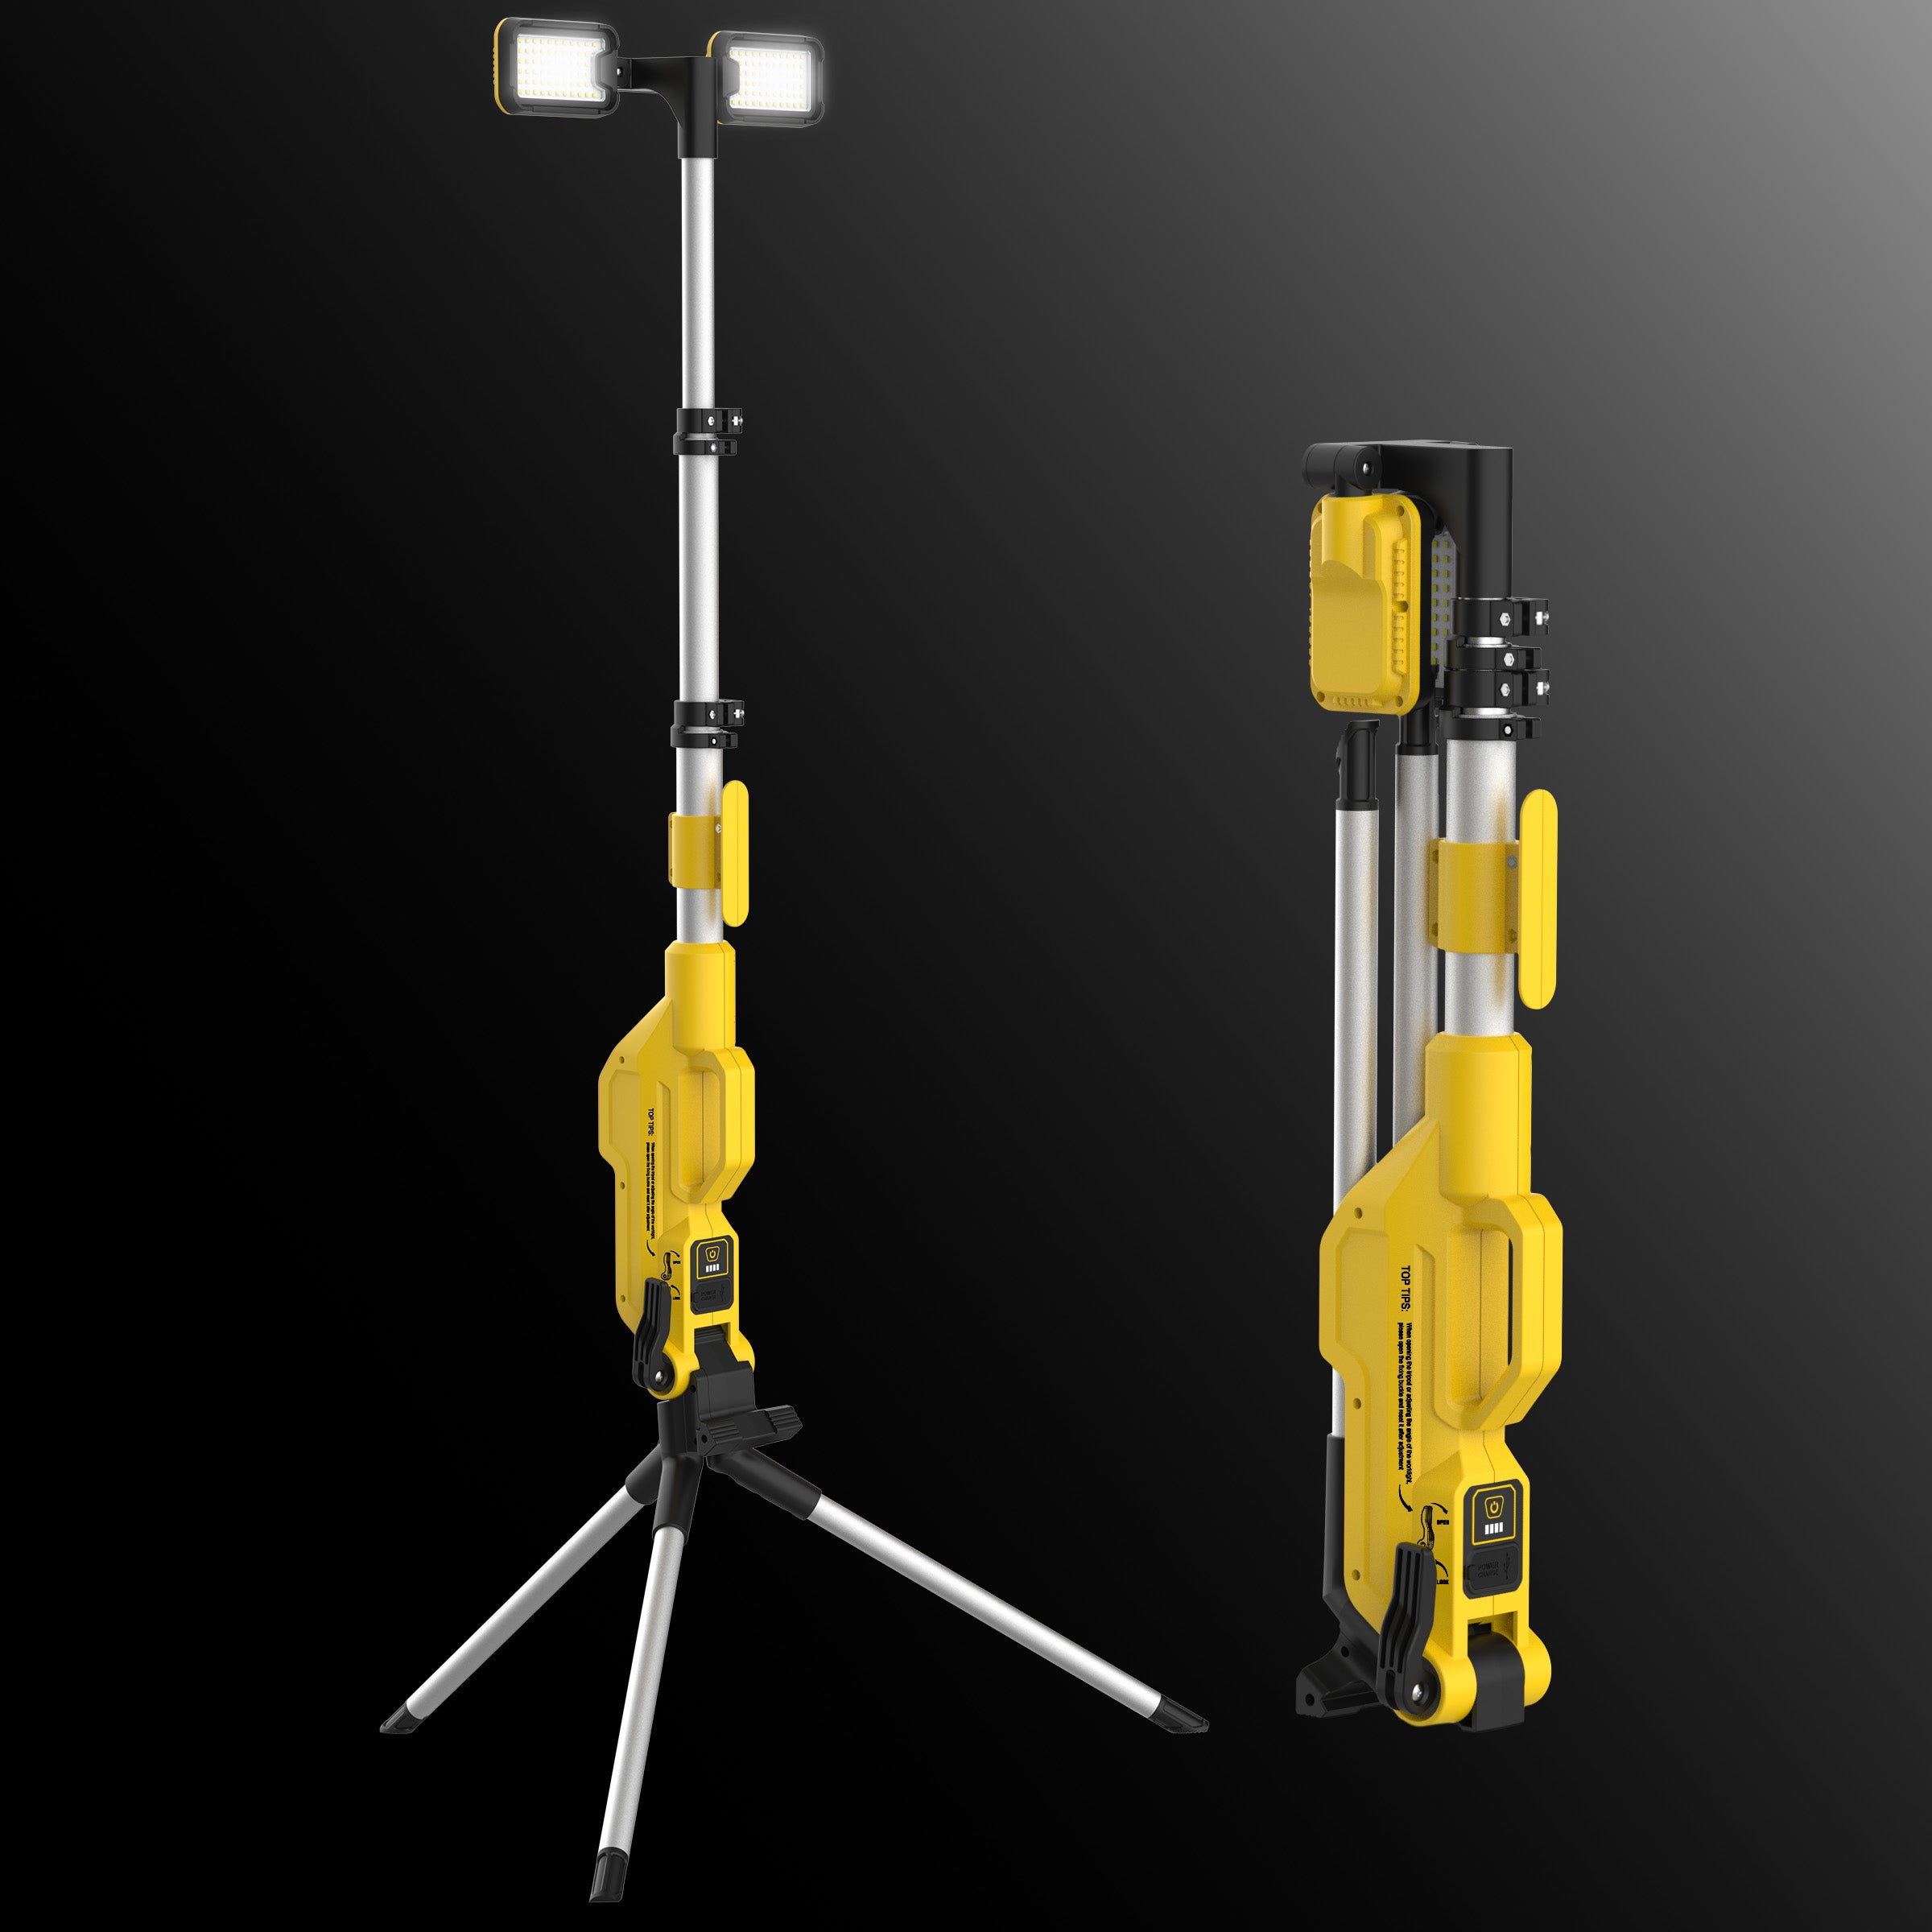
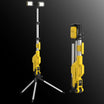
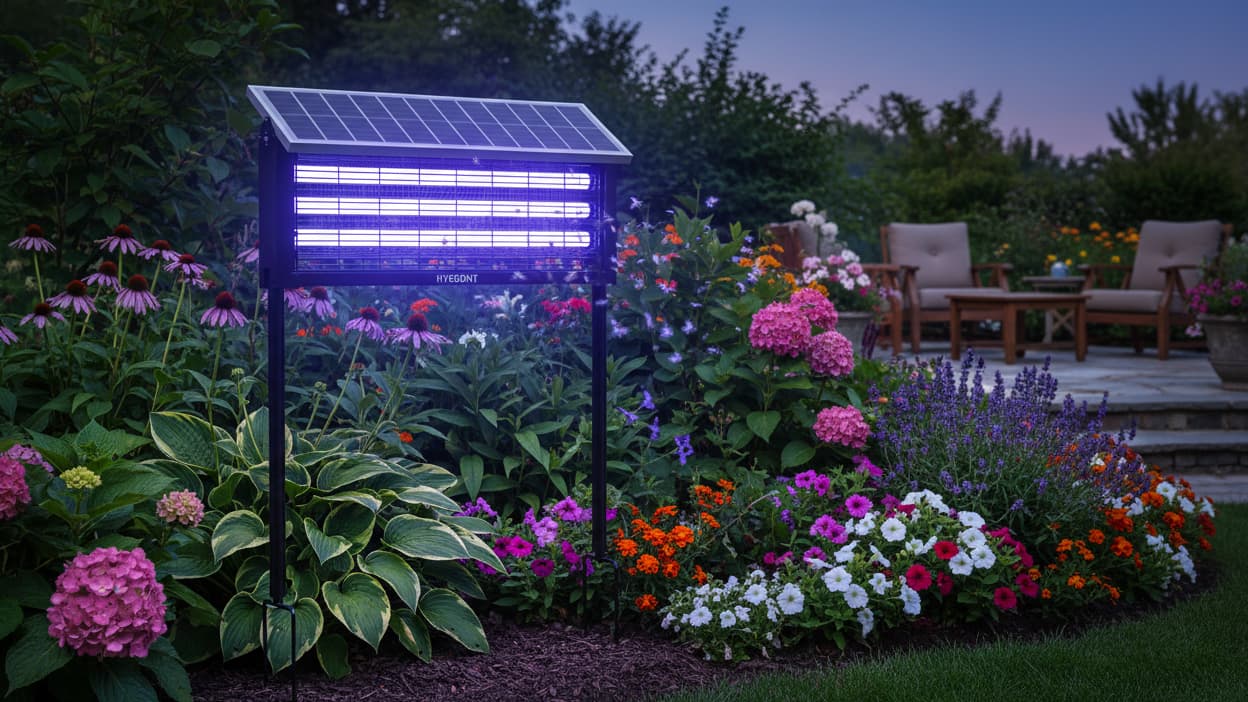
Product Pick: Hykoont 30W Solar LED Bug Zapper Pro

Hykoont 30W Solar LED Bug Zapper Light Pro — Triple Tube, Dusk-to-Dawn
From $125.00
The Pro version is the one to get if you have a larger yard or a serious mosquito problem. The triple UV tube design creates a 360-degree UV field that's significantly more effective than single-tube units — insects can approach from any direction and still be attracted to the light. At 30W, it's one of the higher-output solar bug zappers on the market.
The dusk-to-dawn operation means it turns on automatically at sunset and runs until sunrise — no timers to set, no switches to flip. The solar panel charges the internal battery during the day, and the unit manages its own power. In most U.S. summer conditions (6-8 hours of usable sunlight), it runs a full night without issue.
The weatherproof housing handles rain without problems, and the hanging design lets you position it at the optimal height for mosquito interception. Available in multiple configurations depending on your coverage needs.
Best for: Larger yards (5,000+ sq ft), serious mosquito pressure, all-night coverage
Product Pick: Hykoont 19W Solar LED Bug Zapper Standard

Hykoont 19W Solar LED Bug Zapper Light Standard — Triple UV Tubes, Ground Stake & Hanging
$125.00
The Standard version is the more versatile option for most residential yards. The dual-mount design — ground stake or hanging — gives you flexibility that the Pro doesn't have. Stake it in a garden bed to intercept insects at ground level, or hang it from a pergola or fence post at head height. Most people end up using the ground stake option near their garden or lawn perimeter.
Triple UV tubes on a 19W unit still deliver solid coverage for a typical suburban backyard. The IPX4 rating handles rain, and the solar charging means zero operating cost after purchase. At $125.00 flat, it's a straightforward buy for anyone who wants to test the solar bug zapper concept before committing to a larger setup.
Best for: Average-sized yards, patios, garden areas, flexible placement needs
Part 2: Solar Lighting — Turning Your Yard Into a Space You Actually Use After Dark
Here's the thing about outdoor lighting that most people don't fully appreciate until they have it: it doesn't just let you see at night. It changes how you use the space. A well-lit backyard becomes an extension of your living area. A dark one is somewhere you walk through quickly to get inside.
For summer 2026, the solar street light category has matured to the point where the output levels are genuinely comparable to wired fixtures — without the installation cost or the monthly utility bill.
What Makes a Solar Street Light Actually Good
The specs that matter, in order of importance:
- Lumen output — this is actual brightness. For a driveway or parking area, you want 15,000+ lumens. For a pathway or garden, 5,000-10,000 is plenty. Don't get distracted by wattage claims — lumens are what you actually see.
- Battery chemistry — LiFePO4 batteries handle temperature extremes better and last longer than standard lithium-ion. Worth paying for if you're in a climate with cold winters or very hot summers.
- IP rating — IP65 minimum for outdoor use. IP66 if you're in a wet climate or near sprinklers.
- Motion sensor vs. dusk-to-dawn — motion sensor mode conserves battery but leaves areas dark between triggers. Dusk-to-dawn runs all night but uses more battery. Many quality units offer both modes.
- Panel adjustability — a panel you can angle toward the south makes a real difference in charging efficiency, especially in northern states.
Lighting Zones: How to Think About Your Yard
Before buying, sketch out your yard and identify three zones:
- High-security zones — driveway entrance, garage area, side gates. These need the highest output (20,000+ lumens) and motion detection.
- Activity zones — patio, deck, outdoor dining area. Medium output (8,000-15,000 lumens), dusk-to-dawn preferred so the space is always lit when you're out there.
- Pathway/accent zones — garden paths, steps, perimeter. Lower output (2,000-6,000 lumens), more about visibility than brightness.
Most residential yards need 2-4 fixtures total to cover all three zones adequately. Start with the high-security zones and add from there.

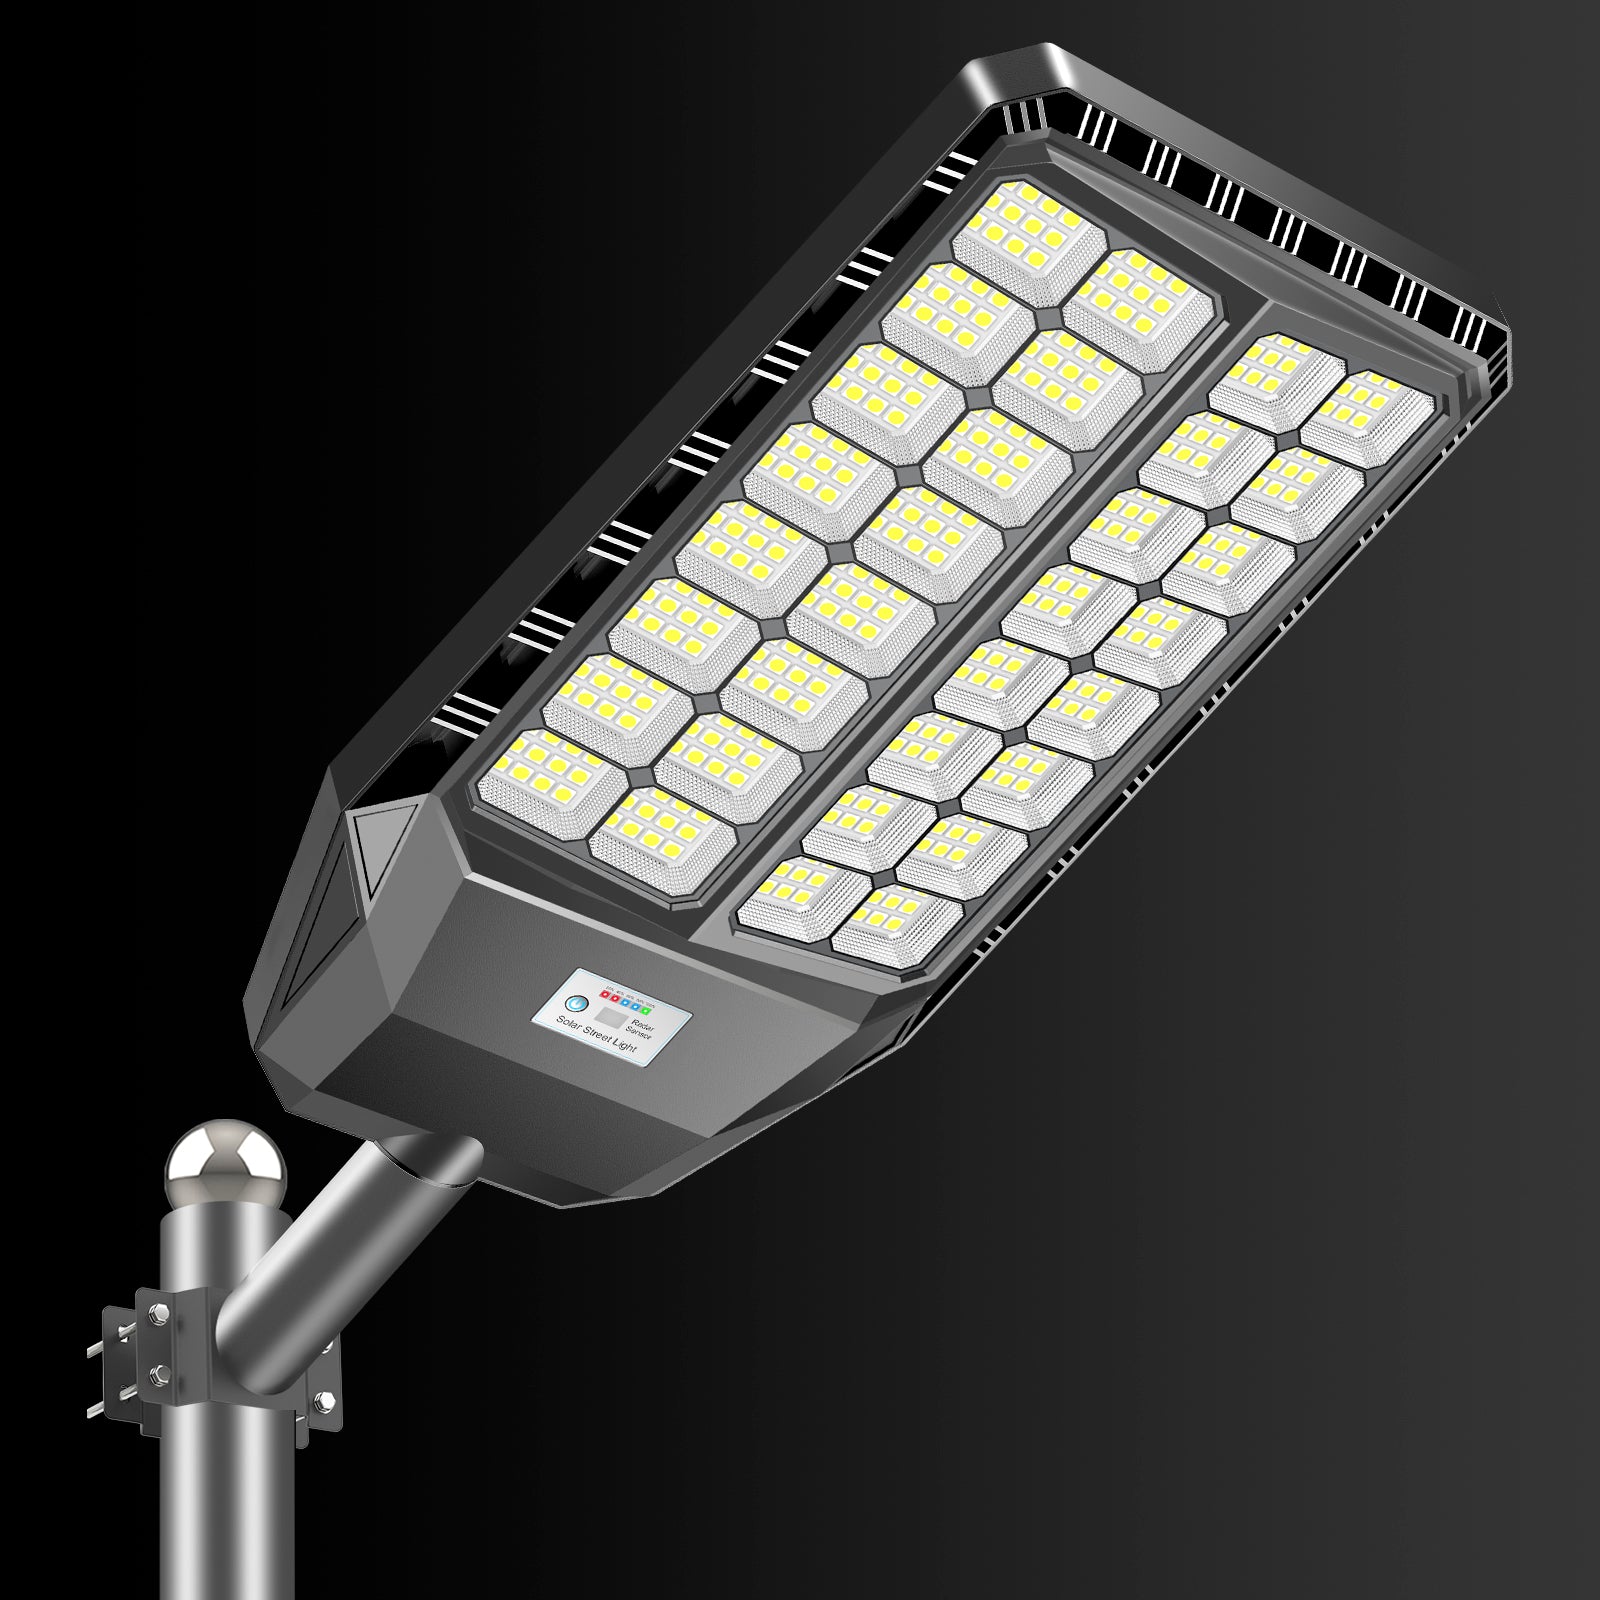
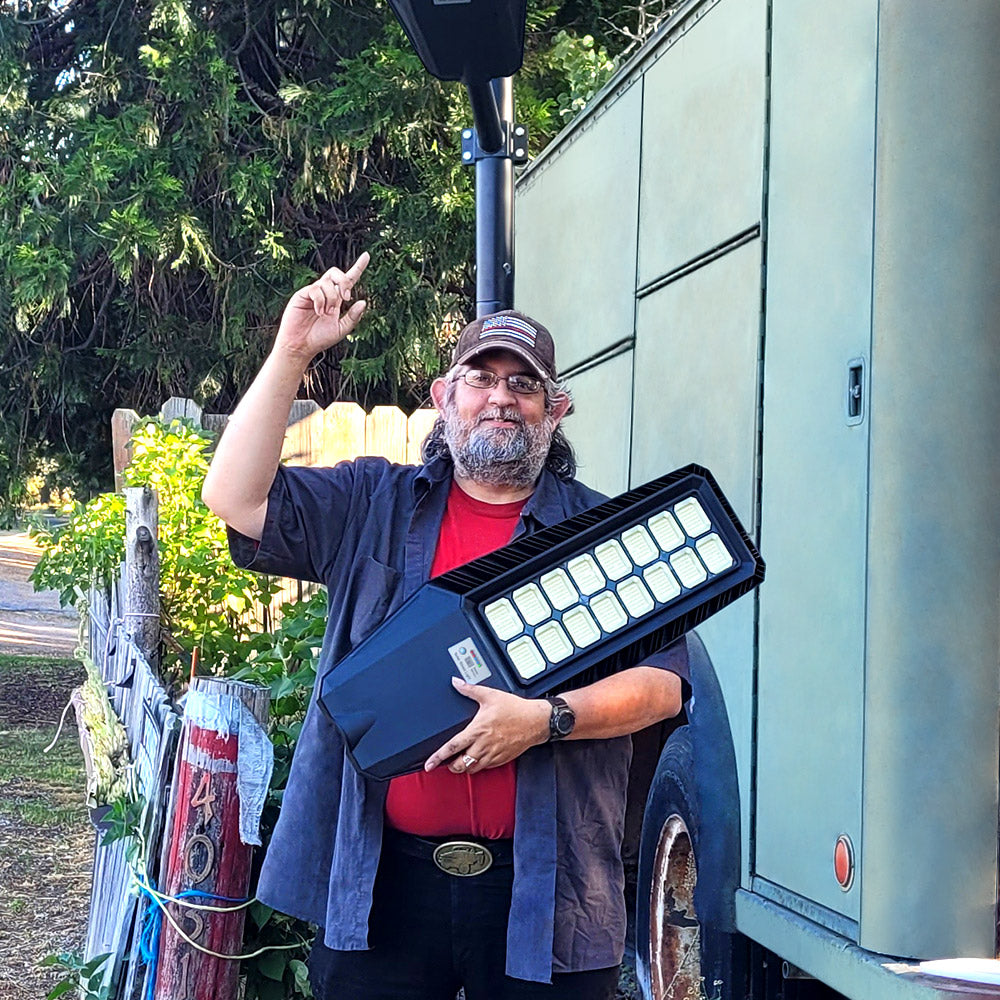
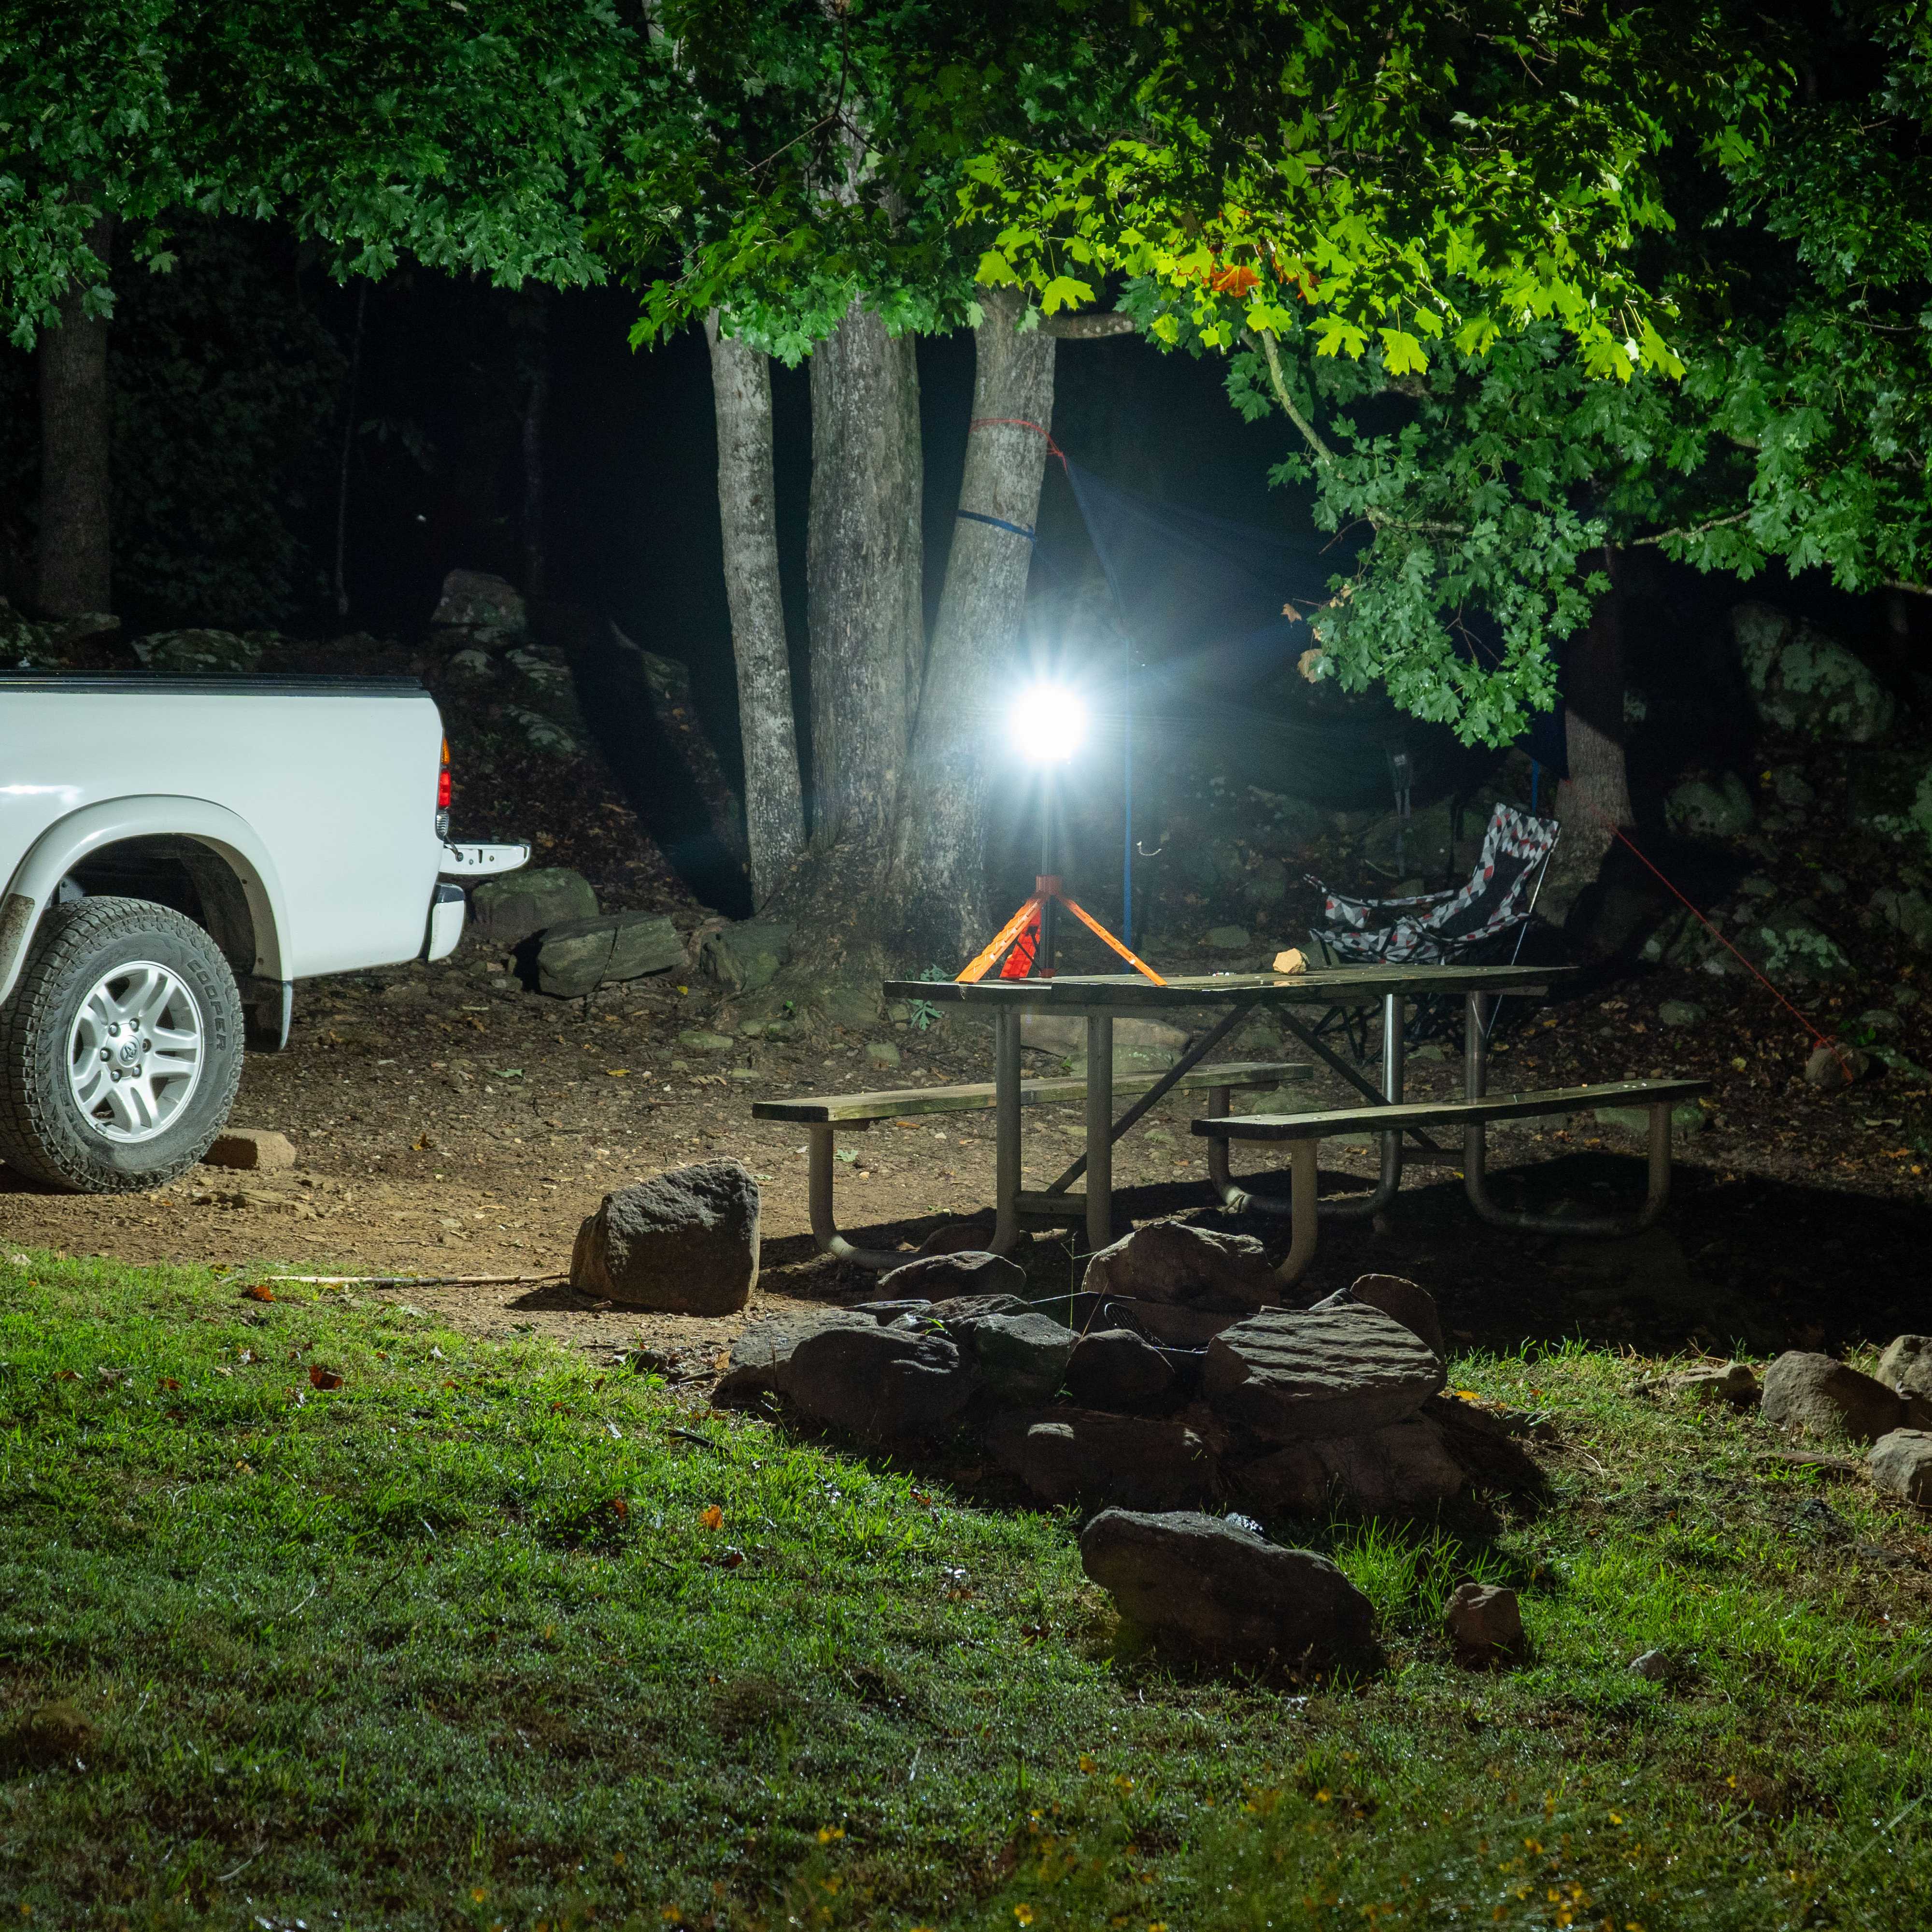
Product Pick: Hykoont TW020 200W Solar Street Light

Hykoont TW020 200W Solar Street Light
$89.00
The TW020 is the standout value pick in the solar street light category right now. At 200W with serious lumen output, it's built for applications that need real coverage — long driveways, large parking areas, commercial properties, rural roads. The TW series design separates the solar panel from the light head, which lets you optimize the panel angle independently of where the light is pointing. That's a meaningful advantage in northern states where sun angles are lower.
At $89.00, the price-to-performance ratio is hard to argue with. This is the kind of fixture that used to cost $200-300 from commercial suppliers. The all-weather construction handles everything from summer thunderstorms to winter ice without issue.
If you're covering a driveway or a large yard area and want one fixture that does the job properly, the TW020 is the one to start with.
Best for: Driveways, large yards, parking areas, rural properties, commercial use
Part 3: The Complete Summer Backyard Solar Setup
If you're starting from scratch and want to set up a backyard that's actually usable all summer — good lighting, no mosquitoes, no wiring — here's how to think about it as a system rather than individual purchases.
The Minimal Setup (Under $300)
- 1x TW020 Solar Street Light ($89) for the main yard/driveway area
- 1x Bug Zapper Standard ($125) positioned 20-30 feet from your seating area
- Total: ~$214 — covers lighting and insect control for a typical suburban yard
The Full Setup (Under $500)
- 1x TW020 Solar Street Light ($89) for driveway/main area
- 1x BM024 2-Pack ($199) for secondary coverage areas
- 1x Bug Zapper Pro ($125) for larger yard coverage
- Total: ~$413 — comprehensive lighting and insect control for larger properties
Installation Tips for Summer
A few things that make a real difference:
- Install lights before peak summer. Give the batteries a few weeks of full charge cycles before the hottest months. New batteries perform better after a break-in period.
- Face panels south. In the continental U.S., south-facing panels at a 30-45 degree tilt get the most sun. Even a 15-degree error in panel direction can reduce daily charge by 10-15%.
- Install bug zappers in late May. Mosquito populations build through June and July. Getting the zapper running before peak season means it's already positioned and working when you need it most.
- Check for shading in summer vs. winter. Trees that were bare in winter may now cast shadows on your panels. Do a midday check to make sure panels are getting full sun.
Part 4: Why Solar Makes More Sense in 2026 Than It Did Three Years Ago
This is worth addressing directly, because there's still a lot of skepticism about solar outdoor lighting — some of it earned from bad experiences with cheap products, some of it just outdated.
Battery Technology Has Improved Significantly
The shift from NiMH to lithium-ion to LiFePO4 batteries in outdoor solar products has been the biggest performance driver. LiFePO4 batteries hold charge better in cold temperatures, have a longer cycle life (2,000-3,000+ cycles vs. 500-800 for standard Li-ion), and don't degrade as quickly from partial-charge cycling. A solar light with a LiFePO4 battery bought in 2026 will still be performing well in 2031. That wasn't true of the NiMH-based products from five years ago.
LED Efficiency Has Crossed a Threshold
Modern high-efficiency LEDs produce significantly more lumens per watt than the LEDs in solar products from even three years ago. This means a 200W solar panel can now power a light that produces what used to require a 300W panel. The practical result: longer runtime, brighter output, or both.
The Installation Cost Comparison Has Shifted
Electrician rates have increased significantly since 2020. Running a new outdoor circuit — trenching, conduit, GFCI outlet, permit in many jurisdictions — now costs $800-2,000+ depending on your location and the complexity of the run. A quality solar street light at $89-199 that requires no wiring at all is a genuinely different value proposition than it was when electrical work was cheaper.
The "Cheap Solar" Reputation Is Outdated for Quality Brands
The solar lighting market has bifurcated. There's still a lot of cheap, unreliable product at the low end — the kind that works for two months and then fails. But there's also a tier of products from manufacturers who've invested in quality components, proper IP ratings, and real battery chemistry. The price difference between the two tiers is smaller than most people expect, and the performance difference is enormous.

Part 5: Maintenance for Summer — Keeping Everything Running
Solar gadgets are low-maintenance, but not zero-maintenance. Here's what actually matters for summer specifically:
Solar Lights
- Clean panels every 3-4 weeks during summer — pollen, dust, and bird droppings accumulate fast in warm months and can reduce charging efficiency by 15-25%
- Check for new shading — trees that were bare in spring are now full. Do a midday check to confirm panels are still getting direct sun
- Monitor runtime — if lights are cutting out before dawn, check panel cleanliness first, then battery condition
Bug Zappers
- Empty the collection tray weekly — a full tray reduces effectiveness and can attract other pests
- Clean the UV tubes monthly — dust and debris on the tubes reduces UV output. Use a dry soft brush; never use water on the electrical components
- Check the grid for debris — insects and debris can accumulate on the electrified grid. Clean with a dry brush when the unit is off and the capacitor has discharged (wait 30 seconds after turning off)
- Replace UV tubes annually — UV output degrades over time even if the tube still glows. Most manufacturers recommend annual tube replacement for optimal performance

Frequently Asked Questions
Do solar bug zappers actually work, or are they just a gimmick?
They work — with caveats. UV bug zappers are effective at killing mosquitoes, moths, gnats, and other flying insects that are attracted to UV light. The key is placement: put the zapper between your yard perimeter and your seating area, not directly on the patio. A zapper placed correctly will noticeably reduce mosquito pressure in your outdoor space. One placed incorrectly (right next to where you're sitting) will attract insects toward you before killing them.
How long do solar bug zappers run on a full charge?
Quality solar bug zappers like the Hykoont Pro and Standard models are designed to run a full night (8-10+ hours) on a full day's charge in typical summer conditions. In areas with 6+ hours of direct sunlight, this is achievable consistently. In cloudy periods or in northern states with shorter summer days, runtime may be reduced.
Can I use solar lights in a shaded yard?
Partial shade is manageable — most solar lights need 4-6 hours of direct sun to charge adequately for a full night's runtime. Full shade (less than 2-3 hours of direct sun) will result in poor performance. If your yard is heavily shaded, look for fixtures with larger solar panels that can capture more energy from indirect light, or consider wired alternatives for the shadiest areas.
What's the difference between the TW020 and the BM024 series?
Both are high-output solar street lights, but they're designed differently. The TW020 uses a split design where the solar panel is separate from the light head, allowing independent angle adjustment. The BM024 is an all-in-one integrated design where panel, battery, and LED are in a single housing. The TW020's split design is better for optimizing panel angle; the BM024's integrated design has fewer connection points and is slightly easier to install and maintain.
How many solar lights do I need for my backyard?
For a typical suburban backyard (5,000-8,000 sq ft), 2-3 fixtures usually provide adequate coverage. One high-output fixture (like the TW020) for the main area, and 1-2 lower-output fixtures for pathways or secondary areas. Larger properties or those with specific security needs may require more. Start with one fixture in your highest-priority area and assess coverage before adding more.
Do solar lights work in winter too, or just summer?
Quality solar lights work year-round. Runtime is shorter in winter due to shorter days and reduced battery capacity in cold temperatures — expect 4-6 hours instead of 8-10 hours. But they continue to function. LiFePO4 batteries handle cold significantly better than standard lithium-ion, which is one reason they're worth the premium for year-round outdoor use.
Are solar bug zappers safe around kids and pets?
The electrified grid delivers a shock that's lethal to insects but not dangerous to humans or pets in normal use. The grid is recessed inside the housing and not easily touched accidentally. That said, keep them out of reach of small children who might try to touch the grid directly, and position them high enough that pets can't reach them. Standard safety precautions apply.
How do I know if a solar light is actually IP65 rated vs. just claiming it?
Look for products from manufacturers who provide actual test documentation or have verifiable third-party certifications. IP65 means the fixture is dust-tight and protected against water jets from any direction — it should handle rain, sprinklers, and hose-down cleaning without issue. If a product claims IP65 but fails in light rain, the rating was likely self-reported without proper testing. Buying from established brands with customer reviews that mention real-world weather performance is the best proxy.
Can I install solar street lights myself, or do I need a professional?
Solar street lights are designed for DIY installation — that's one of their main advantages over wired fixtures. Most pole-mounted units require setting a concrete anchor (a weekend project with basic tools) and then mounting the fixture. Wall-mounted units are even simpler. No electrical work, no permits required in most jurisdictions. The installation instructions for quality fixtures are straightforward, and most people complete the job in 2-4 hours.
What's the realistic lifespan of a quality solar outdoor light?
LED modules typically last 50,000+ hours — that's 15+ years of nightly use. The limiting factor is the battery. LiFePO4 batteries last 5-7 years (2,000-3,000 charge cycles). Standard lithium-ion batteries last 2-4 years. After the battery reaches end of life, it can usually be replaced without replacing the entire fixture, extending the product's useful life significantly.
The Short Version
If you want to actually use your backyard this summer — not just look at it through a window — two things make the biggest difference: light and bug control. Solar technology in 2026 handles both without wiring, without monthly costs, and without the installation headaches that used to make outdoor electrical work a project you'd put off indefinitely.
The Bug Zapper Pro and Bug Zapper Standard handle the mosquito problem passively — set them up once and they run every night. The TW020 handles the darkness problem with output that's genuinely comparable to wired street lights.
Set it up before Memorial Day. You'll actually use your yard this summer.
Shop Bug Zapper Pro → Shop TW020 Solar Light → Shop Bug Zapper Standard →


Leave a comment
This site is protected by hCaptcha and the hCaptcha Privacy Policy and Terms of Service apply.