


Introduction: Mastering Solar Light Sensor Diagnostics and Repair
Solar lighting systems represent a sophisticated integration of photovoltaic technology, energy storage, and intelligent light sensing—all working in harmony to provide sustainable outdoor illumination. When these systems malfunction, the culprit is often the photosensor, a critical component responsible for automatic dusk-to-dawn operation. Understanding how to diagnose and repair solar light sensors not only saves replacement costs but also extends the operational lifespan of your entire lighting system.
This comprehensive technical guide provides professional-level troubleshooting methodologies, detailed repair procedures, and preventive maintenance strategies to restore your solar lights to optimal performance. Whether you're dealing with intermittent operation, complete failure, or reduced sensitivity, this guide will equip you with the knowledge to resolve sensor-related issues effectively.
Understanding Solar Light Sensor Technology
How Photosensors Work: The Science of Light Detection
Solar light sensors utilize photoelectric components—primarily cadmium sulfide (CdS) photoresistors, phototransistors, or photodiodes—to detect ambient light levels and control circuit operation. These components exhibit variable electrical resistance or current flow based on light intensity, enabling automatic switching between charging and illumination modes.
Technical Operating Principles:
- Photoresistors (LDR - Light Dependent Resistors): Most common in budget solar lights; resistance decreases from 1MΩ (darkness) to 10-20kΩ (bright light), triggering relay or transistor switching circuits
- Phototransistors: Semiconductor devices offering faster response times (microseconds vs. milliseconds) and greater sensitivity, commonly used in premium solar lighting systems
- Photodiodes: Precision sensors providing linear response across wide light ranges, typically found in commercial-grade solar installations
- Threshold Circuitry: Comparator circuits (often using operational amplifiers) establish activation thresholds, typically 5-10 lux for turn-on and 20-50 lux for turn-off, creating hysteresis to prevent flickering
Complete System Integration
The photosensor functions as part of an integrated control system:
- Daylight Mode: High light levels (>50 lux) keep the sensor in high-resistance state, disconnecting LED circuit and directing solar panel output to battery charging
- Transition Period: As ambient light decreases below threshold (5-10 lux), sensor resistance increases, triggering control circuit
- Night Mode: Control circuit activates LED array, drawing power from rechargeable battery until dawn or battery depletion
- Protection Circuits: Overcharge protection, deep discharge prevention, and reverse polarity safeguards ensure system longevity
 Comprehensive Diagnostic Framework: Identifying Sensor Failures
Common Failure Modes and Root Causes
1. Contamination-Related Failures (40% of sensor issues)
- Surface Fouling: Dust, pollen, bird droppings, or mineral deposits create optical barriers reducing light transmission by 30-70%
- Moisture Intrusion: Condensation inside sensor housing causes erratic readings and potential corrosion
- Chemical Degradation: UV exposure, acid rain, or salt spray can degrade sensor protective coatings
2. Power System Failures (35% of issues)
- Battery Degradation: NiMH or lithium batteries lose 20-30% capacity annually, reducing voltage below sensor operating threshold (typically 1.2V minimum)
- Sulfation and Corrosion: White or green deposits on battery terminals increase resistance, disrupting power delivery
- Cell Imbalance: In multi-cell configurations, individual cell failure creates voltage irregularities affecting sensor operation
3. Electrical Connection Failures (15% of issues)
- Solder Joint Failure: Thermal cycling causes cold solder joints, creating intermittent connections
- Wire Fatigue: Vibration and temperature fluctuations cause wire breakage at connection points
- Connector Oxidation: Moisture exposure creates non-conductive oxide layers on electrical contacts
4. Component-Level Failures (10% of issues)
- Photoresistor Degradation: UV exposure and thermal stress reduce sensitivity over 3-5 years
- Transistor Failure: Voltage spikes from lightning or static discharge damage semiconductor junctions
- Capacitor Deterioration: Electrolytic capacitors in timing circuits dry out, altering threshold behavior
Professional Diagnostic Procedures
Initial Assessment Protocol
Visual Inspection Checklist:
- Examine sensor lens for cracks, discoloration, or opacity indicating UV damage
- Check housing integrity for water intrusion points (cracks, degraded seals)
- Inspect solar panel for physical damage, delamination, or heavy soiling
- Verify LED functionality by manually covering sensor in daylight (should illuminate if sensor works)
- Look for corrosion indicators (green/white deposits) around battery compartment and connections
 Functional Testing Methods
Cover Test (Basic Functionality):
- In bright daylight, completely cover sensor with opaque material (cardboard, hand)
- Light should activate within 3-10 seconds if sensor and control circuit function properly
- If light doesn't activate, issue lies in sensor, wiring, battery, or LED circuit
Multimeter Testing (Advanced Diagnostics):
- Battery Voltage Test: Measure battery voltage after full sunny day (should read 1.2-1.4V per cell for NiMH, 3.7-4.2V for lithium)
- Solar Panel Output: In direct sunlight, measure panel voltage (should exceed battery voltage by 0.5-1.0V for charging)
- Sensor Resistance: Disconnect sensor and measure resistance in bright light (10-50kΩ) vs. darkness (500kΩ-1MΩ); minimal change indicates sensor failure
- Circuit Continuity: Test all wire connections for continuity; >1Ω resistance indicates poor connection
Step-by-Step Professional Repair Procedures
1. Sensor Cleaning and Restoration
Proper cleaning can restore 80-90% of contamination-related failures without component replacement.
Professional Cleaning Protocol:
-
Materials Required:
- Microfiber cloths (lint-free)
- Isopropyl alcohol (90%+ concentration)
- Distilled water
- Soft-bristle brush (toothbrush)
- Compressed air (optional)
- Cotton swabs
Detailed Procedure:
- Disassembly: Remove solar light from mounting position; open housing using appropriate screwdriver (typically Phillips #1 or #2)
- External Cleaning: Wipe sensor lens with microfiber cloth dampened with isopropyl alcohol; use circular motions to avoid scratching
- Internal Cleaning: If moisture or debris visible inside sensor housing, carefully disassemble and clean internal surfaces with alcohol-dampened cotton swabs
- Contact Cleaning: Use soft brush with isopropyl alcohol to clean electrical contacts and sensor terminals
- Drying: Allow all components to air-dry completely (15-30 minutes) before reassembly; use compressed air to accelerate drying if available
- Reassembly: Ensure all seals and gaskets properly seated to prevent future moisture intrusion
- Testing: Perform cover test to verify restoration of function
Preventive Coating Application: After cleaning, apply thin layer of clear acrylic sealant or UV-resistant coating to sensor lens to prevent future degradation (optional but recommended for harsh environments).

2. Battery Diagnosis and Replacement
Battery health directly impacts sensor circuit operation, as insufficient voltage prevents proper switching behavior.
Battery Testing Protocol:
-
Voltage Test: Measure battery voltage after full day of sunlight charging
- NiMH: Should read 1.25-1.35V per cell (1.2V nominal); below 1.0V indicates replacement needed
- Lithium (18650): Should read 3.9-4.2V; below 3.5V indicates degradation
- Lithium (LiFePO4): Should read 3.3-3.6V; below 3.0V indicates replacement needed
- Load Test: Connect battery to light circuit and measure voltage under load; >0.3V drop indicates high internal resistance requiring replacement
- Capacity Test: Fully charge battery, then measure runtime; less than 50% of original specification indicates replacement needed
Professional Replacement Procedure:
-
Battery Selection: Use exact replacement specifications (voltage, capacity, chemistry); never mix battery types or brands
- NiMH: 600-1200mAh for small lights, 1500-2000mAh for larger fixtures
- Lithium: Match voltage (3.7V vs. 3.2V) and capacity; ensure protection circuit included
-
Corrosion Removal: Before installing new batteries, clean compartment thoroughly
- Mix 1 tablespoon baking soda with 100ml water
- Apply to corroded areas with cotton swab or small brush
- Neutralize with vinegar solution (1:1 vinegar:water)
- Dry completely and apply thin layer of dielectric grease to terminals
- Installation: Insert batteries observing correct polarity (+ and - markings); ensure firm contact with terminals
- Conditioning: Allow 2-3 full charge/discharge cycles for optimal battery performance
- Documentation: Mark installation date on battery or housing for future maintenance tracking
Battery Upgrade Considerations: When replacing batteries, consider upgrading to higher capacity (within voltage specifications) for extended runtime, or lithium chemistry for better cold-weather performance and longer lifespan (5-7 years vs. 2-3 years for NiMH).
3. Wiring Inspection and Repair
Electrical connection failures often manifest as intermittent operation or complete system failure.
Advanced Diagnostic Techniques:
- Visual Inspection: Look for discolored insulation (heat damage), frayed wires, or loose connections
- Continuity Testing: Use multimeter in continuity mode to test each wire from end to end; beep indicates good connection
- Resistance Measurement: Measure wire resistance; should be <0.5Ω for typical solar light wire lengths (6-12 inches)
- Stress Testing: Gently flex wires while monitoring continuity; intermittent readings indicate internal wire breakage
Professional Repair Methods:
-
Solder Joint Repair:
- Heat existing joint with 30-40W soldering iron until solder flows
- Add small amount of fresh rosin-core solder (60/40 tin-lead or lead-free)
- Allow to cool naturally without movement for strong mechanical bond
- Apply heat-shrink tubing or liquid electrical tape for insulation
-
Wire Replacement:
- Use 22-24 AWG stranded wire for flexibility and durability
- Strip 1/4 inch insulation from wire ends
- Twist strands tightly and tin with solder before connecting
- Create mechanical connection before soldering for reliability
- Insulate with heat-shrink tubing (2:1 or 3:1 shrink ratio)
-
Connector Restoration:
- Clean oxidized connectors with contact cleaner or isopropyl alcohol
- For severe oxidation, use fine sandpaper (600-grit) or contact file
- Apply dielectric grease to prevent future oxidation
- Ensure connectors fully seated with audible click or firm resistance
 4. Sensor Component Replacement
When cleaning and electrical repairs fail to restore function, sensor component replacement becomes necessary.
Sensor Identification and Sourcing:
- Component Marking: Photoresistors typically marked with resistance values (e.g., "5516" = 5-10kΩ light resistance, 500kΩ dark resistance)
- Physical Dimensions: Measure sensor diameter (common sizes: 4mm, 5mm, 12mm) and lead spacing
- Spectral Response: Most solar light sensors optimized for visible spectrum (400-700nm); ensure replacement matches
- Source Options: Electronics suppliers (Digi-Key, Mouser, Amazon), manufacturer direct, or salvage from identical non-functional units
Professional Replacement Procedure:
- Documentation: Photograph sensor orientation and wire connections before removal
-
Desoldering:
- Heat solder joints with soldering iron while applying gentle pulling force
- Use desoldering pump or wick to remove excess solder
- Avoid excessive heat (>350°C) which can damage circuit board traces
-
Installation:
- Insert new sensor leads through circuit board holes
- Bend leads slightly to hold sensor in position
- Apply soldering iron to lead and pad simultaneously
- Feed solder into joint (not onto iron tip) until it flows smoothly
- Remove iron and allow joint to cool without movement (3-5 seconds)
- Inspection: Verify solder joints are shiny and concave (not dull or balled up)
- Testing: Perform cover test and resistance measurement to confirm proper installation
Alternative: Complete Control Board Replacement: For complex failures or when soldering expertise unavailable, replacing entire control board (sensor, charging circuit, LED driver) may be more practical. Many manufacturers offer replacement boards for $5-$15, often more cost-effective than individual component repair.
5. Advanced Troubleshooting: Control Circuit Issues
Some sensor-related problems originate in the control circuitry rather than the sensor itself.
Common Circuit Failures:
- Threshold Drift: Aging components cause activation threshold to shift, resulting in lights turning on too early/late or not at all
- Transistor Failure: Switching transistors can fail in open (light never turns on) or shorted (light always on) states
- Capacitor Degradation: Timing capacitors lose value, affecting turn-on delay or causing flickering
Diagnostic Approach:
- Measure voltage at sensor output under varying light conditions; should vary from 0.2V (bright) to battery voltage (dark)
- Check transistor base voltage; should switch from low (<0.7V) to high (>1.5V) as light decreases
- Test capacitors with ESR meter or capacitance meter; replace if value drifted >20% from marking
- For complex circuit issues, consider complete control board replacement rather than component-level repair
Environmental Protection and Preventive Maintenance
Weatherproofing Strategies
Seal Enhancement:
- Apply silicone sealant around housing seams and screw holes (use clear, UV-resistant formulation)
- Replace degraded O-rings and gaskets with silicone or EPDM rubber versions
- Install sensor in downward-facing orientation when possible to prevent water pooling
- Use dielectric grease on all electrical connections to prevent moisture intrusion and corrosion
UV Protection:
- Apply UV-resistant clear coat to plastic housings and sensor lenses
- Position lights to minimize direct sun exposure during peak UV hours (10am-2pm) when possible
- Consider installing UV-filtering covers over sensors in extreme sun exposure locations
Maintenance Schedule for Maximum Longevity
Monthly Tasks (5 minutes):
- Clean sensor lens and solar panel with microfiber cloth
- Verify lights activate properly at dusk
- Check for physical damage or loose mounting
Quarterly Tasks (15 minutes):
- Deep clean sensor and solar panel with isopropyl alcohol
- Inspect housing seals and gaskets for degradation
- Test battery voltage and runtime performance
- Tighten mounting hardware and electrical connections
- Trim vegetation blocking sunlight to solar panel
Annual Tasks (30-60 minutes):
- Complete disassembly and thorough cleaning of all components
- Battery replacement if voltage or capacity below specifications
- Reapply weatherproof sealant to housing seams
- Inspect and clean all electrical connections; apply fresh dielectric grease
- Test sensor resistance and replace if degraded
- Document performance metrics for trend analysis
Seasonal Considerations:
- Winter: Remove snow accumulation from panels; verify batteries maintain charge in cold temperatures; consider bringing lights indoors in extreme cold (<-20°C)
- Spring: Clean pollen and debris; inspect for winter damage; replace batteries if needed
- Summer: Monitor for heat-related battery degradation; ensure adequate ventilation in housing
- Fall: Clear fallen leaves; prepare for reduced sunlight hours; verify full charge capacity before winter
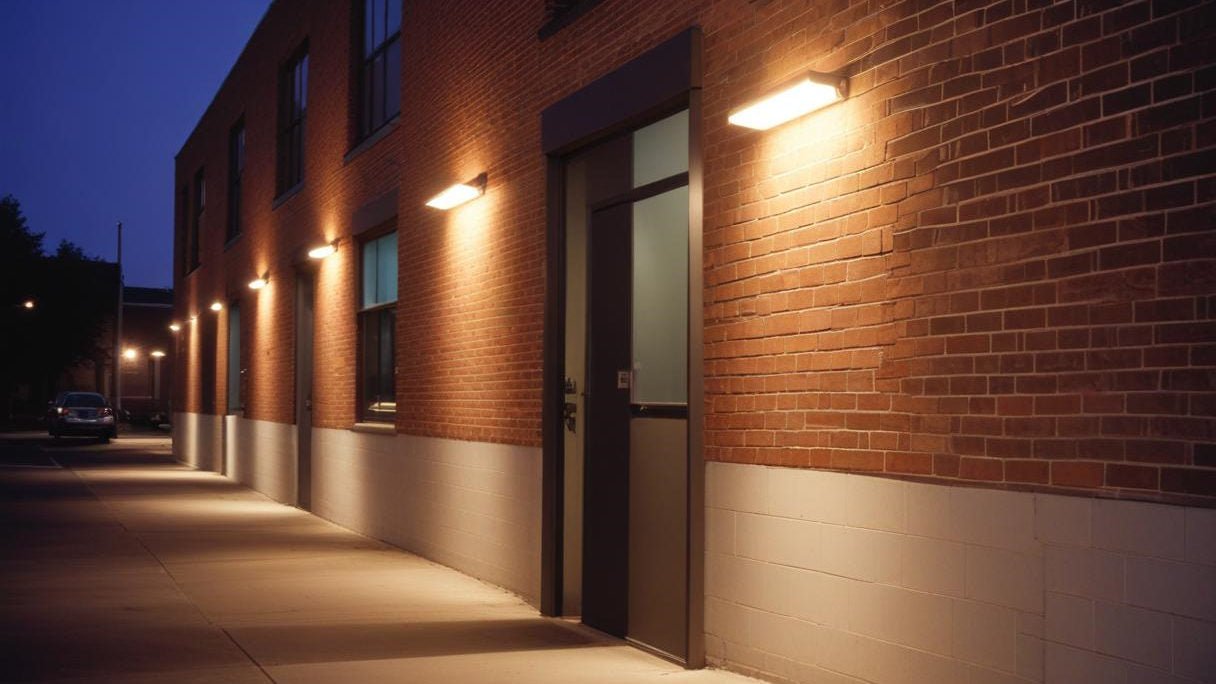
Optimal Placement for Sensor Performance
Proper installation location significantly impacts sensor reliability and longevity:
- Solar Exposure: Ensure panels receive minimum 6-8 hours direct sunlight daily; south-facing (Northern Hemisphere) or north-facing (Southern Hemisphere) orientation optimal
- Sensor Shielding: Position sensor away from direct artificial light sources (porch lights, street lamps, security lights) which can prevent activation
- Weather Protection: Install under eaves or in partially sheltered locations when possible to reduce weather exposure while maintaining solar access
- Temperature Management: Avoid locations with extreme temperature fluctuations (metal surfaces, dark pavement) which accelerate component degradation
- Accessibility: Position lights for easy access to facilitate regular maintenance and cleaning
When to Replace vs. Repair
Cost-Benefit Analysis
Repair Makes Sense When:
- Light is less than 3 years old and of good quality construction
- Issue is simple (cleaning, battery replacement) requiring <30 minutes labor
- Replacement parts readily available and cost <50% of new unit price
- Light has sentimental value or matches existing landscape design
- Multiple lights can be repaired simultaneously, improving efficiency
Replacement Recommended When:
- Light is >5 years old with multiple component failures
- Housing severely damaged or degraded beyond effective sealing
- Repair requires specialized tools or expertise (circuit board repair, precision soldering)
- Newer models offer significantly improved efficiency or features (higher lumens, longer runtime, better weather resistance)
- Total repair cost (parts + labor) exceeds 70% of replacement cost
Upgrading to Advanced Sensor Technology
When replacing sensors, consider upgrading to enhanced technologies:
- Adjustable Sensitivity Sensors: Allow customization of activation threshold for different environments
- Motion-Activated Sensors: Combine light sensing with PIR motion detection for energy conservation and security enhancement
- Smart Sensors: WiFi-enabled sensors offering remote control, scheduling, and integration with home automation systems
- Multi-Mode Sensors: Provide dim/bright modes, motion-boost features, or programmable timing sequences
Safety Precautions and Best Practices
Electrical Safety:
- Always disconnect batteries before working on electrical components
- Use insulated tools when working with live circuits
- Avoid touching circuit boards with bare hands (use ESD wrist strap or touch grounded metal first)
- Never mix battery types or insert batteries with incorrect polarity
Chemical Safety:
- Work in ventilated area when using solvents or soldering
- Wear safety glasses when cleaning corroded batteries
- Dispose of old batteries properly at designated recycling centers
- Avoid skin contact with battery acid or corrosion products
Tool Safety:
- Use appropriate wattage soldering iron (30-40W for solar lights; higher wattage can damage components)
- Keep soldering iron in proper stand when not in use
- Allow components to cool before handling after soldering
- Use proper eye protection when cutting wires or using compressed air

Conclusion: Maximizing Solar Light Sensor Performance and Longevity
Effective solar light sensor repair requires systematic diagnostic approach, proper tools, and understanding of underlying technology. By following the professional procedures outlined in this guide—from basic cleaning to advanced component replacement—you can restore functionality to malfunctioning solar lights while developing valuable troubleshooting skills.
The key to long-term success lies in preventive maintenance: regular cleaning, timely battery replacement, and environmental protection measures significantly extend sensor lifespan and system reliability. When combined with optimal placement and quality component selection, these practices ensure your solar lighting investment delivers years of sustainable, automatic illumination.
Remember that sensor repair is just one aspect of solar light maintenance. Holistic system care—including solar panel cleaning, battery management, and housing integrity—creates synergistic benefits that maximize performance and minimize future failures. Whether you're maintaining a single pathway light or managing dozens of landscape fixtures, the principles and procedures in this guide provide the foundation for professional-quality results.
Invest in quality tools, practice proper techniques, and maintain regular service schedules—your solar lights will reward you with reliable, eco-friendly illumination for years to come.


Leave a comment
This site is protected by hCaptcha and the hCaptcha Privacy Policy and Terms of Service apply.