


Whether you're lighting a warehouse, a parking lot, a retail space, or your backyard, one of the most common questions electricians and DIYers face is: how many LED light fixtures can be on one circuit? Getting this wrong can trip breakers, damage fixtures, create code violations, or—in serious cases—start an electrical fire. Get it right, and you'll have a safe, efficient, and fully code-compliant lighting system that performs reliably for years.
This comprehensive guide covers everything you need to know—from basic circuit math and NEC compliance to advanced considerations like wire gauge, voltage drop, ambient temperature derating, and how modern solar-powered LED fixtures can eliminate circuit overload concerns for outdoor applications entirely. Whether you're a homeowner planning a garage upgrade or a facilities manager designing a commercial lighting layout, this guide has you covered.
Why LED Fixtures Changed the Circuit Calculation Game
Before LED technology became mainstream, lighting circuit planning was relatively straightforward because incandescent and fluorescent fixtures consumed so much power that circuits filled up quickly. A single 150-watt incandescent bulb used more electricity than three or four modern LED equivalents combined. This meant electricians rarely needed to think about running dozens of fixtures on a single circuit—it simply wasn't possible.
LED technology changed everything. Today's LED fixtures convert roughly 90–95% of electrical energy into light, compared to just 10–15% for incandescent bulbs. A 4-foot LED shop light that replaces a 100-watt fluorescent fixture might draw only 30–40 watts. This dramatic efficiency improvement means a single 20-amp circuit can theoretically power dozens of LED fixtures—but it also means the limiting factor has shifted from wattage to other considerations like wire gauge, breaker sensitivity, and code compliance.
Understanding these nuances is essential for anyone planning a serious LED lighting installation. Let's start with the fundamentals.
Understanding Electrical Circuits: The Basics
An electrical circuit is a closed loop through which current flows from the breaker panel, through the wiring, to your fixtures, and back to the panel via the neutral wire. Every circuit has three key parameters that determine how many fixtures it can safely support:
- Amperage (Amps): The maximum current the circuit can carry, determined by the breaker rating. Residential lighting circuits are typically 15A or 20A.
- Voltage (Volts): The electrical pressure driving current through the circuit. Standard North American residential voltage is 120V; some commercial and industrial circuits run at 240V or 277V.
- Wattage (Watts): The actual power consumed by your fixtures. Calculated as Amps × Volts = Watts.
The circuit breaker is your safety valve. If the total load on a circuit exceeds the breaker's rated amperage, the breaker trips—cutting power to prevent the wiring from overheating. Repeated overloading degrades the breaker over time and, in worst-case scenarios, can cause wiring insulation to melt and ignite surrounding materials.

15-Amp vs. 20-Amp Circuits: What's the Difference?
The most common lighting circuit ratings in North America are 15 amps and 20 amps. Here's how to tell them apart and when each is appropriate:
- 15-amp circuits use 14 AWG wire and are standard in most residential lighting applications. They're suitable for bedrooms, living rooms, and light-duty garage lighting.
- 20-amp circuits use 12 AWG wire and are required for commercial spaces, workshops, and any application where you anticipate higher loads or future expansion. The outlets and fixtures on a 20-amp circuit must be rated for 20 amps.
- 240V circuits are used in some commercial and industrial lighting applications, particularly for high-bay fixtures. They double the available wattage for the same amperage, allowing significantly more fixtures per circuit.
If you're unsure which type of circuit you have, check the breaker panel. The amperage is printed on the breaker handle. If the breaker is labeled "15," you have a 15-amp circuit; if it's labeled "20," you have a 20-amp circuit.
Step-by-Step Circuit Load Calculation for LED Fixtures
Now let's walk through the exact calculation process for determining how many LED fixtures you can safely install on a single circuit.
Step 1 — Identify Your Circuit Rating
Locate your electrical panel and identify the breaker for the circuit you're planning to use. Note the amperage (15A or 20A) and the voltage (120V for most residential circuits). If you're working with a new circuit, consult your electrician about the appropriate rating for your application.
Step 2 — Calculate Total Circuit Capacity
Use the basic power formula: Watts = Amps × Volts
- 15-amp / 120V circuit: 15 × 120 = 1,800 watts total capacity
- 20-amp / 120V circuit: 20 × 120 = 2,400 watts total capacity
- 20-amp / 240V circuit: 20 × 240 = 4,800 watts total capacity
Step 3 — Apply the 80% NEC Safety Rule
This is the most important step that many DIYers overlook. The National Electrical Code (NEC) Article 210.20 mandates that continuous loads—defined as any load that operates for 3 or more hours continuously, which includes virtually all lighting—must not exceed 80% of the circuit's rated capacity.

This rule exists for good reason. Electrical components—wiring, breakers, connectors—generate heat under load. Running a circuit at 100% capacity for extended periods causes thermal stress that degrades components over time, increases resistance, and raises the risk of failure. The 80% rule provides a thermal safety margin that keeps your system running reliably for its full rated lifespan.
- 15-amp circuit safe capacity: 1,800 × 0.8 = 1,440 watts
- 20-amp circuit safe capacity: 2,400 × 0.8 = 1,920 watts
- 20-amp / 240V circuit safe capacity: 4,800 × 0.8 = 3,840 watts
Step 4 — Determine Your Fixture Wattage
Check the specification label on your LED fixture or the product data sheet. Use the actual rated wattage—not the "equivalent" incandescent wattage listed for marketing purposes. Common 4-foot LED shop lights range from 30W to 50W. High-bay LED fixtures for warehouses typically range from 100W to 200W.
If you're mixing fixture types on the same circuit (e.g., shop lights plus task lights), calculate the wattage for each type separately and add them together.
Step 5 — Subtract Other Loads on the Circuit
If your lighting circuit also powers outlets, fans, sensors, or other equipment, you must subtract their wattage from the available capacity before calculating fixture count. Common shared loads include:
- Exhaust fans: 50–150W each
- Occupancy sensors: 1–5W each (negligible but worth noting)
- Outlet-connected equipment: varies widely
Step 6 — Calculate Maximum Fixture Count
Divide the remaining available wattage by the wattage per fixture:
Maximum Fixtures = Available Wattage ÷ Watts per Fixture
Examples with a 20-amp / 120V circuit (1,920W safe capacity):
- 30W fixtures: 1,920 ÷ 30 = 64 fixtures
- 40W fixtures: 1,920 ÷ 40 = 48 fixtures
- 50W fixtures: 1,920 ÷ 50 = 38 fixtures
- 100W high-bay fixtures: 1,920 ÷ 100 = 19 fixtures
Quick Reference Table: LED Fixtures Per Circuit
| Circuit | Safe Capacity (80%) | 30W Fixtures | 40W Fixtures | 50W Fixtures | 100W Fixtures |
|---|---|---|---|---|---|
| 15A / 120V | 1,440W | 48 | 36 | 28 | 14 |
| 20A / 120V | 1,920W | 64 | 48 | 38 | 19 |
| 20A / 240V | 3,840W | 128 | 96 | 76 | 38 |
| 30A / 240V | 5,760W | 192 | 144 | 115 | 57 |
Practical Installation Examples
Example 1: Residential Garage (15-Amp Circuit)
You're upgrading a two-car garage with 4-foot LED shop lights rated at 40W each. The circuit is 15 amps at 120V, and there are no other devices on the circuit.
- Safe capacity: 1,440W
- Fixtures: 1,440 ÷ 40 = 36 fixtures maximum
- Typical two-car garage needs 4–6 fixtures—well within limits
Example 2: Commercial Workshop (20-Amp Circuit)
A workshop uses a 20-amp circuit with 40W LED fixtures and shares the circuit with two exhaust fans (100W each).
- Safe capacity: 1,920W
- Fan load: 200W
- Available for lighting: 1,720W
- Fixtures: 1,720 ÷ 40 = 43 fixtures maximum
Example 3: Warehouse High-Bay Lighting (20-Amp / 240V Circuit)
A warehouse installs 150W LED high-bay fixtures on a 20-amp, 240V circuit.
- Safe capacity: 3,840W
- Fixtures: 3,840 ÷ 150 = 25 fixtures maximum

Advanced Factors That Affect Circuit Capacity
The basic calculation above gives you a solid starting point, but real-world installations involve additional variables that can reduce the number of fixtures you can safely install. Here's what experienced electricians consider:
1. Inrush Current (Startup Surge)
LED drivers draw a brief surge of current when first powered on—sometimes 2 to 5 times the steady-state operating current. This inrush typically lasts only a few milliseconds, but it can cause nuisance tripping on sensitive breakers, especially when many fixtures start simultaneously.
If you experience breaker trips at startup despite being within the 80% load limit, consider these solutions:
- Install a slow-blow (time-delay) breaker rated for the same amperage—these tolerate brief inrush surges without tripping
- Use a staged startup controller that powers fixtures in groups with a short delay between each group
- Reduce the fixture count by 10–15% to provide additional headroom
- Choose LED fixtures with low inrush current drivers (check the spec sheet for inrush current rating)
2. Voltage Drop Over Long Wire Runs
In large facilities, the resistance of long wire runs causes voltage to drop between the panel and the fixtures. This voltage drop reduces fixture brightness, can cause flickering, and shortens LED driver lifespan by forcing the driver to compensate for the lower input voltage.
The NEC recommends keeping voltage drop below 3% for branch circuits (and below 5% total including feeder circuits). For a 120V circuit, that means no more than 3.6V of drop. To calculate voltage drop for your specific run length and wire gauge, use the formula:
Voltage Drop = (2 × Wire Length in Feet × Current in Amps × Wire Resistance per 1,000 ft) ÷ 1,000
Practical guidelines for managing voltage drop:
- For runs under 50 feet: 14 AWG wire is typically adequate for 15A circuits
- For runs of 50–100 feet: upgrade to 12 AWG even on 15A circuits
- For runs over 100 feet: use 10 AWG wire or consider splitting into multiple shorter circuits from a sub-panel
- For very long runs in large warehouses: consider 277V lighting circuits, which reduce current draw by more than half for the same wattage, dramatically reducing voltage drop
3. Wire Gauge and Ampacity
Wire gauge determines how much current a wire can safely carry without overheating. Using undersized wire is one of the most dangerous electrical mistakes. Here are the standard ampacity ratings for common wire gauges in conduit at 60°C:
- 14 AWG: 15 amps maximum — use only on 15A circuits
- 12 AWG: 20 amps maximum — required for 20A circuits
- 10 AWG: 30 amps maximum — used for sub-feeds and long runs
- 8 AWG: 40 amps maximum — used for high-current commercial feeds
Never install a larger breaker without upgrading the wire to match. The breaker protects the wire, not the fixtures—if the wire can't handle the current, the breaker must be sized to the wire's ampacity.

4. Ambient Temperature Derating
Wire ampacity ratings assume an ambient temperature of 30°C (86°F). In hotter environments—attics, industrial spaces, outdoor conduit in direct sunlight—the wire's ability to dissipate heat is reduced, which lowers its safe ampacity. The NEC provides correction factors in Table 310.15(B)(1):
- At 40°C (104°F): multiply ampacity by 0.91
- At 50°C (122°F): multiply ampacity by 0.82
- At 60°C (140°F): multiply ampacity by 0.71
For example, 12 AWG wire in a 50°C attic has an effective ampacity of 20 × 0.82 = 16.4 amps—not the full 20 amps. This means you'd need to treat it as a 15A circuit for load calculation purposes.
5. Conduit Fill and Bundling Derating
When multiple current-carrying conductors are bundled together in conduit or cable trays, they generate heat collectively and must be derated. NEC Table 310.15(C)(1) specifies derating factors:
- 4–6 conductors: multiply ampacity by 0.80
- 7–9 conductors: multiply ampacity by 0.70
- 10–20 conductors: multiply ampacity by 0.50
This is particularly relevant in commercial installations where multiple circuits share the same conduit run.
6. Power Factor of LED Drivers
LED fixtures have a power factor (PF) rating that describes how efficiently they use the electrical current drawn from the circuit. A power factor of 1.0 is ideal; many budget LED fixtures have power factors of 0.6–0.7, meaning they draw more current than their wattage alone would suggest.
For circuit load calculations, use the fixture's apparent power (VA) rather than just the wattage if the power factor is below 0.9. Apparent power = Watts ÷ Power Factor. For example, a 40W fixture with a 0.7 power factor draws 40 ÷ 0.7 = 57 VA of apparent power. Always choose LED fixtures with a power factor of 0.9 or higher for commercial installations.
7. Dimmer Compatibility
If you plan to use dimmers, ensure they are rated for LED loads and compatible with your specific fixtures. Incompatible dimmers can cause flickering, buzzing, reduced dimming range, and premature driver failure. Most modern LED dimmers have a minimum load requirement—check that your fixture count meets this minimum, especially in small rooms with only one or two fixtures.
8. Local Electrical Codes and Permits
The NEC is the baseline standard, but local jurisdictions frequently adopt amendments or stricter requirements. California's Title 24 energy code, for example, has specific requirements for lighting controls and efficacy in commercial spaces. New York City has its own electrical code that differs from the NEC in several areas. Always:
- Check with your local building department before starting any electrical work
- Pull the required permits for new circuits or significant modifications
- Have the work inspected by a licensed electrical inspector
- Consult a licensed electrician for commercial or industrial installations
How Many Fixtures Can You Daisy-Chain?
Many modern LED shop lights and commercial fixtures support daisy-chaining—connecting multiple fixtures in series using built-in power connectors or short jumper cables. This simplifies installation by reducing the number of home-run wires back to the panel.
The number of fixtures you can daisy-chain is limited by two factors:
- The circuit's total load capacity (as calculated above)
- The fixture manufacturer's daisy-chain limit, which is based on the connector and internal wiring rating
Most LED shop lights specify a maximum daisy-chain count in their documentation—commonly 10 to 20 fixtures per chain. Never exceed the manufacturer's specified limit, even if the total wattage is within the circuit's capacity. The connectors and internal wiring have their own current ratings that must be respected.
For large installations, use multiple daisy-chains connected to the same circuit (if within load limits) or distribute across multiple circuits for maximum flexibility and fault isolation.

Dedicated Lighting Circuits vs. Shared Circuits
Should your lighting be on a dedicated circuit, or is it acceptable to share with outlets and other devices? Here's the practical guidance:
When a Dedicated Lighting Circuit Makes Sense
- Commercial and industrial spaces: Dedicated lighting circuits simplify load management, make troubleshooting easier, and are often required by code
- High fixture counts: If you're running 20+ fixtures, a dedicated circuit prevents lighting from competing with other loads
- Sensitive work environments: Photography studios, medical facilities, and precision manufacturing benefit from stable, isolated lighting circuits
- Future expansion: A dedicated circuit with headroom makes it easy to add fixtures later without rewiring
When Sharing a Circuit Is Acceptable
- Residential spaces: Bedrooms, living rooms, and kitchens commonly share lighting and outlet circuits without issues
- Low fixture counts: If you only need 4–6 fixtures, sharing a circuit with a few outlets is typically fine
- Temporary installations: Job site lighting or seasonal setups where permanent wiring isn't warranted
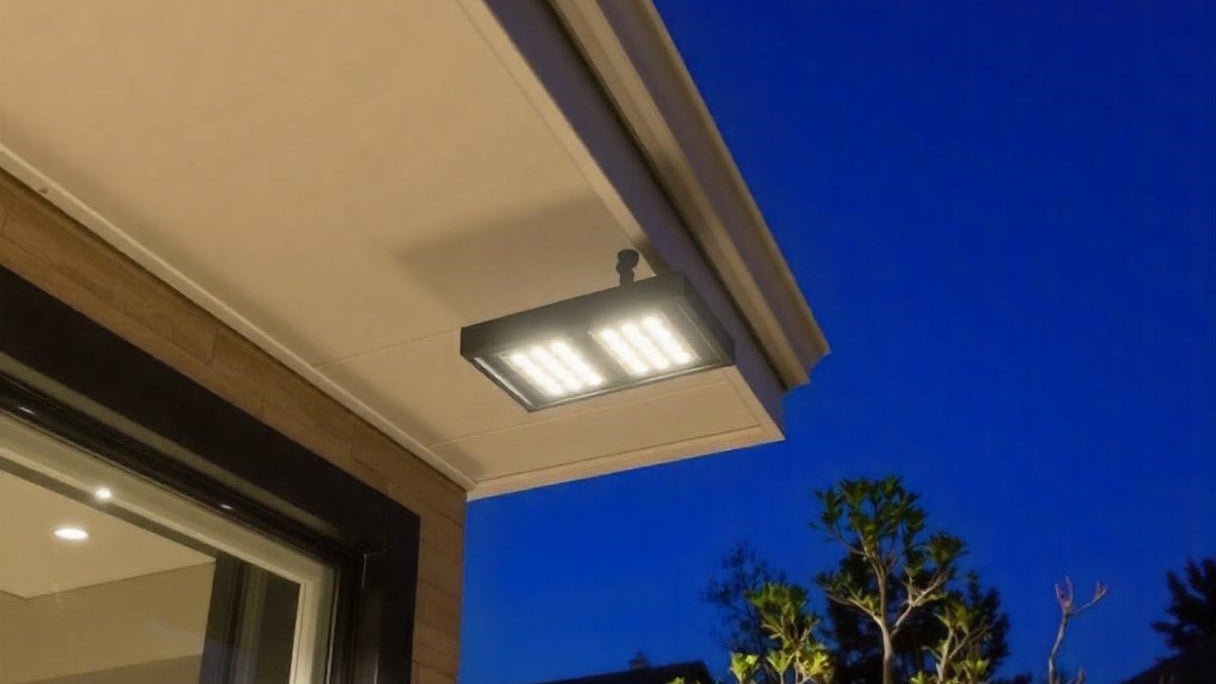
When Solar LED Fixtures Are the Smarter Choice
All of the calculations and considerations above apply to grid-tied LED fixtures. But for outdoor applications—driveways, parking lots, pathways, security zones, construction sites, and remote areas—running new electrical circuits is expensive, disruptive, and sometimes simply impractical.
Trenching for underground conduit can cost $5 to $20 per linear foot, and that's before accounting for permits, inspection fees, and the cost of the circuit itself. For a 200-foot run to a parking lot, you could easily spend $2,000–$4,000 just on the electrical infrastructure—before buying a single fixture.
Solar-powered LED fixtures eliminate this cost entirely. They operate completely off-grid, drawing power from integrated or separate solar panels that charge an onboard battery during the day. Modern solar LED technology has advanced dramatically: today's commercial-grade solar fixtures deliver high lumen output, smart controls, and reliable performance even in regions with variable sunlight or extended cloudy periods.
Here are three Hykoont solar LED fixtures that represent the current state of the art for outdoor lighting applications:
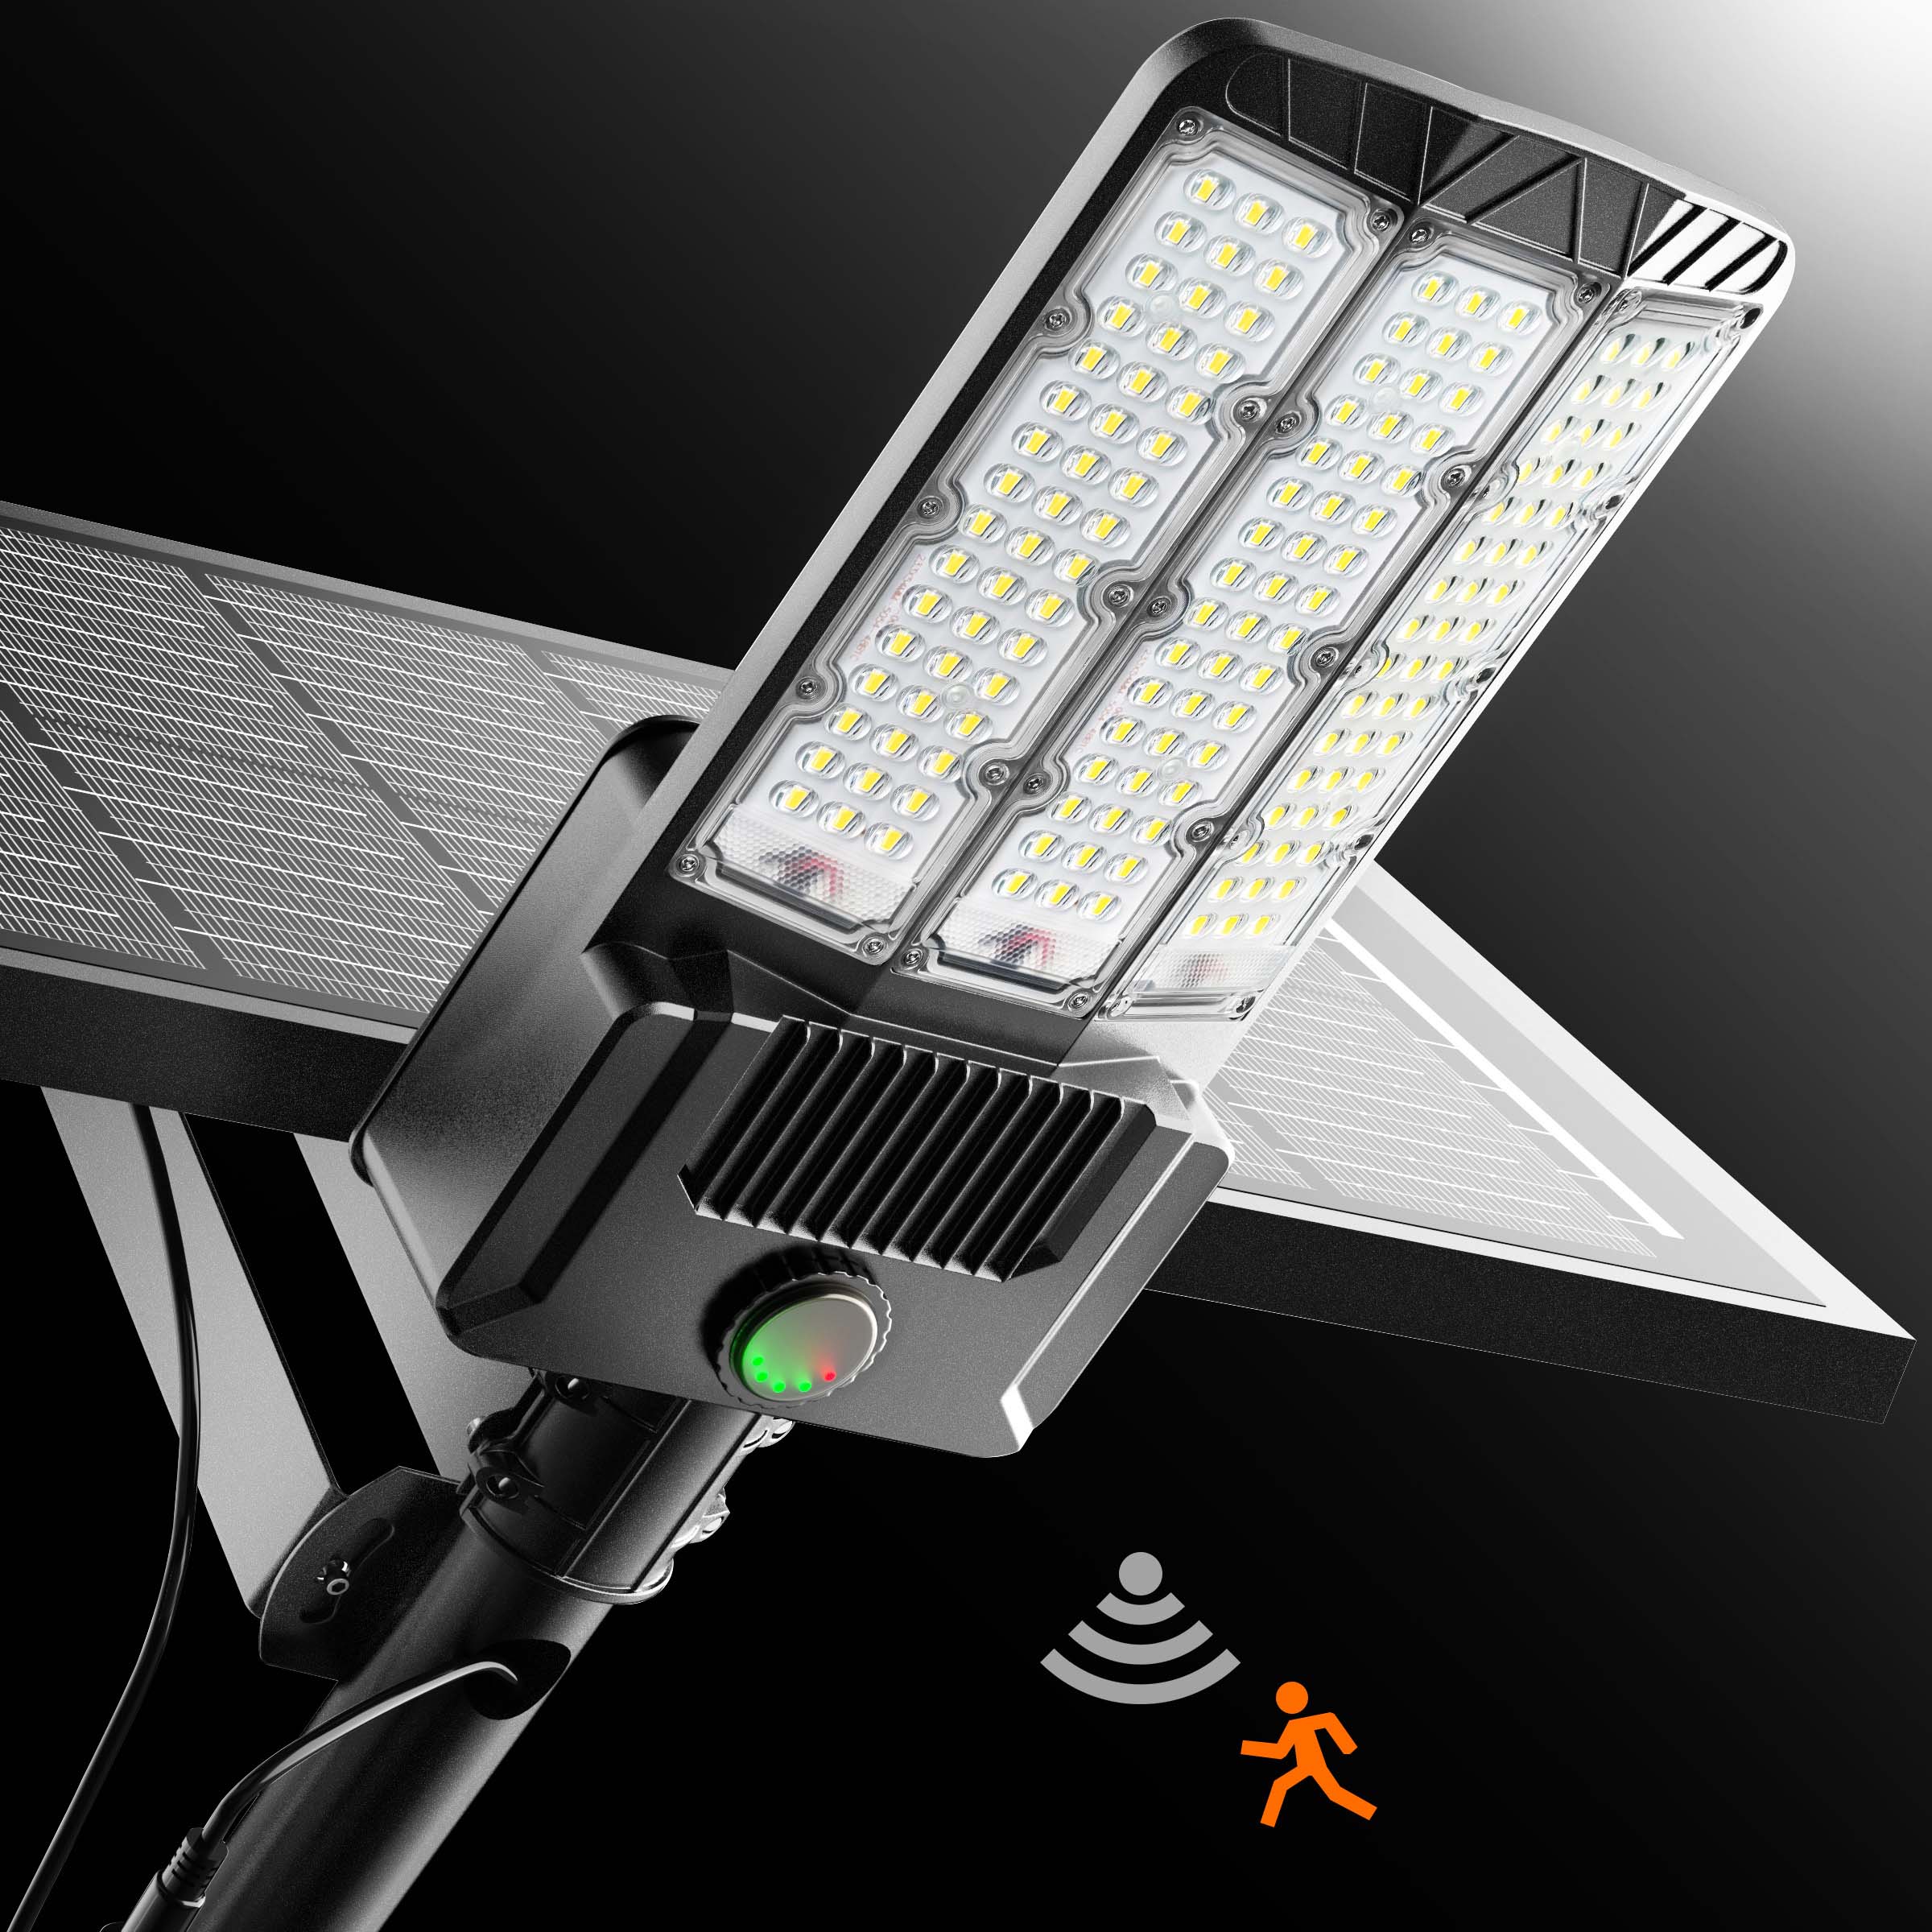
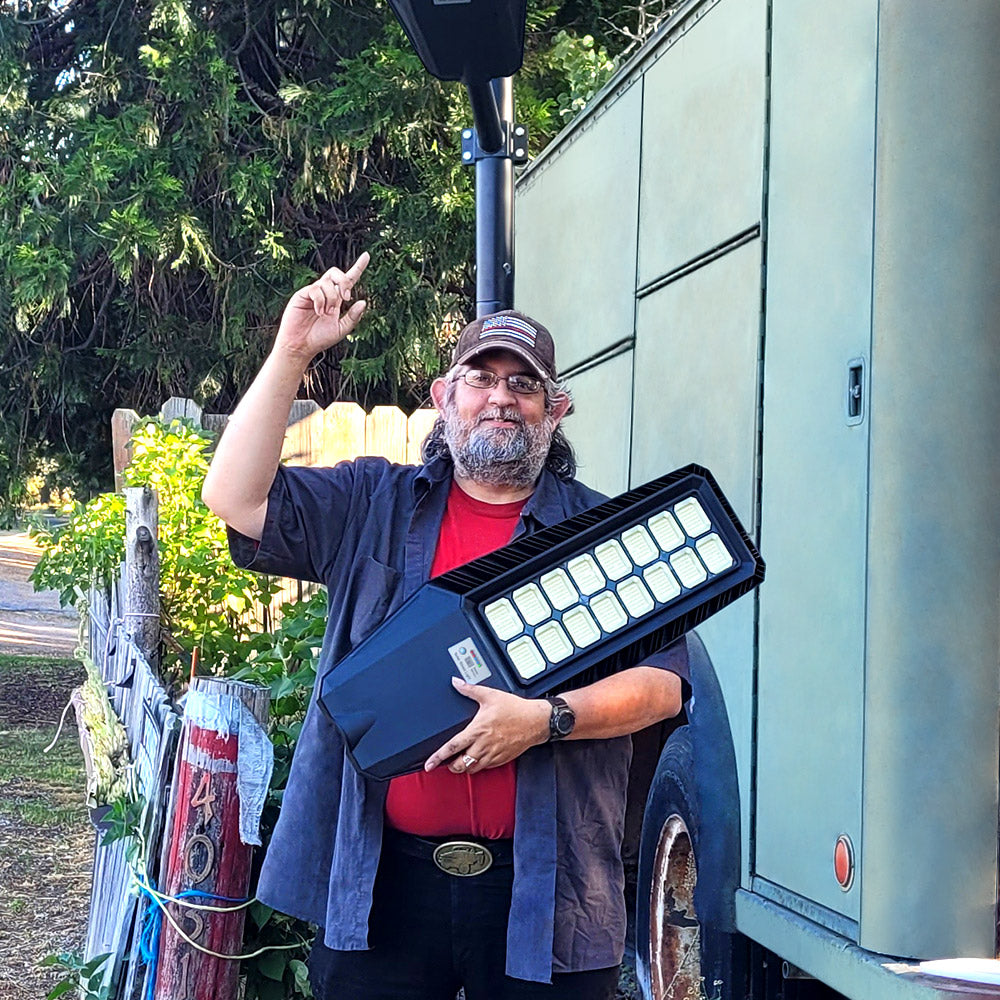
Hykoont XC940 Solar Flood Light — Best for Large-Area Security and Commercial Lighting
The XC940 is a high-performance solar flood light engineered for demanding outdoor environments. It delivers up to 40,000 lumens from a solar-equivalent output of 400–500W, powered by a massive 48,000mAh lithium battery that provides extended runtime even after multiple cloudy days.
Key features include:
- Radar motion sensor with adjustable sensitivity and detection range
- Red and blue emergency flash mode for security and safety applications
- Optical convex lens for wide-area, uniform light distribution
- Remote control with up to 32.8 ft range for mode and brightness adjustment
- IP66 waterproof rating for reliable performance in rain, snow, and extreme temperatures
- Dual installation options: hanging mount or screw-fixed, with a 16.4 ft extension cable for flexible positioning
- Timer modes: 2, 4, 6, or 8 hours for automated operation
The XC940 is ideal for warehouses, construction sites, large backyards, sports courts, and any application requiring high-lumen security lighting without the cost of running new electrical circuits. No wiring, no electrician, no circuit load calculations required.
Hykoont XC920 Solar Flood Light — Best for Residential Outdoor Spaces
The XC920 strikes an excellent balance between performance and versatility for residential and light commercial outdoor lighting. It covers up to 2,772 square feet with 20,000–30,000 lumens of bright, cool-white light (6,500–7,000K color temperature).
Key features include:
- Three intelligent control modes: time scheduling, radar motion detection, and remote control—all in one fixture
- Larger LED beads for broader, more uniform light distribution compared to standard solar flood lights
- IP66 waterproof rating for year-round outdoor reliability
- Compact, low-profile design that blends with residential architecture
- Suitable for garages, driveways, backyard perimeters, garden paths, and side yards
The XC920 is one of the most feature-rich residential solar flood lights available at its price point. Installation takes minutes—mount the fixture, position the solar panel for optimal sun exposure, and you're done. No permits, no trenching, no circuit calculations.
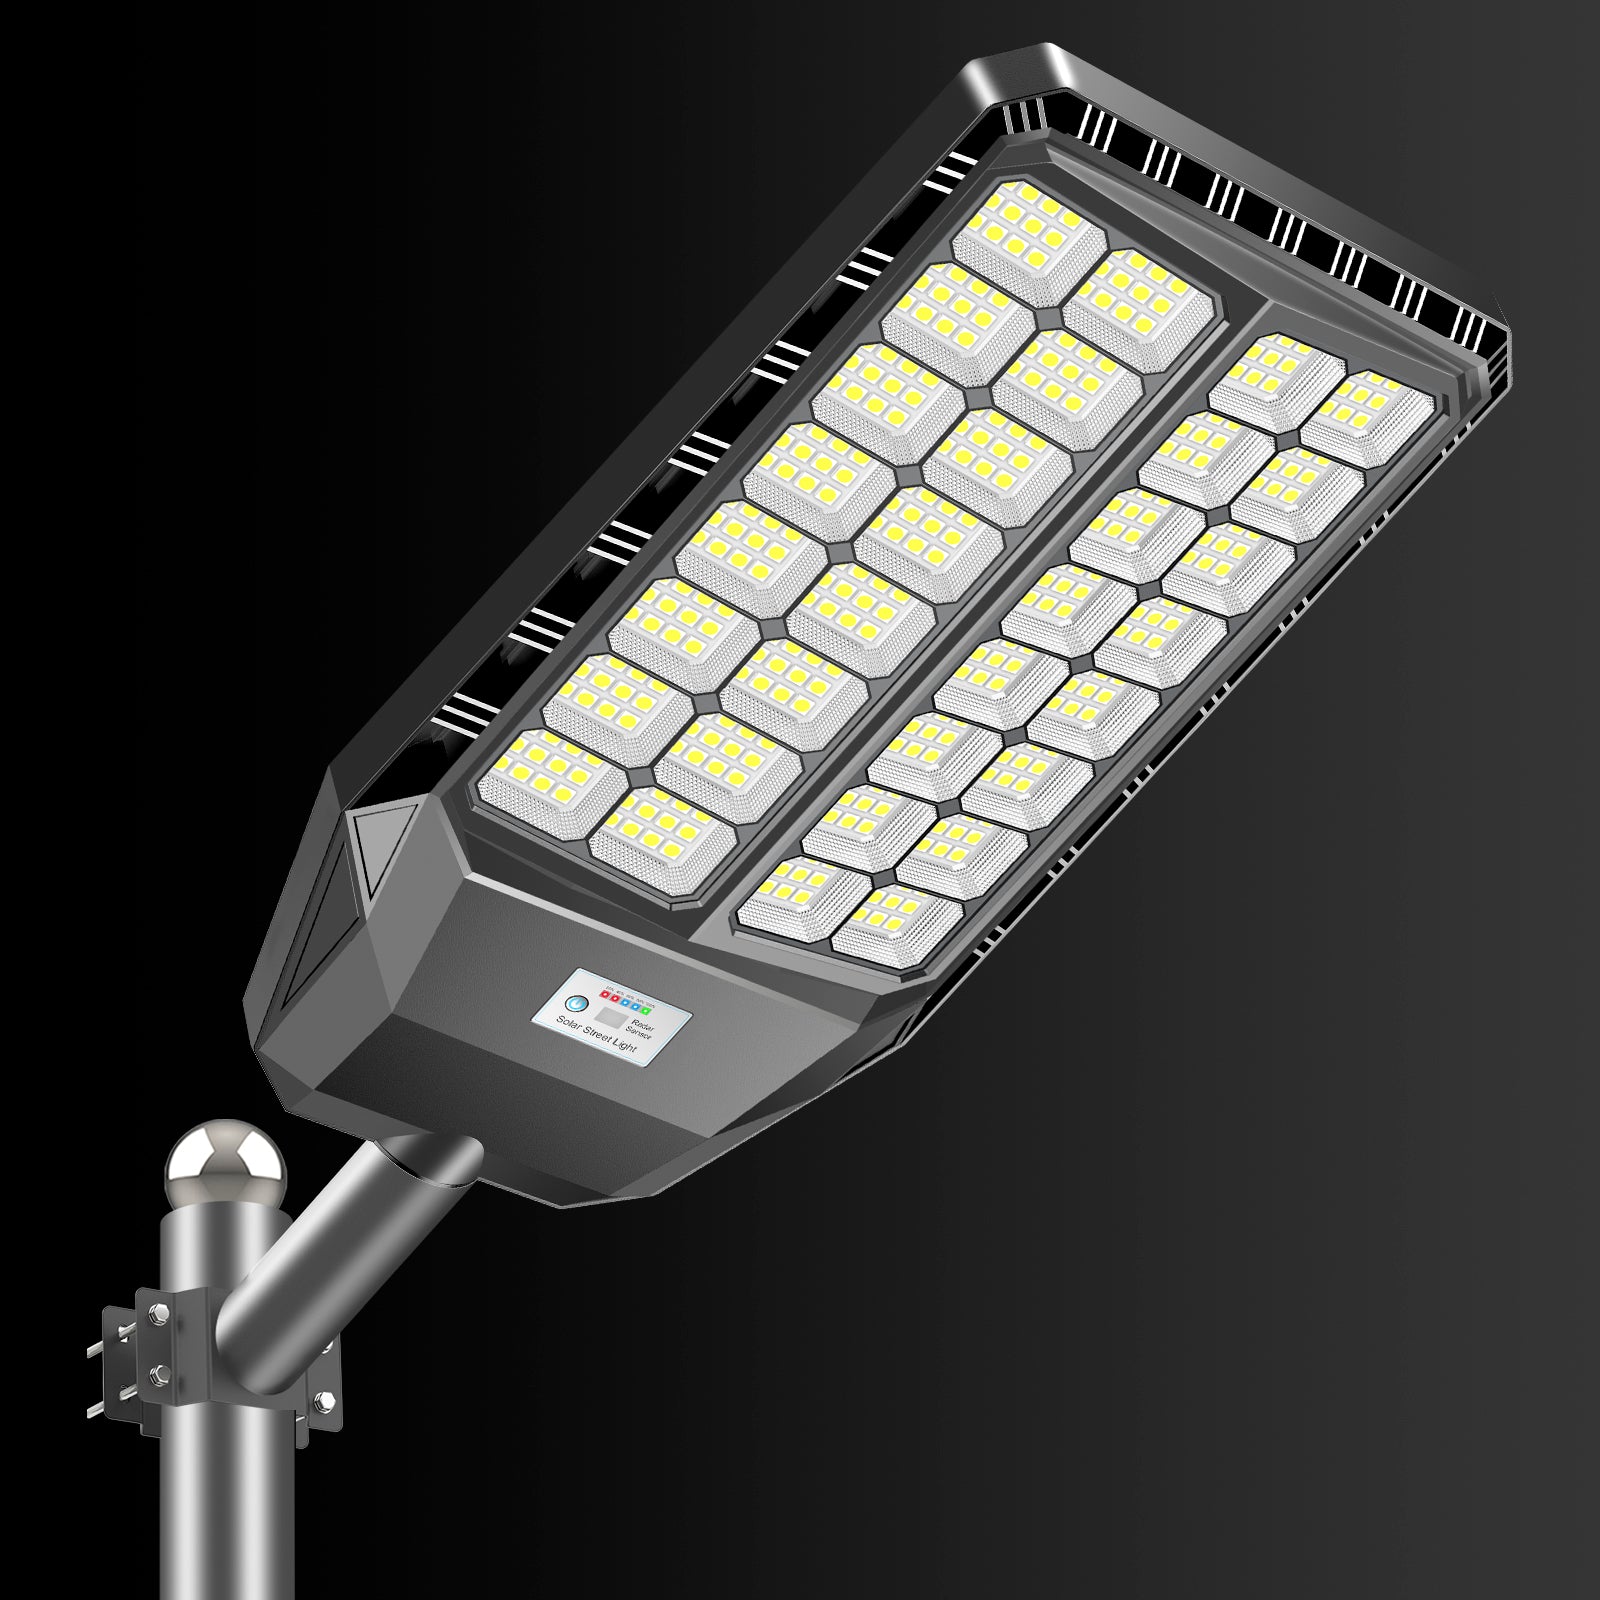
Hykoont BC024 Solar Street Light 180W — Best for Parking Lots, Streets, and Commercial Areas
The BC024 is a commercial-grade solar street light designed for high-traffic outdoor areas that require consistent, reliable illumination throughout the night. With 960 LED beads, a 240° wide-angle beam, and 24,300 lumens of output, it provides uniform coverage across areas up to 2,400 square feet—comparable to a traditional 150W wired street light.
Key features include:
- 25,000mAh lithium battery (3.2V, 25Ah) for extended runtime
- Up to 36 hours of operation in low-light mode after a full charge—exceptional autonomy for extended cloudy periods
- Four control modes: light sensor, time scheduling, remote control, and radar motion detection
- IP66 waterproof rating for all-weather reliability
- 3-year warranty for commercial peace of mind
- Designed for parking lots, private roads, pathways, campuses, and municipal street lighting
For property managers and municipalities looking to upgrade outdoor lighting without the cost of electrical infrastructure, the BC024 offers a compelling ROI. The elimination of trenching, conduit, wiring, and ongoing electricity costs typically results in payback periods of 2–3 years compared to equivalent wired installations.
Solar vs. Wired LED Fixtures: Which Is Right for Your Application?
| Factor | Wired LED Fixtures | Solar LED Fixtures |
|---|---|---|
| Installation cost | Higher (wiring, permits, labor) | Lower (no trenching or wiring) |
| Ongoing electricity cost | Yes | None |
| Performance in low sunlight | Unaffected | Reduced (battery dependent) |
| Indoor applications | Yes | No |
| Remote/off-grid locations | Impractical | Ideal |
| Circuit load concerns | Yes (requires calculation) | None |
| Smart controls | Requires additional hardware | Often built-in |
| Maintenance | Minimal | Panel cleaning recommended |

Frequently Asked Questions
How many LED lights can I put on a 15-amp circuit?
With the 80% NEC safety rule applied, a 15-amp / 120V circuit has a safe capacity of 1,440 watts. With 40W LED fixtures, that's a maximum of 36 fixtures. With 30W fixtures, you could install up to 48. In practice, most residential rooms need far fewer—the limiting factor is usually the number of fixture locations, not the circuit capacity.
Can I put LED lights and outlets on the same circuit?
Yes, in most residential applications. Just subtract the wattage of any outlet-connected devices from the circuit's safe capacity before calculating how many LED fixtures you can add. For commercial spaces, dedicated lighting circuits are generally preferred and may be required by local code.
Do LED fixtures need a dedicated circuit?
Not typically for residential use. However, for commercial installations with high fixture counts, sensitive equipment, or where code requires it, a dedicated lighting circuit improves reliability, simplifies troubleshooting, and makes future expansion easier.
Why does my LED circuit breaker keep tripping?
Common causes include: total load exceeding 80% of circuit capacity, inrush current from simultaneous fixture startup, a failing or undersized breaker, loose connections causing arcing, or a ground fault. Start by calculating your total load and comparing it to the circuit's safe capacity. If the load is within limits, consider a slow-blow breaker or staged startup solution.
Can I daisy-chain LED shop lights?
Yes, most modern LED shop lights support daisy-chaining. The maximum number of fixtures per chain is specified by the manufacturer—typically 10 to 20. Never exceed this limit, and ensure the total wattage of all chained fixtures stays within the circuit's safe capacity.
Are solar LED fixtures as bright as wired LED fixtures?
For outdoor applications, absolutely. Commercial solar flood lights like the Hykoont XC940 (up to 40,000 LM) and the BC024 (24,300 LM) match or exceed the output of many wired commercial fixtures, with the added benefit of zero electricity cost and no circuit load concerns.
What is the 80% rule in electrical wiring?
The 80% rule (NEC Article 210.20) requires that continuous loads—including lighting that runs for 3+ hours—must not exceed 80% of a circuit's rated capacity. This provides a thermal safety margin that protects wiring, breakers, and connectors from heat-related degradation over time.
How do I calculate voltage drop for a long lighting circuit?
Use the formula: Voltage Drop = (2 × Wire Length in Feet × Current in Amps × Wire Resistance per 1,000 ft) ÷ 1,000. Keep voltage drop below 3% of the supply voltage (3.6V for a 120V circuit). For long runs, upgrade wire gauge or consider splitting into multiple shorter circuits.
Conclusion: Plan Smart, Wire Safe
Calculating how many LED light fixtures can be on one circuit is straightforward once you understand the underlying principles. The key steps are: identify your circuit's amperage and voltage, calculate total capacity, apply the 80% NEC safety rule, subtract any shared loads, and divide by your fixture wattage. For most 20-amp / 120V circuits with standard 40W LED shop lights, you can safely run up to 48 fixtures—far more than most installations require.
Beyond the basic math, remember to account for inrush current, voltage drop on long runs, wire gauge requirements, ambient temperature derating, and local code requirements. These factors can meaningfully reduce the number of fixtures you can safely install, and ignoring them can lead to nuisance tripping, premature component failure, or—in serious cases—fire hazards.
For outdoor applications where running new electrical circuits is impractical or cost-prohibitive, modern solar LED fixtures offer a compelling alternative. Products like the Hykoont XC940 Solar Flood Light, XC920, and BC024 Solar Street Light deliver commercial-grade lumen output, smart controls, and all-weather reliability—with zero circuit load concerns, no wiring costs, and no ongoing electricity bills.
Whether you're wiring a garage, designing a warehouse lighting layout, or illuminating a commercial parking lot, the principles in this guide will help you make informed, safe, and code-compliant decisions. When in doubt, always consult a licensed electrician—the cost of professional advice is far less than the cost of fixing an unsafe installation.


Leave a comment
This site is protected by hCaptcha and the hCaptcha Privacy Policy and Terms of Service apply.