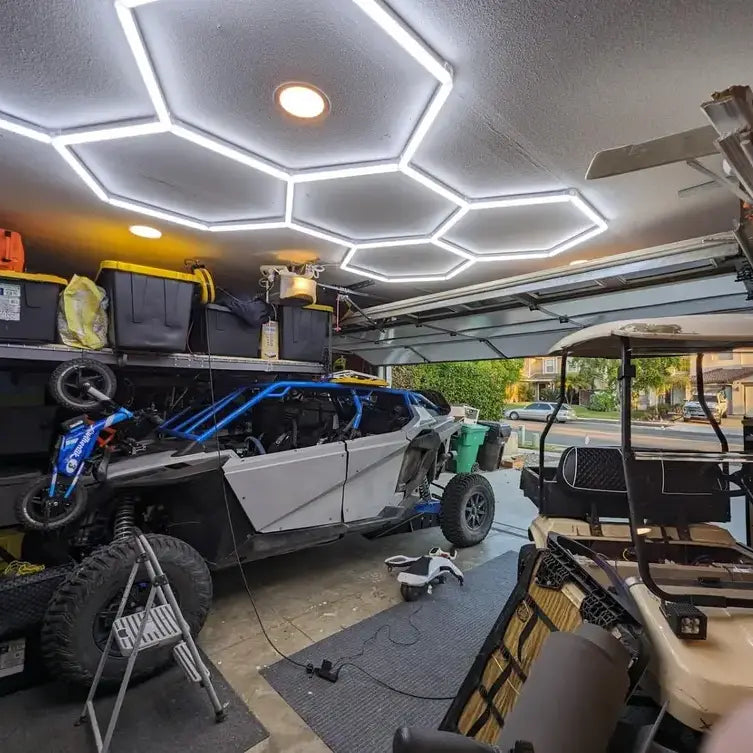
Hexagon lights have become increasingly popular due to their unique geometric design and versatile applications. These lights offer a modern aesthetic that enhances the visual appeal of any space. Additionally, they provide customizable lighting options, including various colors and brightness levels, making them ideal for both functional and decorative purposes.

Setting up hexagon LED lights involves several steps to ensure proper installation and functionality. Here's a guide to help you with the setup process:
Materials You’ll Need:
- Hexagon LED light panels
- Adhesive strips or mounting tape (usually included in the package)
- Power supply (adapter, connecting cables, etc.)
- Remote control or smartphone app (if applicable)
- Level and pencil
- Measuring tape
- Cleaning cloth and mild cleaner
- Ladder or step stool (if needed)
Detailed Setup Guide:
- Unbox and Inspect:
- Carefully open the box and take out the hexagon LED light panels.
- Examine each panel to ensure there’s no damage or missing parts.
- Confirm that all necessary items are present, including adhesive strips, power supply, and connection cables.
- Decide on the design and arrangement of your hexagon lights. Popular patterns include honeycomb, linear, and custom shapes.
- Use a measuring tape to figure out the spacing between each panel.
- Lightly mark the positions on the wall with a pencil, ensuring the marks are level and correctly spaced.
- Clean the wall or surface where you’ll be mounting the lights with a cloth and mild cleaner. This helps the adhesive stick properly.
- Make sure the surface is completely dry and free from dust or dirt.
- If the hexagon LED lights have adhesive backing, peel off the protective layer from the adhesive strips.
- If separate mounting tape is included, cut the tape to the appropriate length and attach it to the back of each hexagon panel.
- Start with the first hexagon panel, aligning it with your marked position on the wall.
- Press the panel firmly against the wall, applying even pressure to ensure the adhesive holds.
- Hold the panel in place for a few seconds to let the adhesive set properly.
- Continue this process for the remaining panels, ensuring they align with your planned layout.

- Once all panels are mounted, connect them using the provided cables. Typically, this involves plugging connectors from one panel to the next in a series.
- Ensure all connections are secure and that the cables aren’t strained or pinched.
- Plug the main power cable into the first panel, then connect it to the power adapter.
- Connect the power adapter to an electrical outlet. Make sure the outlet is accessible for turning the lights on and off.
- Turn on the lights using the power switch, remote control, or smartphone app, depending on your model.
- Check each panel to ensure they light up correctly and there’s no flickering or uneven lighting.
- If any panels are misaligned, gently adjust them to the correct position.
- For lights with customizable settings, use the remote control or app to experiment with different colors, brightness levels, and lighting effects.
- Use cable clips or organizers to tidy up any visible cables. This will keep your setup neat and safe.

11. Enjoy Your Lighting:
- With everything in place, enjoy the new ambiance created by your hexagon LED lights.
- Experiment with different lighting modes and colors to create various moods and effects in your space.
By following these rephrased steps, you can successfully set up your hexagon LED lights and enjoy the enhanced lighting in your room. Hexagon lights are a stylish and functional lighting solution, perfect for enhancing any room. With careful planning and proper installation, you can create a unique and visually appealing lighting setup that suits your needs and preferences.






![[50%OFF] Hykoont LS018 Multi-Function 2 in 1 Flashlight Portable Extendable Adjustable Brightness CCT Bright](http://hykoont.com/cdn/shop/files/HYK-STDG18-2.jpg?v=1765273877&width=104)




Leave a comment
This site is protected by hCaptcha and the hCaptcha Privacy Policy and Terms of Service apply.