


Here's something nobody tells you when you start researching hexagon garage lights:
The lights themselves are the easy part. The planning is where most people mess up.
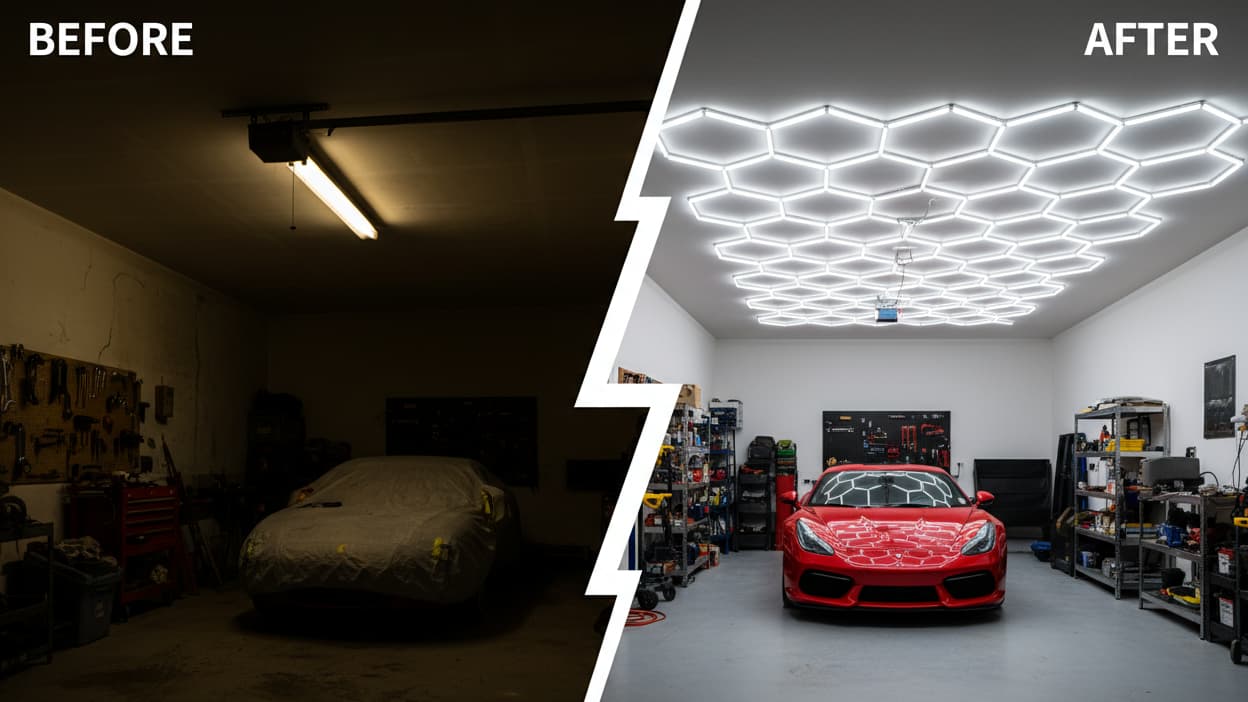
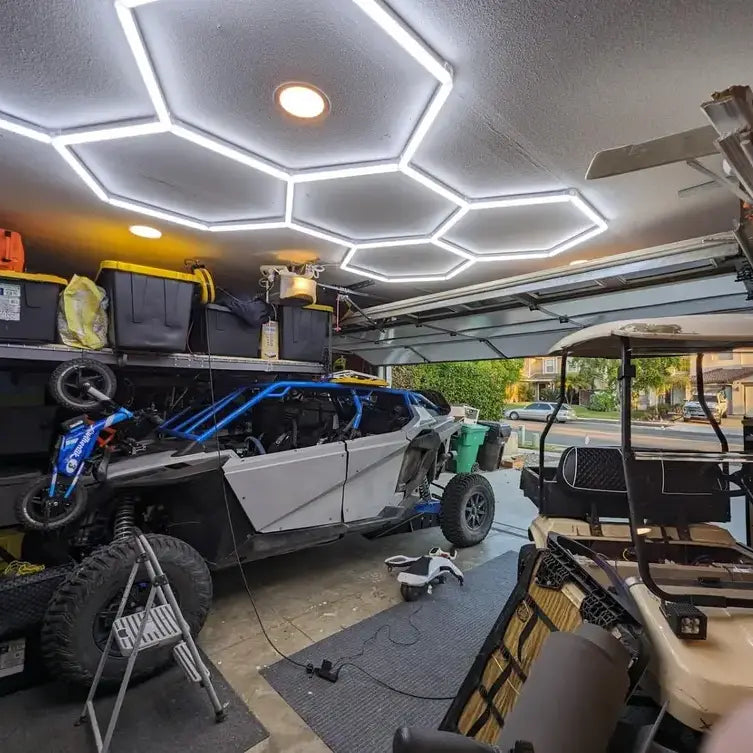
You've seen the photos. A perfectly symmetrical honeycomb of glowing hexagons across a garage ceiling, the kind of setup that makes your space look like a professional detailing studio or a high-end workshop. It looks effortless in the pictures. In reality, there are about a dozen decisions you need to make before you drill a single hole or connect a single wire — and getting them wrong means redoing the whole thing.
This guide covers all of it. Layout planning, grid sizing, wiring, mounting, common mistakes, and how to pair your permanent ceiling lights with a portable work light for the jobs that need focused illumination where your hexagons can't reach.
Let's get into it.
Why Hexagon Lights? (And Why They're Not Just for Looks)

The honest answer is: both. Hexagon garage lights look great, and they're genuinely functional. But let's separate the two.
Functionally, hexagon LED lights solve a real problem with traditional garage lighting. Standard shop lights — the long fluorescent or LED strip fixtures — create uneven coverage. You get bright zones directly under the fixtures and dimmer zones between them. Shadows fall in the wrong places. You end up moving your car or your work table to chase the light.
Hexagon lights, because of their modular geometry, distribute light more evenly across a space. The honeycomb pattern means you can cover a ceiling with fewer dark spots. And because each panel is an independent light source connected to the others, you get consistent illumination across the entire footprint.
Aesthetically, they transform a garage from a storage space into a workspace you actually want to spend time in. That matters more than people admit. If your garage looks like a dungeon, you're less likely to use it. If it looks like a studio, you'll be out there every weekend.
The Hykoont hexagon lineup covers both bases — serious lumen output with a design that looks intentional rather than industrial.

Choosing Your Grid Size: 5-Grid, 11-Grid, or 14-Grid?

This is the first real decision, and it depends on three things: your garage size, your lighting goals, and your budget.
5-Grid (7.55 ft × 5.24 ft) — $99
The 5-Grid puts out 24,960 lumens at 192W. It covers roughly 40 square feet of ceiling footprint. For a single-car garage or a dedicated corner of a larger space — a detailing area, a workbench zone, a photography backdrop — the 5-Grid is the right starting point.
It's also the entry point if you want to test the system before committing to a larger installation. The modular design means you can add panels later.
11-Grid (7.55 ft × 10.45 ft) — $249
The 11-Grid delivers 47,840 lumens at 368W. That's enough to properly light a two-car garage bay or a large workshop. The footprint is roughly 79 square feet — wide enough to cover most of a standard two-car garage ceiling with a single installation.
For most homeowners doing serious garage work — automotive, woodworking, fabrication — the 11-Grid is the sweet spot between coverage and cost.
14-Grid with Frame — $359 (+ Free 5-Grid)
The 14-Grid is the professional-grade option. 73,920 lumens at 700W, covering a 7.87 ft × 15.75 ft footprint. This is the setup for a full two-car garage, a commercial detailing bay, or a workshop where you need consistent, shadow-free illumination across the entire space.
The current deal includes a free 5-Grid with purchase — which means you're effectively getting a secondary lighting zone (workbench, storage area, side bay) at no extra cost.
🔆 Shop Hexagon Lights — 5-Grid $99 | 11-Grid $249
Planning Your Layout Before You Touch Anything

This is where most DIY installations go sideways. People unbox the lights, hold them up to the ceiling, and start marking holes. Then they realize the layout is off-center, or the power cable doesn't reach the outlet, or the panels are too close to the garage door track.
Do the planning on paper first. Here's the process:
Step 1: Measure Your Ceiling
Get the exact dimensions of your garage ceiling — length, width, and height. Note the location of any obstructions: garage door tracks, HVAC ducts, ceiling joists, existing light fixtures, smoke detectors.
Standard two-car garage: 20 ft × 20 ft or 20 ft × 22 ft. Single-car: 12 ft × 20 ft or 14 ft × 22 ft. Your actual dimensions may vary — measure, don't assume.
Step 2: Identify Your Power Source
Where is your nearest ceiling outlet or junction box? The hexagon system needs a power connection point. If you're mounting on the ceiling, you'll want the power entry point to be as close to the center of your installation as possible to minimize visible cable runs.
If you don't have a ceiling outlet, you'll need to run a new circuit or use a surface-mounted conduit from a wall outlet. For a 368W (11-Grid) or 700W (14-Grid) installation, make sure your circuit can handle the load. A 15-amp circuit handles up to 1,800W — you're fine. A 20-amp circuit gives you even more headroom.
Step 3: Sketch Your Layout
Draw your ceiling to scale on graph paper or use a free tool like RoomSketcher or even Google Slides. Mark the center point of your ceiling. The hexagon installation should be centered on this point, not on a wall.
For a single installation (one 5-Grid or 11-Grid), center it over your primary work area — usually the center of the garage bay where your car sits. For multiple installations, space them evenly across the ceiling.
Step 4: Plan Your Cable Routing
The extension cables included with the system are 1.5 meters (about 5 feet). Plan where your cables will run from the power source to the first panel, and how the panels will connect to each other. The plug-and-lock connectors make this straightforward, but you need to know the routing before you start mounting.
Step 5: Mark Your Mounting Points
Use painter's tape on the ceiling to mock up the hexagon footprint before drilling. Stand back and look at it from multiple angles. Adjust until it's centered and level. Only then mark your actual mounting holes.

What's in the Box: Understanding the Accessories

Before you start the installation, know what you're working with. The Hykoont hexagon kits include:
5-Grid kit:
- 120° V connections: 11
- Y connections: 9
- 1.5-meter extension cable: 1
- Nylon zip ties: 1 pack
- Mounting accessories: 1 pack
11-Grid kit:
- 120° V connections: 15
- Y connections: 21
- 1.5-meter extension cable: 1
- Nylon zip ties: 1 pack
- Mounting accessories: 1 pack
14-Grid with Frame kit:
- Tubes: 71 (69 + 2 backup)
- 120° V connections: 17
- 180° V connections: 8
- 90° V connections: 3
- 90° T connections: 1
- Y connections: 27
- 1.5-meter extension cables: 2
- Nylon zip ties: 1 pack
- Mounting accessories: 1 pack
The plug-and-lock connectors with latches are the key safety feature here. They prevent accidental disconnection once installed — important for a ceiling-mounted system where you don't want anything coming loose over time.
Step-by-Step Installation: Ceiling Mount

Here's the actual installation process, step by step.
Tools You'll Need
- Drill with bits (for drywall and wood/concrete anchors)
- Stud finder
- Level (a laser level makes this much easier)
- Tape measure
- Pencil
- Ladder (tall enough to work comfortably at ceiling height)
- Wire stripper (if hardwiring)
- Voltage tester
Step 1: Turn Off Power
If you're connecting to an existing ceiling outlet or junction box, turn off the circuit at the breaker. Verify it's off with a voltage tester. Don't skip this. Ceiling work with live wires is how people get hurt.
Step 2: Assemble the Hexagon Frame on the Ground
Before mounting anything, assemble the full hexagon configuration on the garage floor. Connect all the panels using the V and Y connectors. This lets you verify the layout, check all connections, and identify any issues before you're working overhead.
For the 14-Grid with Frame, the frame structure makes this especially important — assemble the frame first, then attach the LED tubes.
Step 3: Test Before Mounting
Plug in the assembled system and verify all panels light up. Check for any flickering or dead panels. Fix any connection issues now, while it's on the floor. Much easier than troubleshooting on a ladder.
Step 4: Mark and Drill Mounting Points
Using your pre-planned layout, mark the mounting points on the ceiling. Use a stud finder to locate joists — mount into joists wherever possible for maximum holding strength. For drywall-only mounting, use appropriate toggle bolts or drywall anchors rated for the weight of your installation.
Weight reference: the 5-Grid system is lightweight enough for standard drywall anchors. The 11-Grid and 14-Grid benefit from joist mounting or heavy-duty anchors.
Step 5: Install Mounting Hardware
Install the mounting brackets or hooks at your marked points. Use a level to verify they're aligned — a slightly off-level installation will be obvious once the lights are up and glowing.
Step 6: Hang the Hexagon Assembly
With a helper (strongly recommended for 11-Grid and 14-Grid), lift the assembled hexagon system and attach it to the mounting hardware. The included nylon zip ties help secure cable runs and keep everything tidy.
Step 7: Connect Power
Route the power cable to your outlet or junction box. If using a plug-in connection, plug it in. If hardwiring, connect to the junction box following standard wiring practices (black to black, white to white, ground to ground). Restore power at the breaker.
Step 8: Final Check
Turn on the lights. Walk the space and check for even illumination, any dark spots, or flickering. Verify all connectors are fully seated and latched. Tidy up any cable runs with zip ties.

Wall Mount vs. Ceiling Mount: Which Is Right for Your Garage?
Both mounting options are supported by the Hykoont hexagon system. Here's when to choose each:
Ceiling mount is the standard choice for most garages. It maximizes light coverage across the floor and work surfaces, keeps the lights out of the way, and creates the cleanest visual effect. If your ceiling is 8 to 12 feet high, ceiling mount is almost always the right call.
Wall mount works well for accent lighting, photography backdrops, or situations where ceiling access is difficult (very high ceilings, concrete ceilings without easy anchor points). Wall-mounted hexagons create a dramatic visual effect but provide less functional work lighting than ceiling-mounted units.
For a garage workshop, ceiling mount. For a content creation space or showroom, wall mount can work beautifully as a secondary installation alongside ceiling lights.
The Gap Your Hexagon Lights Can't Fill — And What Does

Here's something the hexagon light marketing doesn't tell you: ceiling lights, no matter how bright, have a fundamental limitation. They light the floor. They don't light inside an engine bay, under a car on a lift, inside a wheel well, or behind a firewall.
For any serious garage work — automotive, fabrication, detailed woodworking — you need a portable work light that goes where the ceiling lights can't.
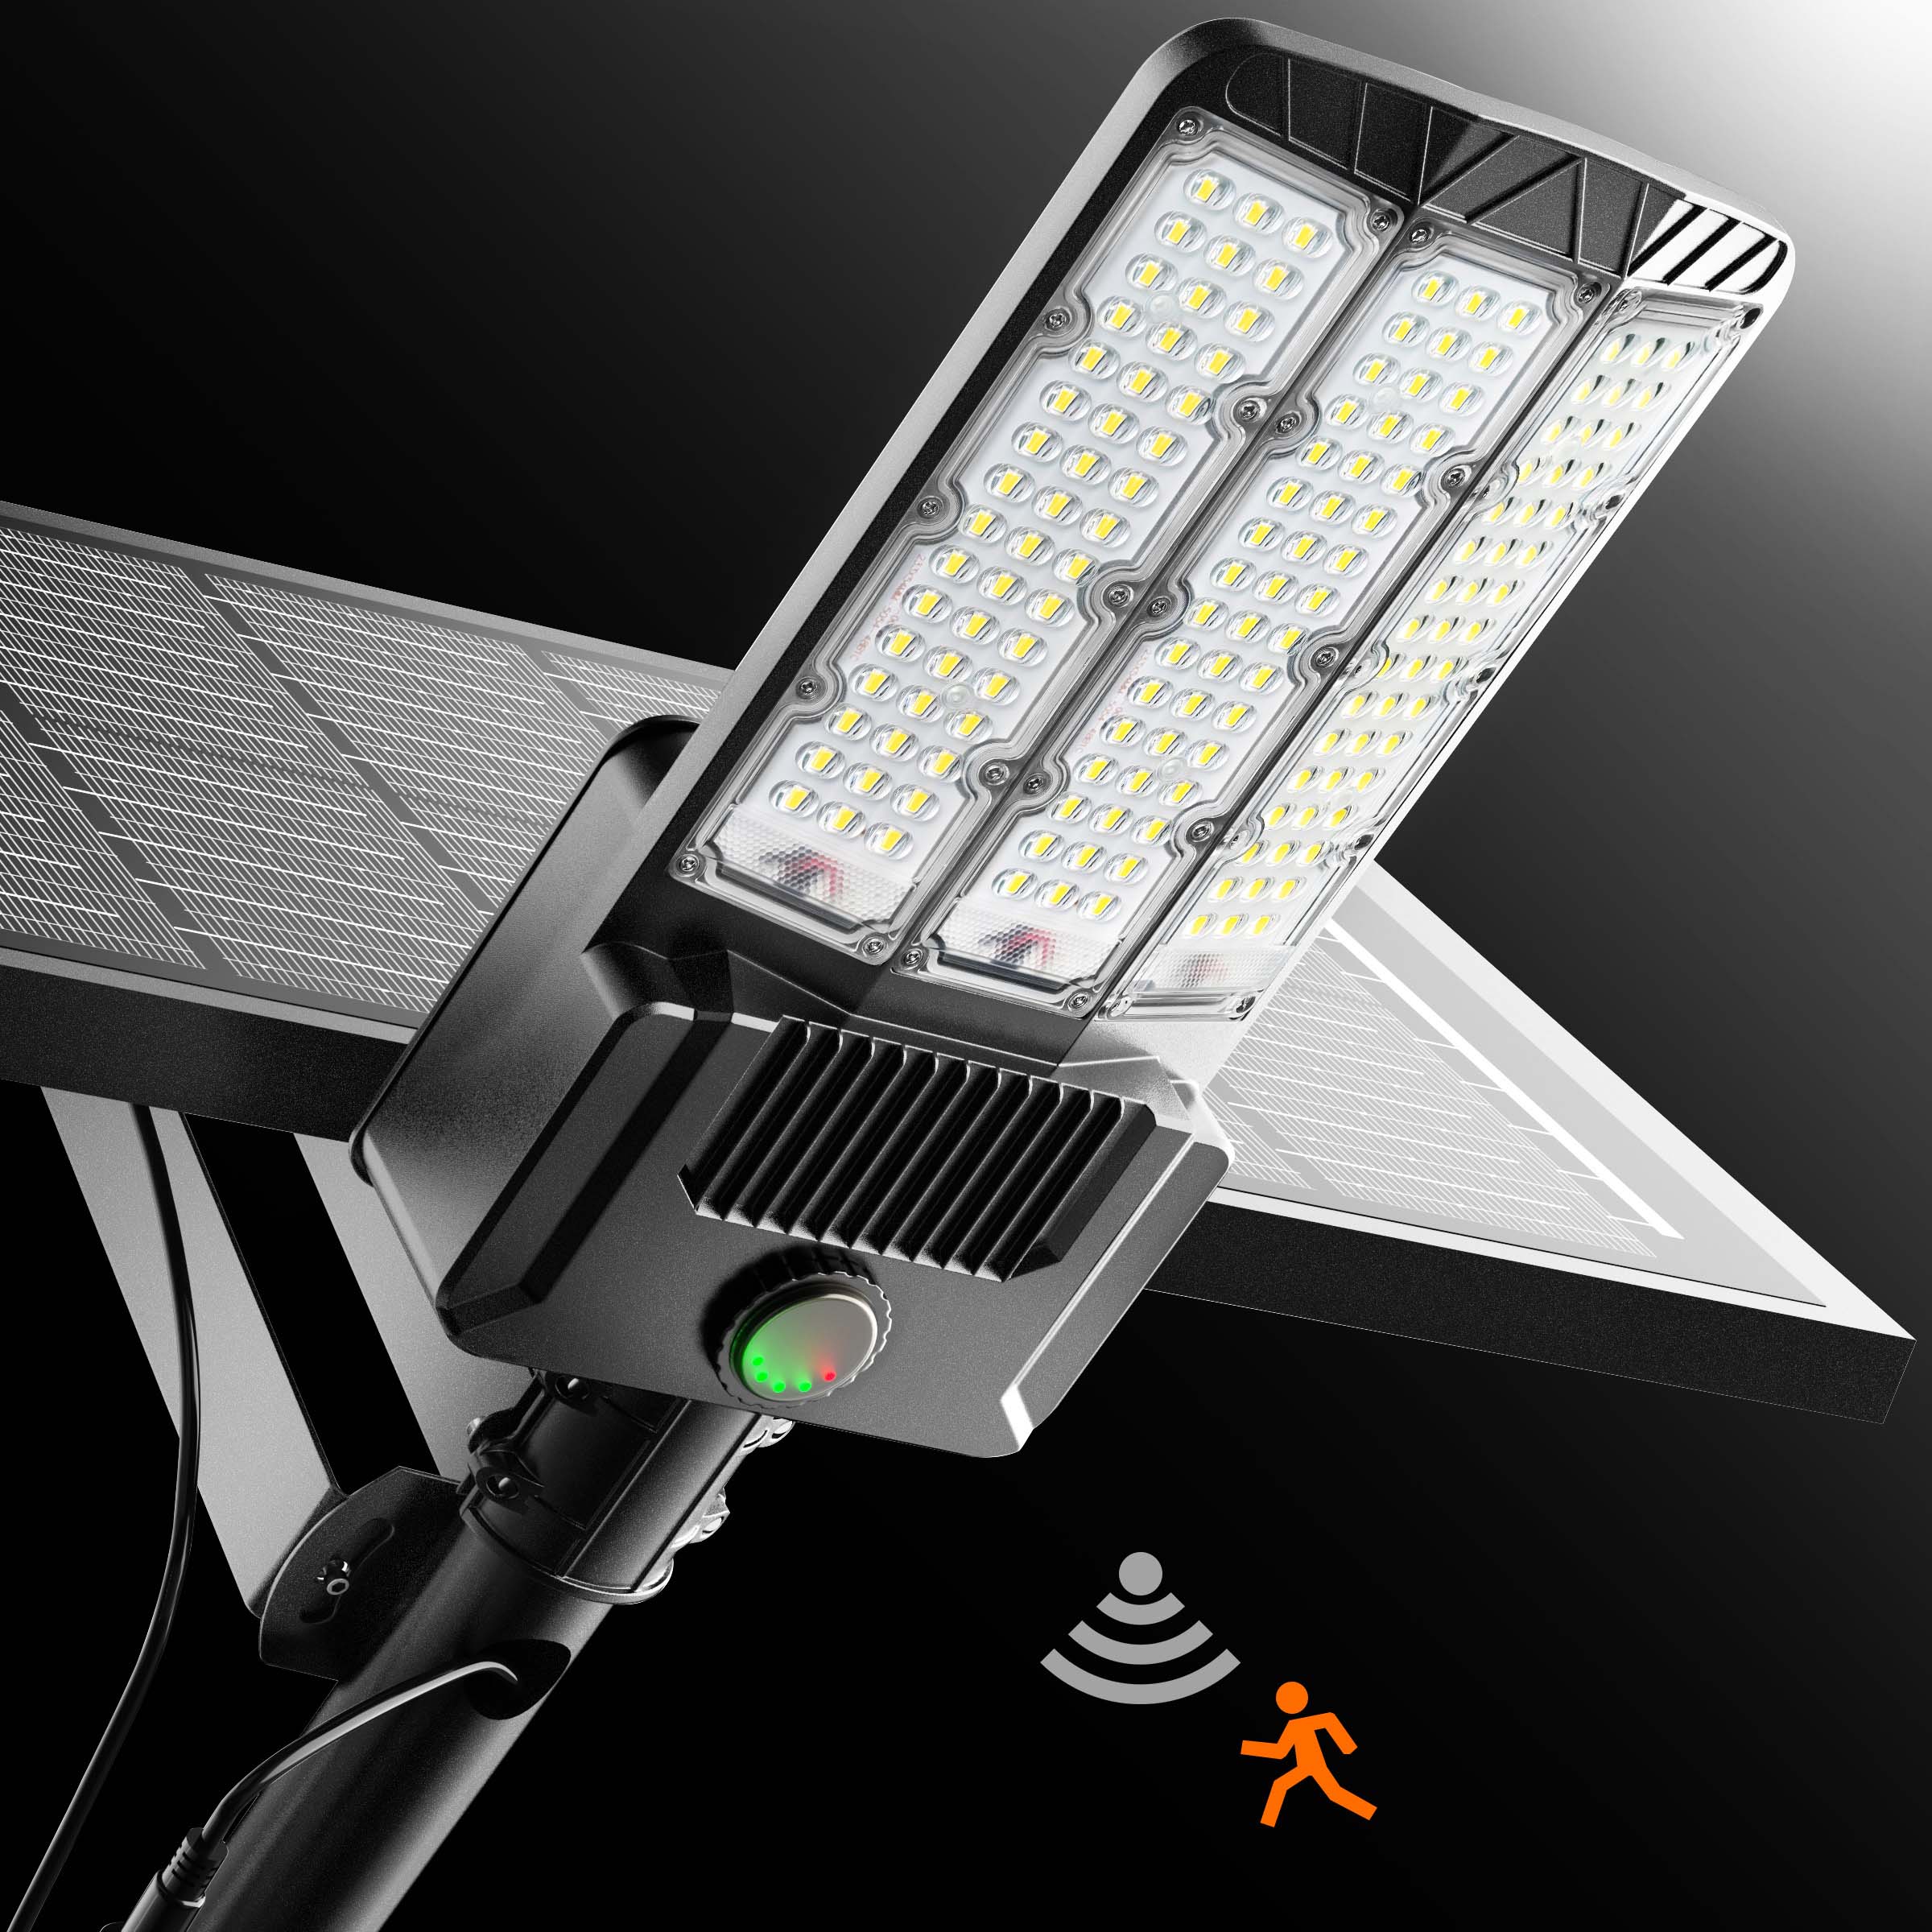
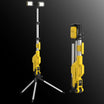
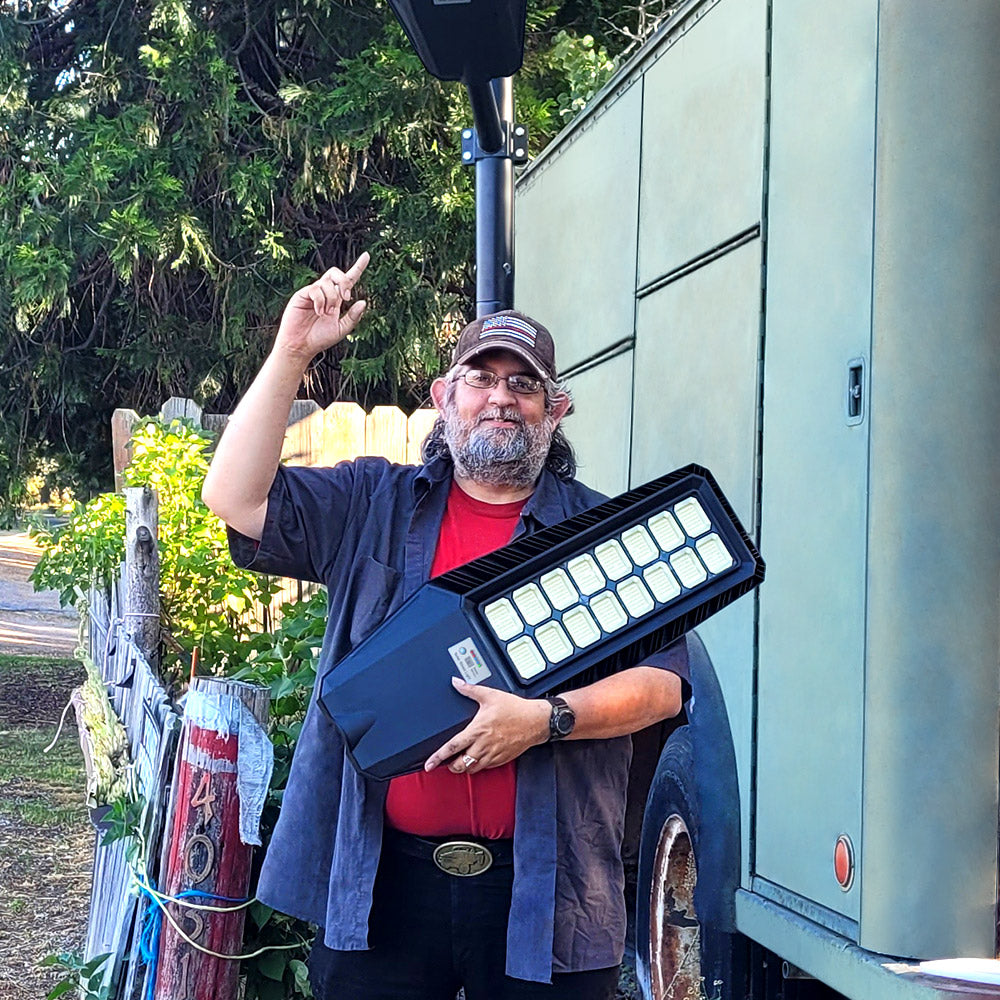
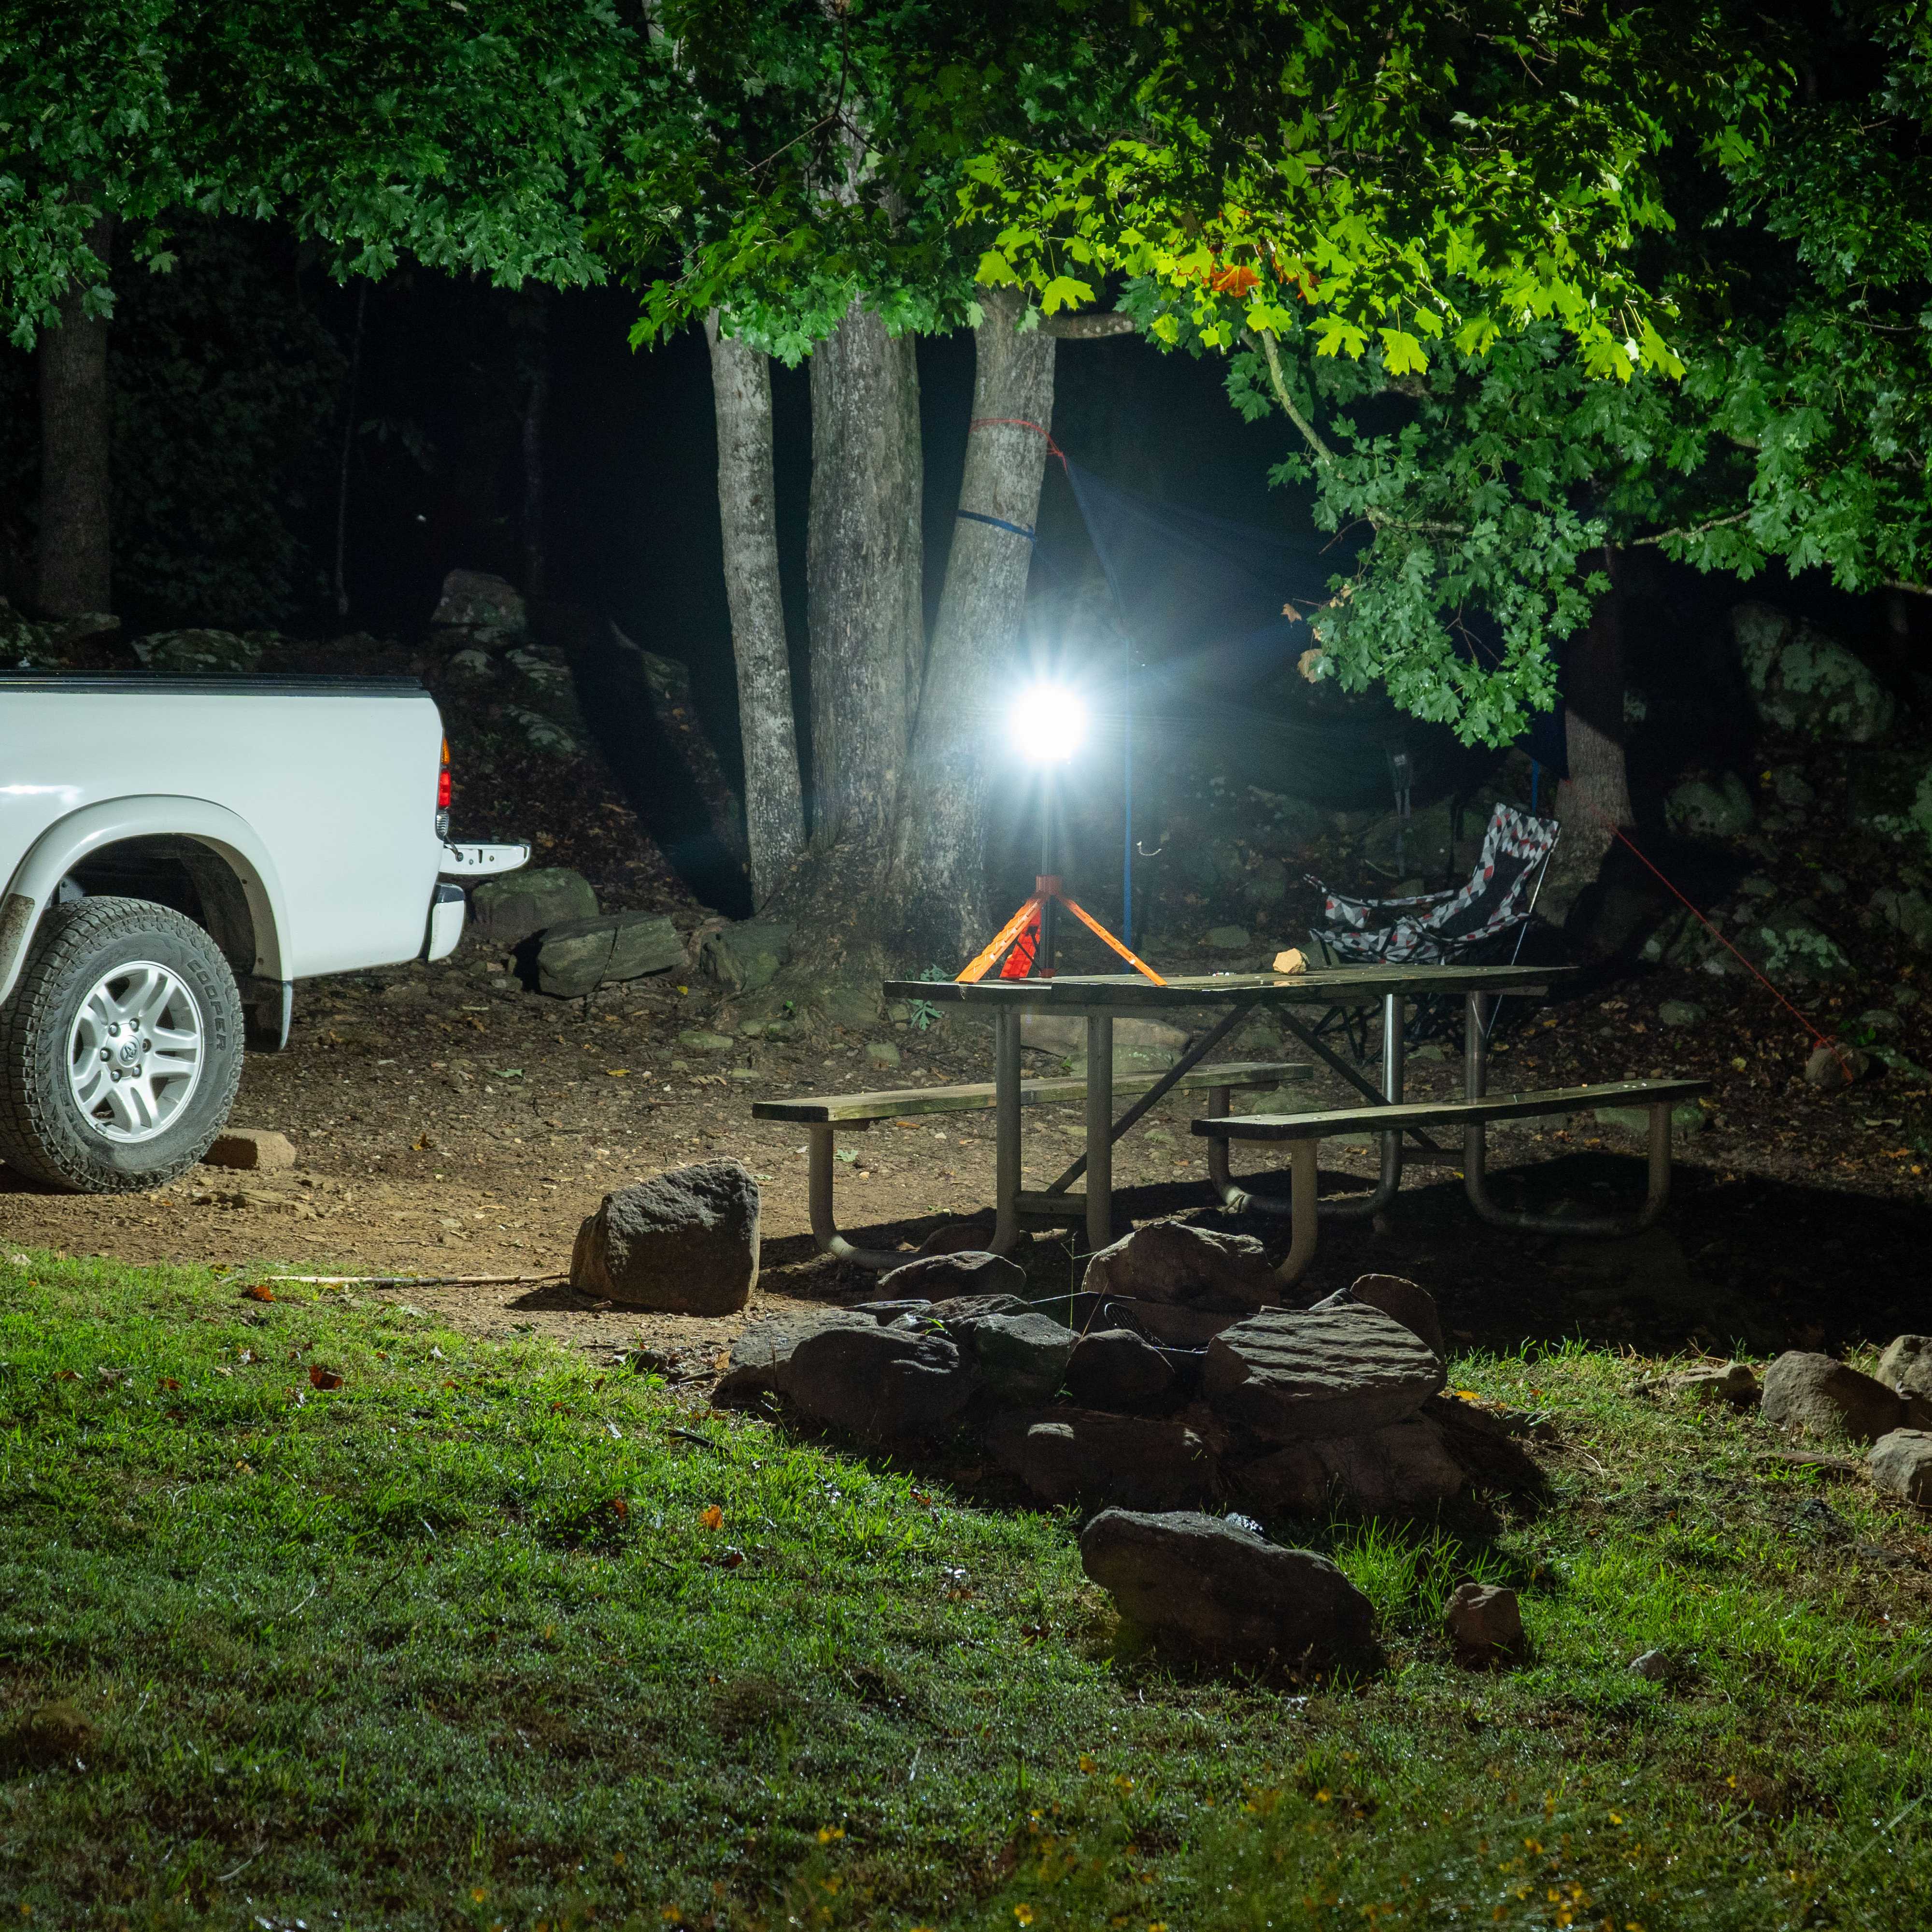
That's where the Hykoont MX5085 comes in. It's an 8,000-lumen portable LED work light with a built-in power bank, IP65 waterproof rating, and universal tripod mount. It's the complement to your hexagon ceiling lights — the ceiling handles ambient illumination, the MX5085 handles task lighting wherever you need it.
Practical example: your 11-Grid hexagon lights flood your garage with 47,840 lumens of even ceiling light. You pull a car in for a brake job. The ceiling lights illuminate the car from above — great for seeing the overall work area. But when you need to see inside the wheel well, you position the MX5085 on its tripod at wheel height, angle it in, and suddenly you can see every bolt, every brake line, every clip. Both hands free. No flashlight in your teeth.
The two systems work together. The hexagon lights are your permanent ambient layer. The MX5085 is your mobile task layer. A complete garage lighting setup has both.
MX5085 specs: 8,000 lumens, 100W, IP65, 7.4V/4,400mAh battery, 2.5–7 hours runtime, USB-C fast charge, built-in power bank, 10 lighting modes, 3-year warranty. $118.
🔦 Get the MX5085 Work Light — $118
Common Installation Mistakes (And How to Avoid Them)

Mistake 1: Not Testing Before Mounting
Assemble and test on the floor first. Every time. Finding a dead panel or a loose connector on the ground takes two minutes. Finding it after it's mounted to the ceiling takes 45 minutes and a lot of frustration.
Mistake 2: Off-Center Placement
The hexagon pattern looks intentional when it's centered. It looks like an afterthought when it's shifted to one side. Measure twice, mark with painter's tape, stand back and look before drilling.
Mistake 3: Ignoring the Power Source Location
The extension cable is 1.5 meters. If your power source is 3 meters from your planned installation center, you need to either move the installation, add an extension, or relocate the power source. Plan this before you start.
Mistake 4: Using an Incompatible Dimmer
If you want to put your hexagon lights on a dimmer switch, make sure it's an LED-compatible dimmer. Standard incandescent dimmers cause flickering and can damage LED drivers. Look for dimmers rated for LED loads.
Mistake 5: Mounting Into Drywall Only on Heavy Installations
For the 11-Grid and 14-Grid, use joist mounting or heavy-duty toggle bolts. Standard drywall anchors are fine for the 5-Grid but may not provide adequate holding strength for larger, heavier installations over time.
Mistake 6: Skipping the Cable Management
Loose cables hanging from a ceiling installation look messy and can become a hazard. Use the included zip ties to route cables cleanly along the panel edges. Takes an extra 10 minutes and makes a significant difference in the finished look.
Mistake 7: Not Accounting for Garage Door Clearance
If your garage door opens on a track that runs along the ceiling, make sure your hexagon installation doesn't interfere with the track or the door's travel path. Measure the door's full open position before finalizing your layout.
Lighting Math: How Many Lumens Do You Actually Need?
The standard recommendation for garage workshop lighting is 50 lumens per square foot for general work, and up to 100 lumens per square foot for detailed work like automotive or fine woodworking.
Let's run the numbers for common garage sizes:
| Garage Size | Square Footage | 50 lm/sqft | 100 lm/sqft | Recommended |
|---|---|---|---|---|
| Single car (12×20) | 240 sqft | 12,000 lm | 24,000 lm | 5-Grid (24,960 lm) |
| Single car (14×22) | 308 sqft | 15,400 lm | 30,800 lm | 11-Grid (47,840 lm) |
| Two car (20×20) | 400 sqft | 20,000 lm | 40,000 lm | 11-Grid or 14-Grid |
| Two car (20×22) | 440 sqft | 22,000 lm | 44,000 lm | 14-Grid (73,920 lm) |
Note: these are ceiling-mounted lumen outputs. Actual floor-level illumination depends on ceiling height, surface reflectivity (white ceilings and walls reflect more light), and fixture placement. Higher ceilings require more lumens to achieve the same floor-level brightness.
The 6500K Color Temperature: Why It Matters for Garage Work

All Hykoont hexagon lights run at 6,500K — daylight color temperature. This is a deliberate choice for garage and workshop applications, and it's the right one.
Here's why 6,500K matters:
Color accuracy. When you're matching paint, identifying wire colors, reading part numbers, or checking fluid condition, you need light that renders colors accurately. Warm white (2,700K–3,000K) shifts everything toward yellow-orange. Cool white (4,000K–5,000K) is better. Daylight (6,500K) is closest to natural sunlight and gives you the most accurate color rendering for detail work.
Alertness. Cooler color temperatures are associated with higher alertness and focus. For a workspace where you're doing precise, potentially dangerous work, that matters.
Photography and video. If you document your builds, film content, or photograph your work, 6,500K is much easier to color-correct than warm white. It matches natural daylight, which means your camera's auto white balance handles it correctly.
The tradeoff: 6,500K is not relaxing. It's not the light you want for a man cave where you're watching the game. For a workspace, it's exactly right. For a dual-purpose space, consider putting your hexagon lights on a separate switch from any warmer ambient lighting.
Expanding Your Setup: Adding More Panels Over Time
One of the genuine advantages of the modular hexagon system is expandability. You're not locked into your initial configuration.
Start with a 5-Grid over your primary work area. Add a second 5-Grid over your workbench six months later. Eventually build out to an 11-Grid or 14-Grid coverage across the full ceiling. The connector system is compatible across the product line.
A few things to keep in mind when expanding:
- Power capacity: Each expansion adds wattage. Make sure your circuit can handle the total load before adding panels.
- Cable routing: Plan your cable runs so that adding panels doesn't require rerouting existing cables.
- Visual consistency: If you're adding panels to an existing installation, make sure the new panels are from the same product line for consistent color temperature and brightness.
Complete Garage Lighting Setup: The Full Picture
Here's what a complete, well-thought-out garage lighting setup looks like:
Layer 1 — Ambient ceiling lighting: Hykoont hexagon LED lights covering the full ceiling. Even, shadow-free illumination across the entire space. 6,500K daylight color temperature. This is your foundation.
Layer 2 — Task lighting: Hykoont MX5085 portable work light for focused illumination where the ceiling lights can't reach. Engine bays, wheel wells, under-car work, detailed bench work. Tripod-mounted for hands-free operation.
Layer 3 — Exterior lighting (optional): Solar-powered flood lights for the driveway, parking area, and exterior work zones. No wiring required.
Each layer serves a different purpose. Together, they eliminate every lighting problem a garage can throw at you.

Hykoont SMD200 200W LED Flood Light 3-Pack — 9,500 Lumens
For exterior garage lighting, driveway illumination, and outdoor work areas. Pairs with your hexagon interior setup for complete coverage inside and out.

Hykoont WBK200 Pro 200W LED Flood Light 2-Pack — 30,000 Lumens, 6000K
High-output exterior flood lighting for larger driveways, parking areas, or commercial garage exteriors. 6000K color temperature matches your interior hexagon lights for visual consistency.
Maintenance: Keeping Your Hexagon Lights Running Long-Term
LED lights are low-maintenance by nature, but a few habits will extend the life of your installation:
Dust the panels periodically. Dust accumulation on LED panels reduces light output over time. A soft cloth or compressed air every few months keeps output consistent.
Check connections annually. The plug-and-lock connectors are secure, but it's worth a quick visual inspection once a year to verify nothing has worked loose, especially in garages with significant temperature swings.
Keep the area around the panels clear. Don't store items directly against the panels. LED lights generate some heat, and adequate airflow around the fixtures extends their lifespan.
The 3-year warranty has you covered. If any panel fails within the warranty period, Hykoont covers it. Keep your purchase confirmation and warranty documentation.
Real Garage Setups: What Different Configurations Look Like

The Single-Car DIY Garage
One 5-Grid centered over the bay. 24,960 lumens is more than enough for a single-car space. Add an MX5085 for under-hood and under-car work. Total investment: $99 + $118 = $217 for a complete, professional-grade lighting setup.
The Two-Car Workshop
One 11-Grid centered over the primary bay, one 5-Grid over the workbench area. 47,840 + 24,960 = 72,800 lumens across the full space. MX5085 for task lighting. Total: $249 + $99 + $118 = $466.
The Professional Detailing Bay
One 14-Grid with Frame (plus the free 5-Grid) covering the full ceiling. 73,920 lumens of even, shadow-free illumination — critical for paint correction and detail work where shadows hide defects. MX5085 for supplemental task lighting. Total: $359 + $118 = $477.
The Content Creator Garage
11-Grid on the ceiling for functional lighting. Additional 5-Grid on the wall as a backdrop element. The 6,500K color temperature is ideal for video and photography. MX5085 as a portable fill light for filming. Total: $249 + $99 + $118 = $466.
🔆 Shop 14-Grid Hexagon Lights — $359 + Free 5-Grid
Frequently Asked Questions
Q: Do I need an electrician to install hexagon garage lights?
A: For a plug-in installation using an existing ceiling outlet, no — it's a DIY-friendly project. If you need to run a new circuit or hardwire into a junction box, that work should be done by a licensed electrician, especially if you're not comfortable with electrical work. The hexagon system itself is straightforward; the electrical supply is where professional help may be warranted.
Q: Can I install hexagon lights on a concrete ceiling?
A: Yes, but you'll need concrete anchors instead of standard drywall anchors or wood screws. Use a hammer drill with a masonry bit to create pilot holes, then install concrete anchors rated for the weight of your installation. This is more work than drywall installation but very secure once done.
Q: Will the hexagon lights work with a dimmer switch?
A: Yes, but only with an LED-compatible (trailing-edge) dimmer switch. Standard incandescent dimmers cause flickering and can damage LED drivers over time. Look for dimmers specifically rated for LED loads — they're widely available at hardware stores.
Q: How do I fix a flickering panel after installation?
A: Flickering is almost always caused by a loose connection. Check all plug-and-lock connectors and make sure they're fully seated and latched. If you're using a dimmer, verify it's LED-compatible. If a single panel flickers while others are fine, the issue is likely the connection to that specific panel.
Q: Can I connect multiple hexagon installations to one power source?
A: Yes, but verify your circuit's capacity first. A standard 15-amp circuit handles up to 1,800W. The 11-Grid draws 368W and the 14-Grid draws 700W — both well within a single 15-amp circuit. If you're running multiple large installations, use a 20-amp circuit or separate circuits for each installation.
Q: What's the difference between the 5-Grid and 11-Grid beyond size?
A: The 5-Grid (192W, 24,960 lumens) and 11-Grid (368W, 47,840 lumens) use the same LED technology and color temperature (6,500K). The difference is purely scale — more panels, more lumens, larger footprint. The connector system is compatible, so you can start with a 5-Grid and expand to an 11-Grid configuration later.
Q: How long do the hexagon lights last?
A: The rated lifespan is over 30,000 hours. At 8 hours of use per day, that's over 10 years of operation. LED degradation is gradual — you won't notice a sudden failure, but brightness will slowly decrease over time. The 3-year warranty covers any defects or premature failures.
Q: Can I use hexagon lights outdoors?
A: The Hykoont hexagon lights are designed for indoor use (garages, workshops, gyms, studios). They're not rated for outdoor exposure to rain or direct weather. For outdoor lighting, use a dedicated outdoor-rated fixture like the Hykoont flood light series.
Q: Why do I still need a portable work light if I have hexagon ceiling lights?
A: Ceiling lights illuminate from above — they're excellent for general ambient lighting but can't reach inside an engine bay, under a car on a lift, or into a wheel well. A portable work light like the MX5085 provides directed task lighting exactly where you need it, complementing your ceiling installation rather than replacing it.
Q: Is the 14-Grid worth the extra cost over the 11-Grid?
A: For a full two-car garage or a professional workspace, yes. The 14-Grid delivers 73,920 lumens — enough to properly illuminate a 440+ square foot space at 100+ lumens per square foot. The current deal also includes a free 5-Grid, which effectively gives you a secondary lighting zone at no extra cost. For a single-car garage or smaller workshop, the 11-Grid is the better value.
The Bottom Line

Installing hexagon LED garage lights isn't complicated — but it does require planning. Get the layout right before you drill anything. Test before you mount. Plan your power routing. Use the right anchors for your ceiling type.
Do those things, and you'll end up with a garage that looks and functions like a professional workspace. The kind of space where you actually want to spend time, where you can see what you're doing, and where the lighting doesn't fight you.
Pair your hexagon ceiling lights with an MX5085 portable work light for task lighting, and you've covered every lighting scenario a garage can throw at you — from ambient illumination to focused under-hood work.
That's a complete setup. And it starts at $99.
🔆 Shop Hexagon Garage Lights — Starting at $99 →
Free shipping. 30-day returns. 3-year warranty. Ships from the US.


Leave a comment
This site is protected by hCaptcha and the hCaptcha Privacy Policy and Terms of Service apply.